This week's Toolbox Tuesday deviates a little from the tool theme and goes the way of technology supplies. Though it's a bit of a departure from our normal posts, we still hope you'll enjoy reading it. Also, we updated yesterday's 4th of July buntings post with a few additional photos that show the colors just a little bit better. So head on over that way to check out the changes.

We've been working for quite some time on getting our whole house audio and fairly elaborate wiring project done in our house. Throughout this time, we've learned some critical lessons on where we should and shouldn't spend a little extra money to get better results. One of the most critical areas where I learned that extra dollars don't always make "cents" is in the realm of high cost speaker wire.

The debate about speaker wire is one that has raged on for what seems like ages, and a billion dollar industry has been formed out of this very hotly debated topic. From super pretentious audiophiles to Best Buy sales clerks to DIYers, most have an opinion about the best speaker wire that usually costs a boatload, but is said to provide the highest fidelity in sound, lowest signal loss, minimal distortion or interruption, and the "best possible listening experience," All this may be gospel to the preacher, but the simple truth is that it's all meant to sell you something that's overpriced, and really, all of the hype is really just sort of crap.

I know, I may have just touched a nerve there, and I hope you'll accept my apologies if you feel I've wronged you, but I mean no ill will. To be completely honest, I'm actually just trying to inform and educate you, primarily so that you can save some money down the road and help you put that extra cash towards items that matter (like speakers and components). However, if you're the owner of a "high quality" speaker wire manufacturer, or this industry somehow puts food on your table, you have every right to rant to me in the comments. Don't worry, I can take it, and maybe I'll even learn a thing or two.

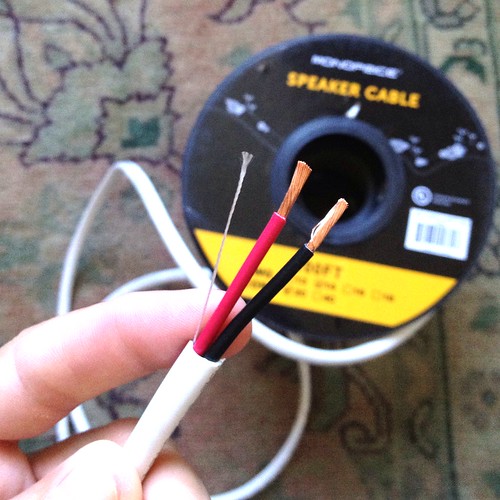
As a young teenager I was bitten by the audio bug. What started with a basement boom box slowly evolved to a portable CD player, home theater, surround sound, car audio with thumping bass (hey, I was a teenager), and eventually, our whole house audio system that I love. Music and the technologies associated with listening to music anywhere have been a serious interest of mine for years, and I was one of those people who initially bought into the idea that Monster Cable, in all its stranded and shielded glory, offered a premium experience to me as a listener, and one that was worth the 10x price tag that came with the higher quality product.

The problem with my belief in the superior product was it was only based in the various advertisements I had seen, or from viewing the systems of others who also bought into the myth. I mean, how can you not believe something that says "You just spent a lot of money on your components, don't ruin it all with inexpensive speaker wire." It was a brilliant marketing strategy to say the least, sort of like buying insurance for your precious sound waves.


Continue Reading Full Post
Comments 5

Back in 2003 when we bought our house we knew we wanted to bring a little patriotic flair to the exterior of our home for the 4th of July holiday. While most homes in the area go the route of a flag, we opted to do something a little bit different in the form of buntings. 

Even though Alex had his heart set on actual flag buntings -- those that have true embroidered stars and different color materials stitched together -- we came up empty handed through our early Internet searches. What we settled on was an inexpensive (and up close, a little cheap looking) screen printed buntings. 

While we enjoyed them for the last several years, they'd started to fade after the beating sun of summers past. In addition, the light weight fabric often became tangled and flipped up on the window sills during strong winds. Alex ended up rigging up an elaborate manner of tethering the buntings to the house and added weighted washers. To say it was an annoyance is an understatement.

While in St. Michaels, Maryland this past weekend (do you notice an Eastern Shore theme this summer?), you can imagine our delightful surprise when, after eight years of looking, we came across actual flag buntings! We actually saw them hanging on the front of The Candleberry Shoppe store on Talbot Street in all their star spangled glory.

After passing the store a few times I suggested we should see if they had any for sale. Alex was skeptical, but we went in anyway. Unfortunately we learned that the three out front were the only three they currently had in stock, but they offered to sell us those. The only issue was they couldn't remember how much they had purchased them for and assured us if we came back the next day that they could give us a price, and the buntings.


Continue Reading Full Post
Comments 30

We've gotten several questions about 1 Shot paint since we painted our French doors in their high gloss black last year, including this question from Andrew in Utah.

Hi, I was reading your post about painting your French doors. I am really interested in using the 1 Shot Paint. I am looking for an extremely high gloss durable mirror finish. Now that it has been up a few months, do you still like it? Any further information you could provide? Did you feel that the roller was better than the brush?

Thanks, Andrew

I think this is a great question, especially since it's been about six months since we painted. So we're answering this question for Andrew and any other people out there thinking about using 1 Shot on some of their outdoor projects.

Old Town Home's Answer

After spending so much effort on the various aspects of our salvaged French door project, the last thing we wanted to do was make a major paint misstep in the final stage of the project. Choosing a paint we had never worked with before, and one that had a very specific method of application to achieve a smooth finish, made me a little bit uneasy going into, but we figured it would be very unlike us if we didn't just take the plunge.


Continue Reading Full Post
Comments 5

WARNING: There are some photos at the bottom of this post of an injury I suffered during but unrelated to this project. They aren't really bad, but I know some people don't like to see x-rays of broken bones.

If you're a regular reader, you may remember a few months back we went into great detail about our custom cherry built in desk and the process we took to create it. Though we covered the various aspects of the desk build in depth, we never really talked all that much about the process that took the room our desk resides in from cramped and hideous, to a place we enjoy working. In order to get you all caught up on this project, we'll do a little rundown of our major tasks in this room in a several part series, and we'll also be sure to point out the various lessons we learned while taking on some of the things we had never accomplished before this project.

Before our office was an office, to meet our needs, we used our back bedroom as both a room for a guest (as there was only room for a twin bed) and our office space for computers, bills, and the like. This less than ideal setup was mildly frustrating at times, and infuriating at others. Forget about a normal sized bed in the back room, or the ability for a pair of guests to stay upstairs.

The space that we currently refer to as our office actually started life as a part of our oversized and gross 1980's guest bathroom and a small closet. This inefficient use of space ate up nearly 1/3 of our upstairs, and limited our ability to have separate guest and office spaces. Here's a look at what our now office looked like on the day of our home inspection.

Hmm. Carving out an entire hallway to get to a nasty grey toilet? That bad boy had to go. I'm sure it's hard to picture the former layout, so here's a birds eye view at what we started with, and where we were headed.

Wendy and I got to work on converting the poorly used space to an office, but we had our fair share of difficulties along the way. The walls weren't insulated or even sheetrocked, the floor was seriously damaged, and we wanted to expose the brick on the back wall behind the desk. Despite these challenges, we dove right in and made quick work of removing all traces of the 1980s.


Continue Reading Full Post
Comments 13

They don't call it spring cleaning for nothin'. I'm not sure what it is about the end of the colder winter months, but come the change in season, the inner OCD / Type A neat freak in me awakens from her state of hibernation. Whether it's tackling our fridge funk, taking on a major basement cleanup, or having a burning desire to clean every cabinet in our house, I'm on a mission.

Here's a little secret. I'm a complete and total neat freak...but only as far as the eye can see. As long as the mess is hidden behind closed doors, or drawers as the case may be, I can stay sane. Eventually though this stash-and-ignore technique catches up with me, and the teetering piles and crammed quantities start begging for a pardon.

Hopefully the following post won't be considered "over sharing" as far as the blogosphere is concerned. (And I'll promise you in advance you'll never read anything here about "lady troubles" or any of the unpleasant side effects that go along with pregnancy, birth or the like on this blog. Heck, I don't know anything about that, and even if I did, you won't find it here.) But what I am going to show you today is a look inside my "undergarments drawer," which I will refer to going forward simply as my "sock drawer." Here's a look at the mess.

I bet you're starting to doubt my type A tendencies, aren't you? I know, I know. It's a total disaster. And the amount of upper body strength required to open and close this drawer when it gets to this point borders on super human. So it was time to do something about it. 

I started off my removing everything from the drawer and laying it on my bed. Next, I hung a plastic shopping bag within easy reach, so I could put items to discard or repurpose inside. (Old socks make the best dust rags.)

I then began grouping like items together: athletic socks, casual socks, trouser socks and tights, etc. It soon became clear that there were several Items that had no business in my sock drawer. Items that fall into this category include winter outerwear and a bathing suit I haven't worn in years.


Continue Reading Full Post
Comments 8
  • Search

  • Login
  • Follow
  • Advertising

If you're looking for information on advertising and sponsorships, head on over to our sponsorships page. You can purchase site sponsorships in a few easy clicks. 

Toolbox Tuesday
Open Housing
  • We're Featured!

Old Town Home has been featured in the following places and publications:

The Washington Post
 
Washingtonian Magazine
 
Domino
 
Old House Journal
 
 
Apartment Therapy House Tour
 
Washington Post Express Feature
 
Home & Garden Blogs
 
© 2026 OldTownHome.com. - Privacy Policy
Login Below
or
Sign in with Facebook
Connect

Unexpected Error

Your submission caused an unexpected error. You can try your request again, but if you continue to experience problems, please contact the administrator.

Working...

Working...