Now that we've more or less recapped all of the nitty gritty details surrounding our home office renovation, we're left with the fun stuff to show off -- the glorious before and after details. Ok, maybe I'm getting a little ahead of myself, and perhaps we aren't actually "done" with our office, even though it is a full four years later, but it's close enough for me.
In our previous posts we covered our major office renovation to get the shell of the room in shape, followed closely by the significant effort to repair the oak floors that were badly damaged through bathroom renovations and neglect over the years. We also showed you the effort we went to that allowed an exposed brick wall to shine, as well as the extensive work we completed on our custom cherry desk. To say this project was "involved" is a pretty significant understatement.
I am getting a little ahead of myself. Before we could claim victory on our room we had a few finishing touches to put in place.
From time to time (okay, sort of constantly), we get a little ahead of ourselves and do things out of order. This is often due to the desire for progress even when progress is not readily available at the time. When this occurs, we've been known to paint the walls before installing the trim, finish floors before sanding the walls, or any number of other out of order item that requires us to take extra time to resolve the issue. Our office project was no different, as you will see from the various photos.
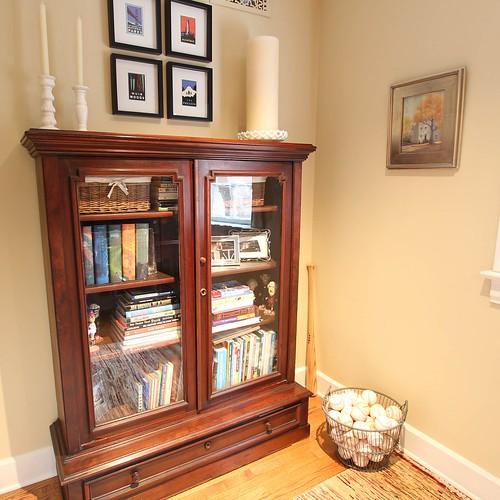
Given that we already had much of the room's palette defined by the dark wood of an antique bookcase, the color of the wood floor, and the reds and oranges of the brick wall, we definitely needed a rug before we chose a paint color. I really wanted to choose one that was unique, would play off of the various colors in the room, and most importantly, one that was the right size for our small office. I started to scour eBay for just the right thing, and after a few days of searching, I came across one that might work. A few days after the auction closed we laid the new and cool rug in place. It was quite a bit different than what we had through much of the rest of the house, but it really worked for us in the room. Unfortunately, I don't have any photos of the rug with white walls, but here's what we were working with.
Though the color is on the wall in the above photo, we didn't decide on the color until after we had purchased and received the rug. For color selection, to complement the exposed brick, I chose a warm yellow color for the walls, Sherwin Williams' "Toasted Pine Nut." This color did an excellent job in making the room feel very welcoming, and also enhanced the colors in both the floors and the brick wall.
Just prior to painting the walls, we had also worked on the installation and painting of the custom and salvaged window and door casing. We had a bit of trim that matched our home's original trim that Alex rescued from the trash several years earlier. He did his normal routine of paint stripper and elbow grease to get these pieces of trim into shape, then cut and installed them around the window.
 Continue Reading Full Post