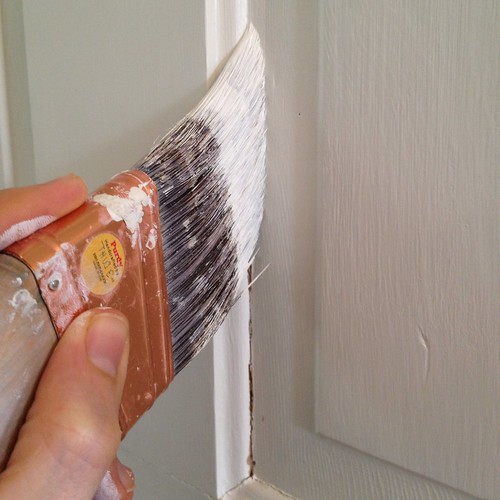
Let's be honest, we've all noticed it this time of year either at a friend's house, or more likely your own. I'm talking about those unsightly cracks in painted doors and trim that seem to pop up all over the place during the winter months.
For those of us in the northern hemisphere's colder areas, the crisp nights and comfortable days of fall have long since given way to the cold and blustery weather typical of east coast winters. Though we're not in the throws the cold that grips the east coast like that of Boston or Buffalo (I'm often jealous of their snow), and this past winter has been far from the bitter cold we've experienced in the past, we get our fair share of cool and dry in our neck of the woods. During this cold and dry weather we all experience the settlement and shrinking throughout the wood trim and wood doors in our home. This change in size is caused by moisture reduction and shrinking of the wood fibers, and most commonly it results in hairline cracks in painted joints and separations in the panels of doors.
Personally, we've experienced this phenomena every year we've been in our home. Since we're constantly stripping old doors and painting them again, it seems like a winter hasn't gone by where we aren't touching up a few of these cracks. Though the cracks are a bit unsightly, the good news is that it's really easy to fix the problem. You just need the right tools, the right timing, and a little patience to do it.
The first key to making sure you do this job right is to pick the right time of year. If you touch it up before it's cold and dry enough, or you do it when it's already headed into spring again, you will just end up with more cracks in the paint. It's best to do this work during the coldest and driest months of the year when your woodwork and doors have shrunk the most and the cracks and separations are the largest. February or March tends to be a perfect time for this chore given the dry days.
The next most important step is to give yourself a good surface to paint. If the paint that was there has pulled away and left a bumpy and jagged edge, you need to clean this away and smooth the surface. I like to use a small razor blade and just gently cut and shave away the old paint until I have a nice and smooth surface.
Simply direct the razor towards the rails of the door and away from the middle of the panel working your way around until all of your edges are smooth.
Once you've got a decently smooth surface, fold a piece of 150 grit sandpaper and gently sand just in the corners where you've removed your paint.
I like to use an old sanding disc that's near the end of its life. That tends to work really well. This process will knock down any final bumps.
Before painting, if you're not very stable with the brush, you will want to mask off the areas of the door that you don't need to paint. On our example door, the only problems are right along the panel edge. I don't want to get any paint up on the flat portion of the door as that might be noticeable. Same goes for the raised panel area -- I just want to get paint in the area that has a problem. Applying tape to the flat parts of the door ensures I'll get paint only where I want it and I don't need to be very careful about it. You can skip this step if you want to take your time on painting and guard against getting paint where you don't need it.
After sanding and optionally taping, you just need to apply paint and you're done. Grab the paint that matches your door's paint (in color and sheen) and get to work. You can probably knock out painting a full panel in about five minutes, less if you only have small cracks on a few sides.
If you put tape on to protect the areas you didn't want to paint, peel off the tape as soon as you're done painting (don't wait for it to dry) and enjoy your crack free and great looking door. The best part, when the weather gets warm again and the door expands, the touched up paint will get tucked away, but when the door shrinks again, that paint will still be there, so you won't have to do this again.
Are you working on any painting projects lately? Or maybe completing some touch ups to areas that have seen better days? Let us know what DIY feats you've been tackling now that Spring is upon us. And if you're interested in learning more about painting and our recommendations, check out this post on what we deem to be the Painting Essentials here at Old Town Home.

![]()
![]()