Tuesday, December 18, 2012
Cookies, candy, cakes and pie. It seems the holiday season has no shortage of an endless supply of sweet treats conveniently lurking around every corner. Each holiday season, I like to bake a few of my favorite recipes to share with friends and family as an expression of gratitude and friendship. But this year I got to thinking -- how can I package my treats in a festive yet functional way?
While cookie bags and "take out boxes" made for treats are all the rage, I knew I wanted something whose life would extend past the holiday season. Decorative tins were also something I considered, but knowing my dusty stash lives in a hard to reach cabinet, I thought I could do better.
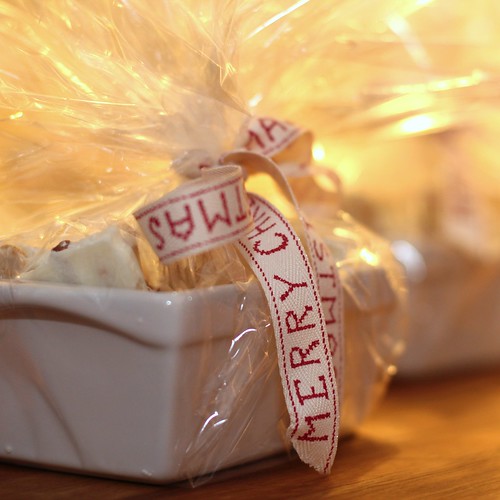
Finally, when I spotted miniature ceramic loaf pans at a local home store, I knew they were just the thing. These petite pans were the perfect size for gifting sweet treats, yet the treat would be packaged in something that the recipient could continue to use year round for the obvious loaf baking, but also as a candy dish, drawer organizer, jewelry vessel, or anything else they might think of.
Last night I whipped up a batch of one of my holiday favorites -- my Aunt Marge's White Chocolate Christmas Bark. (In case you missed the recipe, here's how you can quickly and easily make this treat that's the perfect marriage of salty and sweet.)
While allowing the white chocolate, pretzel, and peanut bark to cool, I peeled the price tags off the loaf pans and gave them a good washing with soap and water. After the bark fully cured in the fridge, I broke the sheets into manageable chunks that would work well in the containers.
As I filled each of my loaf pans with the pieces of the bark, I attempted to arrange them in a somewhat visually pleasing manner by making them stand on end, rather than stacking them from the bottom up.
Once I had all of my bark arranged in their containers, the next step was to cut a piece of cellophane to a size that would easily envelop the loaf pan and goodies. The goal here is to wrap the goody tray in the bottom while gathering a fair amount of excess cellophane at the top as a decorative bouquet of sorts. In case you're looking to purchase some, the hunt for the cellophane wasn't the easiest, but I finally found a roll at a local party supply store. The roll size should be enough to last me for quite some time.
When cutting the cellophane, you will want the edges of the cut piece to extend significantly around the gift. Placing the candy in the center of the cellophane piece, I gathered and twisted the cellophane above the goodies...
...forming a snug seal over the chocolate and a decorative burst of cellophane atop the gift. I then secured the cellophane with a silver twist tie.
The final step was to prepare decorative ribbon, in this case a vintage-inspired spool extending holiday greetings.
I tied a simple yet elegant bow around the twist tie, and voila, I had the perfect presentation of home baked goodies to share with neighbors and friends.
My favorite part? The fact that the vessel puts the "fun" in "fun-ctional" and allows for an extended use of a holiday gift. I'm looking forward to delivering these homemade gifts to help share a little sweetness this holiday season.
Do you have a favorite holiday recipe that has become an annual tradition? Do you have a preferred way of packaging Christmas cookies or other baked goods? I'd love to hear your tips and tricks to turn your homemade treats from tasty to tremendous.

![]()
![]()