If you've been reading our blog posts for the last few months there's no doubt you know how much we like our new butcher block counter tops from IKEA. The efforts that we put into modification of the edges, leveling the base cabinets, ensuring a nearly perfect fit, and finishing the corner in front of the sink were well worth it given the result.
Though we love how our counters look now that they're done, all shiny and new in the space, there's one thing we absolutely must keep in mind to ensure we like them long term, and that's the treatment and care we must give them. But what exactly does that mean?
By their nature, butcher block counter tops are not an "install and forget it" kind of surface. Actually, literally by nature (and by their history/namesake), they are quite the opposite. As a result, a litany of options for treating, sealing, staining, and protecting butcher block counters has popped up. It's big business and a multi-million dollar industry, so it's no surprise every company wants you to believe their product is far superior to the rest.
Before we get to actual treatment and finishing, it's important to recognize why a higher level of maintenance is necessary when caring for butcher block. First and foremost, they're wood. This is where I mean "literally by nature." As it exists in nature, trees are meant to absorb the elements around them. Trees are literally sponges, trying to suck in whatever comes in contact with them including water, sunlight, and CO2. When a tree (or trees) became our oak butcher block counter tops, their life may have ended (sorry tree), but their natural mission to absorb did not.
Now that it's installed in our house, as an untreated surface the butcher block is eager to absorb anything we lay on it, including water, vegetables, fats and oils, dirt, wine or whatever else happens to come in contact with it. Each item can contribute to the drying, aging, and cracking process they is inevitable in wood, as well as the possibility of contamination. So it becomes our mission to protect ourselves from an unsightly and unhealthy counter top by first protecting the counter top from the possible contaminants. But what should we use to protect it?
Butcher block, as their name implies, was made popular in butchers' shops. The meat cutting and prep areas were adorned with the heavy and solid wood blocks. They were installed untreated and put to use. As the butcher's would work on the blocks, the fats and grease from their work would saturate the work area, and the wood would absorb it like a sponge. Ultimately, the butcher block surface would become so saturated with the animal oils that it wouldn't and couldn't possibly absorb anything else. Water could no longer penetrate the surface and would simply bead up when applied. Cleaning products also do not get into the wood, instead just cleaning the essentially solid surface.
Taking the history of butcher block into consideration, the surface preparation and treatment for our butcher block should follow a similar approach, but should be accomplished in a more home friendly manner. (I don't think Wendy or I really feel like smearing meat all over our counters for 40 hours a week.)
We have several simple goals when it comes to treating our butcher block.
- It must be food safe.
- It must be easy and convenient, otherwise we won't do it.
- It must be low cost.
Given these simple goals, we did quite a bit of research and consistently came up with the same end result.
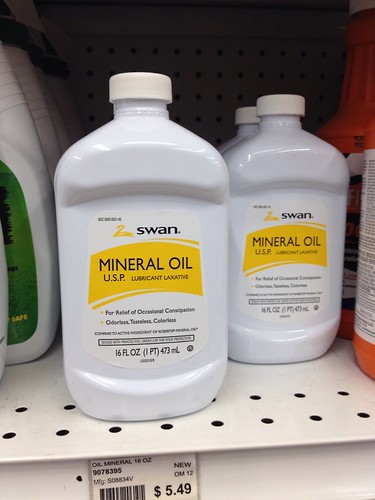
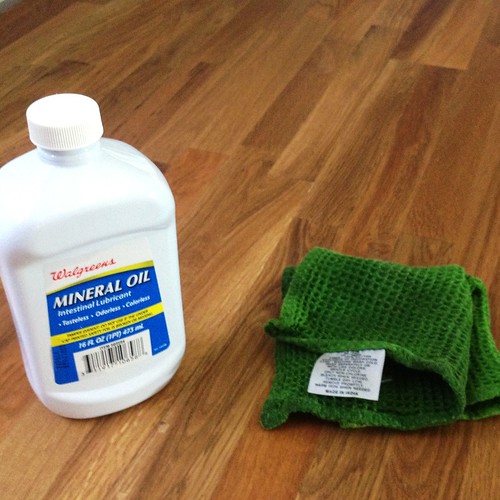
Mineral Oil
That's it, that's all. No special brands, no linseed oil infused items, nothing that boasts penetrating formulas or additives that cause hardening over time, no "mystery" ingredients, just food safe mineral oil.
Instead of mineral oil, if you want something that will dry and harden a bit as you continue applications, you can use walnut oil.
The benefit of these oils is they're food safe and they won't go rancid. Vegetable oils will look and work fine at first, but will ultimately turn rancid. Other oils are not food safe and could be very unhealthy if they were to leach from your counters into the food you are preparing. Sticking with mineral or walnut oil is the best option as you condition your counters immediately after install.
The idea here is the oil's ability to be repeatedly applied to the surface, allowed to penetrate and be absorbed into the porous wood, and ultimately any excess can be wiped away. Each successive application recharges the surface of the counter top, making it resistant to absorbing anything you don't want to soak in.
Though we're using mineral oil thus far, we're considering a switch to walnut oil since it self-polymerizes and dries over time, where the mineral oil stays wet and is wiped off.
You're probably thinking, "Ok, that's great, mineral oil...then what? How do I apply it? How much? When? Just once, or how often?" We had those exact same questions, but I think we found a really great answer.
Here's a good rule of thumb to treating counter tops that we've been sticking to. After you install your counters, make sure you get everything sanded and looking the way you want, then start with your oil. Apply your oil:
- Once per day for the first week.
- Once per week for the first month.
- Once per month for the life of the counters.
That's it, it's that simple.
UPDATE
In addition to plain old mineral oil we've started using Howard Butcher Block Conditioner, which is a mineral oil and beeswax combination. It's worked very well in the nearly two years we've been using it and it's something we're very glad we switched to. You can read more about it in our blog post on Howard Butcher Block Conditioner.
When you apply it, use a rag and pour a generous amount of oil directly on the counter. Then begin wiping the oil around the counter with your rag.
At first your rag will begin absorbing a lot of the oil until it becomes essentially saturated, then it will begin spreading it nicely over the surface of the counter. Remember, you're trying to reach this similar level of absorption with your counter as you quickly achieved with your rag.
After we applied the oil, we actually placed our rag in a plastic ziplock bag so we can use it each time we oil. This way you aren't wasting all of that oil that soaked into the rag.
After allowing the oil to sit and absorb for at least 8-10 hours (we apply the oil before going to sleep), wipe the surface clean with another rag. Each time you apply the oil, you'll notice less and less is actually absorbed. This tells you it's working.
When you oil, your counters will begin to take on a much richer, and much deeper color as the pores of the wood drink in the oil, replenishing the dried out fibers.
After the first week of oiling your counters, drop a bit of water on the surface and watch as it beads and doesn't immediately soak into the material. This shows you that what you've done is working.
Where Do You Buy It?
Well, you can buy it at a lot of different places. The links above show you a few options on Amazon.com, but it's available all over the place at specialty and non-specialty stores alike.
We actually purchased the first mineral oil we used from Walgreens. The funny thing about mineral oil is that it's a natural laxative, which means purchasing a large supply might result in a raised eyebrow or two from an indiscreet cashier. It's up to you of you feel the need to let the cashier know that you just have new butcher block counters. I suppose buying a large supply also means you'll always have what you need on hand in case you're ever in an...ahem...bind. (The 12 year old boy in me simply can't resist a good poop joke.)
We've also found the same items in our local Ace Hardware for a few dollars less than at Walgreen's (but not as cheap as Amazon). Maybe we could do all of our pharmacy shopping at Ace Hardware from now on?

No matter where you buy it, the most important item will be clearly marked somewhere on the label and will say something along the lines of "Food Safe" or "Safe for Ingestion".
What About Staining and Polyurethane?
When we were first starting to look into finishing the counters we initially thought we may want to stain them a darker color. Since we're familiar with the good old "stain and poly" approach to wood finishing that we've used on our floors and furniture, we started to look into that.
While the counters are absolutely wood, and can absolutely be stained and covered with urethane, the question is if it's the right thing to do given how we would be using the counters. Sure the polyurethane surface coverings state they are safe for food contact, but what happens if it flakes off and ends up in your food, is that okay? The answer, I'm really not sure. And rather than leaving it to chance, we opted to leave the counters in their natural state and simply apply oil. If you wanted to stain the wood, but not apply a polyurethane or shellac cover, that's not an advisable option. The stain itself could seep out of the counter and into your food, causing the taste to go south and possibly end up with very toxic food. Notice the can of stain has emergency instructions in the event the contents are swallowed.
I hope this blog post is helpful, informative, and will give you more confidence in how you might treat butcher block counters. We've done a lot of research, but by no means is this meant as a comprehensive guide to butcher blocks. After all, we're still learning as we go, and we're always looking for more information.
Do you have butcher block counters or do you know someone with counters? How have you gone about finishing and treating your counters? I know some people swear by products they tend to use, and I'd love to get the input from all of the different owners.

![]()
![]()