Seeing a project come together is one of the most gratifying aspects of DIY renovation.
We've been working on trying to improve our little first floor bathroom for a while now, and it finally feels like we're starting to get to the home stretch. I can't begin to tell you how excited we are at this point now that we can see it slowly coming together, and thinking back to what it used to look like feels like a distant memory.
We last left off after I applied the Pall X-325 sealer to the repaired and fully sanded heart pine floor. We are using the same finish as the rest of the house, and opted to use the Pall X-325 sealer with Pall X-96 water based topcoat. This will give us the light finish that allows the natural character of the wood to be on display, rather than the stain and finish.
Once the floor's sealer cured we were able to begin prepping for the Pall X-96 matte topcoat. Wendy and I have refinished several floors in our DIY career, and we've watched several pros finish a few floors too, and in almost every case, we're somewhat intimidated by the finish. What happens if we leave streaks? What happens if it peels? What happens if it fractures? What happens if we let dirt or dog fur get into the finish? And we can confidently say having working with oil based poly, water based poly, shellac, and tung oil, these Pallmann products are some of the easiest to work with that we've ever encountered.
Application of the topcoat is simple. Shake the container vigorously for one minute, then pour a four inch line across the far wall of the room and methodically spread it out.
If this were a larger room we'd be using an applicator on a pole to make even, long strokes with turns at each end. But since this room is so small, I decided to use a flat foam roller and a wide foam brush. Your traditional water based finishes aren't very forgiving with this method, but this matte finish lays flat very easily without fuss.
Best of all, with this product you only need a two to three hour cure time before recoat, and as long as you re-coat within 24 hours, there's no need to sand or screen between coats. It can't get much easier.
We opted for three coats of the topcoat to add a little protection since it will be a somewhat high traffic area, then waited for the full cure before moving onto the remaining tasks in the room.
More specifically, the new baseboard and trim in the room.
When we removed our baseboard radiators throughout the house when we replaced the HVAC last year it left several rooms with somewhat odd looking gaps where there were no baseboards behind the radiators. The worst looking room happened to be this small bathroom.
As part of our work on the floor, we also did a little work on the walls when we filled in the large gap of missing wall with drywall. Then we followed that up with skim coating to bring everything back up to flat.
But the real finishing touch in this room was putting actual baseboards in the room to match the rest of the old baseboards in the house.
All of our house's original baseboards are actually a two part baseboard. This means the lower section is a simple flat stock which is then dressed up with a base cap at the top. A few months ago we cut a section of the base cap and sent it off to a mill for replication. A few months ago we received all of the replicated molding and I've been excited to start installing it in the house.
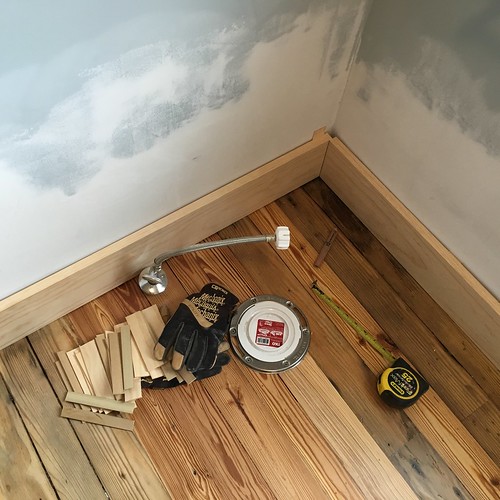
The thing about new vs old is that the old is slightly larger lumber. A modern 1" x 6" board is now 3/4" x 5-1/2", while the 1" x 6" boards used for the original baseboard are 7/8" x 5-3/4". Since the base cap was created to mimic the old dimensions, we had to fake it with the modern boards. In order to do this I ripped a bunch of 1/8" thick spacer shims and cut them to 5-1/2" long on the miter saw.
I then used these spacers to force the baseboard forward a bit, making it look just a little thicker than it actually is.
The increased height isn't an issue since we're using shoe moulding, as we'll just need to bump it up 1/4" of an inch and nail it in place.
Once I installed the base cap, the gap behind the board just disappeared and it looked good as old again.
I ended up coping the joint and back filling with caulk to make sure it will be secure and won't split down the road.
I've dreamed of doing baseboards this way for some time (weird dream, I know) and I just love how the base cap makes the baseboard look.
While I was installing this moulding, I also had to bridge a gap on either side of the sink where there were large gaps in the drywall. In order to dress it up a bit I cut some moulding and added a decorative bead on the front of it with my router.
After all was said and done the moulding was all installed, wood filler applied and sanded, and caulk applied.
We still need to prime and paint all of the molding and patched sections of the walls and ceiling. We also need to paint and install the shoe moulding (we like to paint and then nail and do final touch-ups), and build the vanity front for the built-in vanity. But we're oh so close to being able to install the toilet, door, and rim lock hardware and call this little project done.
We have friends coming up to spend a night at the house next weekend, so with that deadline looming, we're hoping to knock out all (or most) of our remaining checklist items this weekend. Wish us luck!