Last weeks near constant rain from Tuesday through Friday totaled over 6" locally. The whole area had massive flooding due to swollen streams and rivers, and it felt an awful lot like we were living in Seattle. One thing is certain, the rain sure put a damper on our front door work. After I jammed some toothpicks into the door jamb to fix the over-drilled hinges, we were decidedly on hold until the rains let up. Luckily, this weekend was quite nice, so we got back on the proverbial horse.

During the previous weekend we added some material to the hinge sides and bottoms of each door.

We also had to remove a 2x4 that someone had installed above the old front door to make the opening shorter. I've never liked the way it looked, and have always wanted the opening to be the correct size again, so we sized the new doors for the original opening size and went to work removing the extra piece of wood.

With the doors closer to the correct size, we cut and trimmed the French doors to get them properly sized for the outer opening.

And then we turned our sights onto mortising the hinges. Seems like a fairly straight forward task, but oh boy, let me tell you...


Continue Reading Full Post
Comments 7

On an otherwise beautiful September morning, along with much of the world, our lives changed forever. Though we lost no one close to us in New York City, Shanksville, Pennsylvania, or Washington, DC, the experiences of living through the day have left a lasting and profound impact on us that we will surely never forget. Few days have had such an individual impact on who we are today.

Wendy and I moved to the DC area just one year earlier and were living in our first apartment. I was working near 16th & K St., just a few blocks from The White House, and Wendy was working in Old Town Alexandria, just south of the Pentagon. In each of our distinct situations we experienced that day from an intimate and first hand point of view.

The events of the day have been recounted many million times over, each from the individual perspectives of those touched by the day as it unfolded. The shock, sadness, fright, anger, confusion, and frustration that surrounded every moment as we watched on television while smoke from the Pentagon filled the air above our apartment was shared in some part or all by those who viewed the same images both first hand and from a far.

In the days and weeks following the attack, while smoke still billowed from the hole left in the side of the Pentagon, and workers were still in the throws of the search and recovery effort at the Twin Towers, a heavy sadness and concern masked a swell of patriotism that grew from within. On September 12, we took a drive around the area and found overpasses covered in red, white, and blue, sheets draped over fences with painted statements of pride and courage, and more flags hung from the front of houses than we had ever seen before . Though we lived near a major airport, there were no sounds of planes landing or taking off. All air traffic had been grounded.

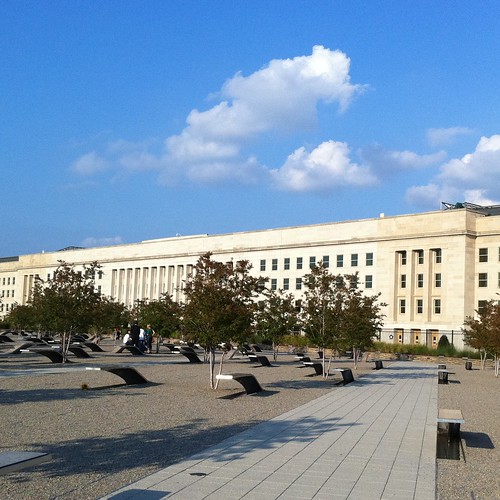
My carpool route to work took me by the Pentagon every day. On September 12, we traveled into the city with the sun in our eyes as we had done many days prior, except on September 12 the sun was obscured by the haze and smoke rising from still smoldering section of the Pentagon's damaged outer rings.


Continue Reading Full Post
Comments 0

The work we've been doing on the new front doors has involved quite a bit of restoration. Not only has this restoration applied to the salvaged items we've purchased, but also to the portions of the house which were already in place. This has included paint stripping, plastering, tiling, wood rot repair, and even a little ingenuity.

We'll be installing the new outer french doors in a location that previously, at some point in the history of our home, had double doors. This means that there are already mortises for the hinges that we'll be installing, but it also means that various hinges have occupied this location and the mortises have been drilled and re-drilled time and again, leaving a swiss cheese of wood that can't hold a screw.

Obviously, swiss cheese isn't a good basis for hanging a door, so this situation needed to be rectified. I decided to use an old trick that I learned some time ago to take care of this issue, and I thought it might be useful to pass my trick onto anyone wo might read this post.

When a door jamb has been over drilled, you end up with too many screw holes that are too large and really don't serve much of a purpose. To correct this, you need to fill these holes with a material that can actually hold a screw. Regular wood filler or epoxy fillers are typically too soft or brittle to give a screw a solid hold, and has the tendency to pull out rather than stay in place. To really correct this sort of a situation, you need to fill the holes with something that will act sort of like a plastic wall anchor does inside of drywall or masonry, and you need this filler to be solid and fixed in its position without risk of coming out.

To provide the backing and solid foundation for screws I like to use toothpicks and wood glue. No joke, simple toothpicks and standard wood glue is all the door doctor ordered. You can use this trick on large or small screw holes, and it is rather simple to tackle.

The tools you'll need for this little job are simple. 


Continue Reading Full Post
Comments 4

Me...paranoid? A little crazy? Um, I guess so. This fact may have been proven by my fanciful idea that the location of our new letter slot would be a magnet for perverts and burglars. As you may remember from a previous post, the location of the mail slot in our new door is now roughly waist height. Our old mail slot was a more pervert proof location, just inches from the floor.

After cutting the hole in the door and hanging the door in place, my paranoid self didn't feel comfortable with a hole in a location that could allow someone to lift open the new mail slot and take a look around. 

Of equal or greater concern was the possibility the burglars with freakishly small hands could reach through the slot and unlock the front door. Please disregard the fact that we live on a busy street and someone would be bound to notice them finagling their arm through a mail slot just 1 1/4" tall. Also ignore the fact that we are diligent about using our security system and are installing a secondary deadbolt. No matter, I still didn't feel good about it.

After some great suggestions and inspiration from our readers, we finally landed on a solution from eBay. The solution is a cast iron mail chute slot from an old building. This is the entry point for a mail drop that you might find in an office building. You know, the glass covered mail chutes you would see as a kid and would just want so badly to see a letter fly by from an upper floor?


Continue Reading Full Post
Comments 8

Thus far we've kept you apprised of major and minor progress on our vestibule efforts. Though sometimes tedious or mundane, each task has taken us one step closer to the goal at hand -- a completely reconfigured front vestibule with a salvaged, shiny and high gloss inner door, and outer salvaged french doors with wavy glass. Sounds simple enough, but the whole process has been anything but.

This weekend, wisely using our Labor Day weekend to labor, we checked off a major component of our overall project. We finally took the significant step of removing our old front door and making our new, salvaged, front door the daily operational door. But before the grand reveal, let me get you up to speed with our checklist. We last left you with the following (pay no mind to the fact that some items were added since the last update. This sort of thing tends to happen on projects):

  1. Sand extension piece smooth
  2. Install molding
  3. Fill nail holes
  4. Fill old holes and gaps
  5. Fill old hinge locations on door jamb
  6. Sand door jamb
  7. Prime door jamb
  8. Paint door jamb
  9. Install weather stripping
  10. Transfer peephole
  11. Transfer knocker
  12. Transfer rim lock
  13. Buy and install deadbolt (Dont need this step)
  14. Complete/fix mail slot Grrrr... Purchase new mail slot
  15. Final sanding
  16. Prime door
  17. Paint (possibly multiple coats with wet sanding for high gloss) 1/2 way done, outside is painted
  18. Darken screws in hinges
  19. Install Rim Lock/Knob
  20. Install Peephole
  21. Install Knocker
  22. Install Mail Slot
  23. Install Mail Slot Backer
  24. Remove Old Door

The last task we talked about was the spring bronze weatherstripping install. Shortly after I drove the final nail in that task I moved our blue/turquoise door from the saw horses where it was being painted in the kitchen to it's rightful home hanging in the front. Since oil paint has an extended cure period, I was only able to paint the outside while the door sat it the kitchen. We allowed the door to cure for several days before laying the door flat on the painted side so that we could prime the back side.

The primer we used was a fast dry alkyd primer, so it was able to dry in about four hours. I kept checking the painted side of the door to make sure the wood and paper it was supported on wasn't getting damaged. It seemed okay for the most part, but I was beginning to see some loss of sheen. This was the last thing I wanted, so as soon as the primer dried we dragged the door back to the front and hung it once and for all.

Though hanging the door felt absolutely great, we still had a lot to do. I followed the same steps with painting as I had on the other side. We wet sanded the primer with a 600 grit sandpaper, then thoroughly wiped the door down. Next up, after the saga of buying paint we described in last week's paint sheen post, we opened our can of Benjamin Moore high gloss alkyd paint and got to work.

The absolute key to painting a door while it hangs in place is to ensure very thin and even coats. If anything is too thick, the paint will pool and end up dripping on your fresh surface. Nobody likes drip marks. I followed the same pattern of painting on this side, first the panels, then inner vertical and cross pieces, then the sides.


Continue Reading Full Post
Comments 24
  • Search

  • Login
  • Follow
  • Advertising

If you're looking for information on advertising and sponsorships, head on over to our sponsorships page. You can purchase site sponsorships in a few easy clicks. 

Toolbox Tuesday
Open Housing
  • We're Featured!

Old Town Home has been featured in the following places and publications:

The Washington Post
 
Washingtonian Magazine
 
Domino
 
Old House Journal
 
 
Apartment Therapy House Tour
 
Washington Post Express Feature
 
Home & Garden Blogs
 
© 2025 OldTownHome.com. - Privacy Policy
Login Below
or
Sign in with Facebook
Connect

Unexpected Error

Your submission caused an unexpected error. You can try your request again, but if you continue to experience problems, please contact the administrator.

Working...

Working...