Friday, September 1, 2017
Things have been pretty quiet here on the blog lately, but we've been hard at work on several projects.
Rather than keep waiting until everything is done, we wanted to share an update to start getting you caught up.
If you've been a reader here for a while you may remember the work we've done in the past to begin restoration of our five original 1880s windows.
Years ago we paint stripped, re-roped, and weather stripped three of these windows, but we never did anything with the sash.
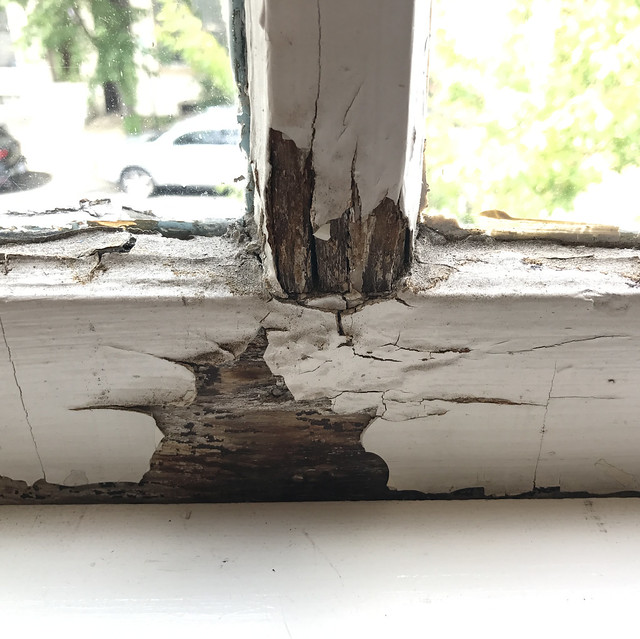
Over the years these sash have withstood blizzards, tropical storms, a derecho, blistering sun, and deep freezes. All the while they've slowly begun to fail. The glazing is cracking in places and the paint peeling and falling off, but the wood has stayed very solid on account of being old growth pine. Sure it's a little weathered in places and needs some rejuvenation, but pretty good all things considered.
So enough is enough. It's high time we do something about these old windows. And by that I mean lovingly restore them to make them wonderful once again.
Consider this the kickoff of the continuation of our original window restoration (which may also eventually result in finishing the storm windows that I've repeatedly promised to finish but also repeatedly failed to finish).
First steps to restoration is removal. This has been a heated debate in our house. Initially I told Wendy that we'd be cutting and installing plywood sheets in the window openings while each was being restored. Wendy, well, she didn't like that idea. So instead I decided to build a temporary window.
Using some two by material, I cut several pieces of wood and pocket holed it all together. Quick and dirty is my plan of action here.
I picked up a few pieces of plexiglass from Lowe's and placed it on my temporary window.
To make sure it was all watertight I applied a bead of silicon caulk around the perimeter of the plexiglass and secured the panels with 1" stainless screws into some decorative washers to properly distribute the pressure.
Removing the sash was easy. Since I never reinstalled the parting beads and the sash stops were just screwed in place, it only took me a few minutes to free the sash. (This also means that the windows have had a terrible time keeping wind and cold out for many years...)
I did have to cut some small notches at the top of the temp window to accommodate the sash pulleys, but other than that I had apparently measured correctly and the whole thing leaned right into place without issue.
Today the front of our house has a single temporary window where an original once hung. The frame has already been restored, but the sash is another story.
We've got a somewhat long road ahead of us that will include a steam chamber, salvaged glass, blopentine (we'll cover what that is in the future), and I'm sure a lot of head scratching. I'm excited. Wendy's excited. Heck, even Lulu and Mel are excited. I hope you're excited too!

![]()
![]()