For the two of us, there are few things in DIY renovation more satisfying than the idea of reuse of salvaged materials through repurposing. It typically combines all of the elements of a project that we always strive for.
- Recycling - Rather than the items ending up in the trash heap, we can put them to good use. That's better for the environment, for us, and for you. (With that last line picture me finger gun pointing at you with a wink, cheesy smile, and a slight head cock.)
- Ingenuity - Using our noodles to figure out a new custom application and installation, no manual or cartoon instruction sheet needed.
- Character - Old and antique materials often mean tremendous character by way of a time worn and natural patina gained over the items' years in use under its previous life. It's not "damaged," it's "distressed."
- Economy - Some would even call it frugal or cheap, but old salvaged materials that are not in great shape and need some help are often pretty inexpensive and can offer huge savings over new material approaches.
Hrm, based on that acronym, we really love R.I.C.E. That could be our new motto. When we DIY, we strive for RICE!
Anyhow, back to the purpose of this post. Over the last few weeks we've been putting RICE to use in one of our latest projects: a retrofit of 125 year old salvaged pine flooring that we turned into wall panelling.
We've had a pile of salvaged random width heart pine sitting in our basement for years. We didn't ever know exactly what we wanted to do with it, but we knew we wanted to do something. Though the rough and weathered surface bore the signs of its age, I knew that below the crusty exterior of stain, paint, shellac, dirt, grime, tar, glue, and whatever else had been applied or dropped on these floors, there was an old growth, sturdy, and great looking distress to the boards...as well as splits, splinters, and even nails.
Every so often we'd think about these boards, in lengths between one and 12 feet, and we'd consider, "what in the world can we do with these boards?" This question was frequently raised while we were either cleaning the basement or tripping on the pile of wood while trying to work in the cramped basement wood shop.
Without anywhere to use these boards as flooring, and unsure of their shape after cleaning them up, Wendy and I recently had the idea to repurpose the boards as wall panelling in our master bathroom closet. Brilliant!
Our master bathroom closet is a small space just inside of the master bathroom to the left and behind the door. We've long planned it to be a catch all space for the supplies and misfit items in our home that do not have a better place like the central vac hose, the ironing board and iron, laundry basket, my socks, t-shirts, shoes, a wifi extender, etc., you know, the normal stuff. It's not a particularly large space, but we're hoping for the best by way of cramming a ton into it.
But as much as it's a closet, we really didn't want it to be a forgotten room and space in our house. Since we feel every space in our home is special and deserves something unique, rather than slapping up some drywall and calling it a day we decided to use the old pine flooring from the basement pile as vertically stacked tongue and groove wall panelling. (I guess you can take these extra steps when your house is only 15 feet wide.)
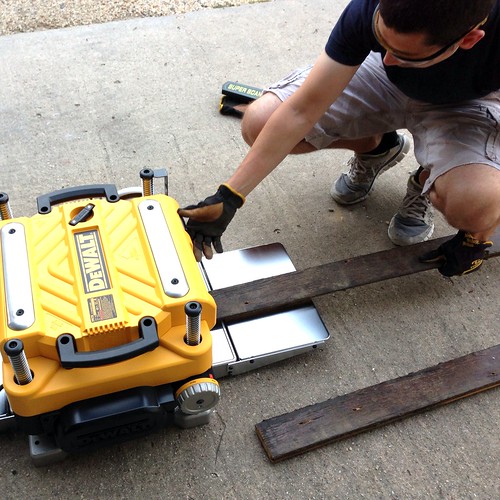
Over the last few weeks we've been hard at working on the various aspects of this project. It all started by breaking out my new (Christmas present) planer. Yes, the same planer that got hit by a truck. It's been a long project.
I ended up needing to take about 1/16th of an inch from the top surface of each board, but it wasn't as easy as just popping them through the planer. Each board had to be carefully inspected for nails or metal pieces that could damage the planer blades or become projectiles. To do this I ended up using my metal detector that I purchased a little while ago. If I found any pieces of metal, I then had to remove them before proceeding...
...Caked on dirt was then cleaned from around the tongue and along the groove face using a large paint scraper tool...
...And then the top layer of finish was scraped to remove any built up tar or gunk that might otherwise impede the planer in its mission.
Only then could I slowly run each length of board through the planer.
It was shocking how beautifully some of the boards cleaned up. The many years of built up finish and dirt were removed to reveal the deep and rich tight grained pine characteristics.
After several nights and hours of planing, we finally had ourselves a rather huge pile of boards that were ready to go into the closet (rather than sit in the basement).
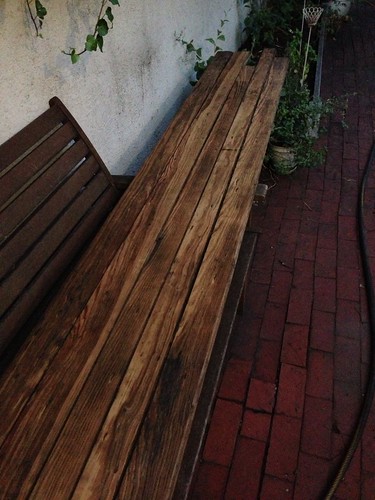
These are just a few that I had prepped, snapping a photo as darkness approached
We hauled them all up into the bathroom where Wendy organized them based on width and length and essentially setup a pine board "store." She stacked the long boards on the floor and leaned the smaller ones against the wall.
Installing the boards was like working a giant puzzle. Though we hoped we had enough to complete the 11 linear feet of the nine foot tall wall and three feet of two foot tall wall (above the door) we knew it would be close. We went to great lengths to piece together each and every piece of flooring with as little waste as possible.
Tremendous time was taken to ensure we were altering board widths, hiding and varying seams, and coordinating the install to use every available piece of wood.
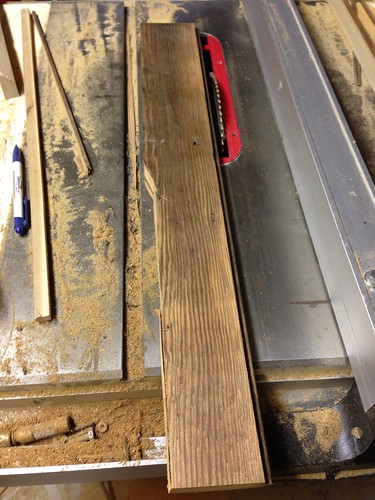
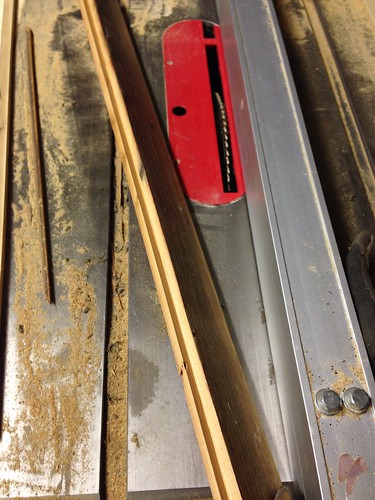
When a broken piece was used, or we needed a size that didn't match another board, I'd take the board down and run it on the table saw. Through a series of rips and cuts I could give myself a newly cut board with the right size groove and all.
Before
After
As we installed the pieces, the closet began to resemble something out of a wilderness lodge more than a bathroom closet. The variation in wood tone was interesting, though haphazard. Some of the boards were victims of water damage and peeling/splintering, while others have an absolutely beautiful yellow/orange look to it.
We were also left with quite the mess of scraps and dirt, leftover from our attempts to piece everything together like a large vertical jigsaw puzzle.
It took us several long days of effort to get everything in place, but once installed the little nondescript closet interior was beginning to look like a special place. Due to the shape of many of the boards, how much they're splintering and peeling, we're planning on hand sanding them a bit and then covering them with a nice coat of glossy white paint or white wash. The hunting lodge look just isn't the right look for the room, though it could be quite lovely in the right house.
As a test fit, we rolled in the carcass of the dresser that will eventually hold so many of my clothes. Just about a perfect fit!
We'll probably also add several shelves in the area above the dresser. After all, we do have nine foot ceilings to do something with in there.
All in all, I'd like to point out once again that my wood hoarding habit can pay off. Even if it means tripping over a pile of 100+ year old boards for the last several years.
Have you ever attempted to salvage old materials and repurpose them in a new way? Have you ever worked with old pine flooring? What were your takeaways? I'll tell you one thing, old pine sure smells great when you cut it!