And our house was blowing it. Big time.
Since this is the first week for our blog, we wanted to look back at a project that we tackled during our first week of home ownership that we feel made a significant impact on our home and how people were introduced to it. No better post for our first "Project From the Past" than to fill you all in on the work we started on the first day we owned the house. We were young and innocent (and our budget was essentially $0), so we had to make the biggest impact for the least amount of money.
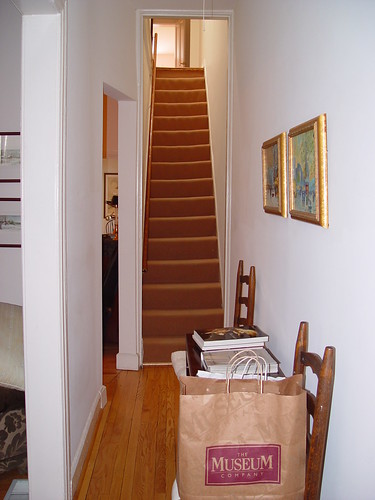
Since our house is only 15 feet wide, when a guest walks in through the front door they are immediately greeted by an entry hall and a view straight back through the house and up the staircase. You may recall a photo of our entryway from a post earlier this week containing photos of our home inspection. Here is a slightly better perspective of the unsightly view our guests were greeted with as soon as the front door opened.
Ick. Make that a double ick. From the "too tight of a squeeze" opening into the house, to the nasty pull chain light, all the way down to the filthy carpet on the stairs, our home was a creepy old man sporting a pocket protector and a bad toupee. And something needed to be done about it, pronto.
No sooner had we finalized the paperwork making it officially ours, we arrived at our new home, ready to make a dent in the ugliness that enveloped the property. We actually settled about two blocks from our house and had parked our car just outside our new front door, full of tools and ready to go.
The toupee, a.k.a. bad rug, was first up on our list. Armed with a hammer and prybar (details on these tools can be found in this blog post), we quickly got to work ripping, pulling, and tearing up the rug and tack strips below. Despite the rough state, we knew we had a diamond in the rough, just waiting to be polished up.
Once the rug and tack strips were removed, the next step was to turn our attention to the scuffed, lumpy paint on the stair risers.
An inexpensive lead test from Home Depot soon revealed what we feared we'd find -- lead paint. Lead abatement is something you don't want to mess around with, and many people call in the professionals. For those that opt to do it themselves, there is a great product on the market for environmentally safe removal of lead-based paint. The product, PEEL AWAY, comes in several "strengths" and, depending on the strength, resembles anything from a thick slime to a cake frosting-like paste that you spread over the surface of what you're stripping.
As you can see, we used Peel Away 6 for this project, because that was what was available at the store and we were Old House newbies. Since then, we've used Peel Away 7, which is a bit stronger but doesn't discolor the wood, as well as Peel Away 1, which is amazing stuff but you have neutralize it after the paint if off, and you must repaint when finished because of how it leaves the wood looking.
After applying the paste, the next step is to cover the paste with laminated paper (included), that is left on until the paint beneath it dissolves. If you run out of the paper, you can also use a standard roll of wax paper. The laminated paper is then removed with the bulk of the paste and paint adhering to it, and the stripped surface is washed clean.
This process prevents lead dust and fumes from becoming airborne, as they would with a heat gun or when sanding, because the paint is kept in a moist state. (For anyone interested, here's
more on the PEEL AWAY system from the manufacturer.) Even so, we were nervous about the prospect of working with lead-based paint, and after Alex had worked in a high lead environment in high school, we weren't willing to take any chances (as seen from the respirators we're sporting in the pictures above). Overkill, maybe. But it made my mom sleep better at night.
After the paint was safely removed, we allowed the professionals in. (A rare occurrence over the last eight years.) While we had our hardwood floors fixed and refinished, we also had the treads of the stairs redone as well, to bring back the luster of the original heart pine. Our contractor was Richard's Flooring, who we've since had back for a quick repair job. Unfortunately they don't work in the D.C. area anymore, but they are a really great family-owned company. Special thanks to Morrison for his work on this project.
We were well on our way to a more welcoming entryway, but the work was just beginning to get to a point where our home would start to make a good first impression.
This was our first week on the job, and we had a lot of items still ahead:
- Strip baseboards.
- Priming and painting the newly stripped risers.
- Replaster stairwell walls.
- Coming up with an alternative for the existing handrail. Although semi-functional, our handrail just wasn't working for us. For one, it was installed in such a way that it was imposing in the already narrow space and often caught pant legs on the way down the stairs. Secondly, well, it was ugly.
- Adding visual interest to the stairwell via a salvaged leaded glass window.
- Renovating the downstairs hallway, to include stripping and repainting the orginal molding, replastering the walls and ceiling, adding crown molding, and the completion of a hand-done harlequin paint treatment.
We'll summarize it all in subsequent posts, as well as additional details on how you can accomplish similar projects in your own home. Do you think our first few hours and days of homeownership were spent wisely? Perhaps there's something you've done to improve the entryway of your home? Please share your tips and projects. We'd love to hear them.