Old Town Home Category: 'Trash to Treasure'2017-12-21T22:42:13.747-05:00http://www.oldtownhome.com/trash-to-treasure/index.atomAlex and Wendyhttp://www.oldtownhome.com/wendy@oldtownhome.com2f60532b-5487-40ff-8a02-5aca8743d466https://www.oldtownhome.com/2017/12/21/Reviving-a-Relic-of-the-1970s---How-To-Restore-Wood-Salad-Bowls/Reviving a Relic of the 1970s - How To Restore Wood Salad BowlsAs many head to their childhood homes for the Christmas holiday, there's a good chance you may stumble on some forgotten yet classic home accessory treasures in your parents' basement just begging to be rescued.
If you're a child of the '80s or '90s, there's a distinct possibility that one of these magical findings may be a beaten and battered set of wooden bowls, a holdover from the '60s and '70s.
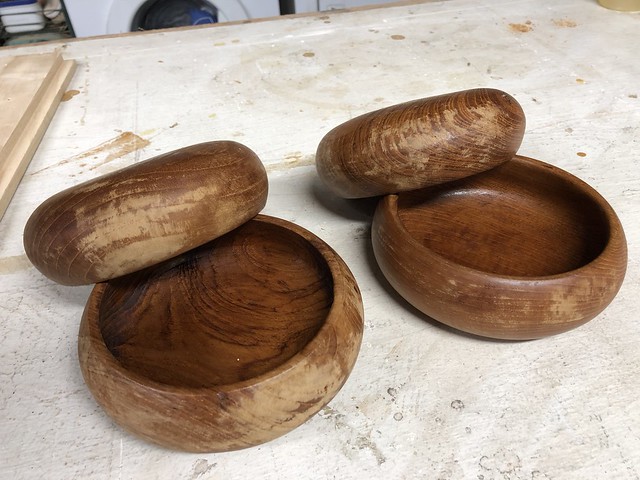
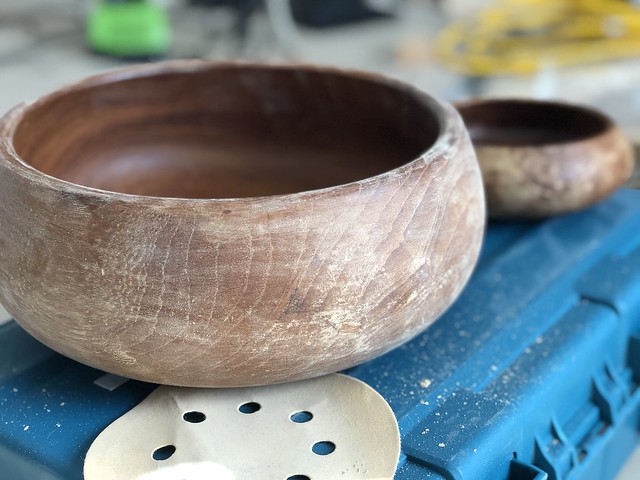
These bowls were so popular in the '60s and '70s and have that classic retro look to them. Can't you just picture them sitting on the table with a pot of bubbling fondue nearby? Many swore by the use of wooden bowls to enhance the flavor of salad, and after use, abuse, and outright neglect, they were often tossed in a pile with other misfit dish ware, never to be seen or eaten off of again. But the thing about these bowls of a bygone era is that they just need a little bit of love to be revived. When a free set of wooden bowls in need of a little TLC presented themselves, Wendy could not pass up the opportunity. Wendy, as the fan of all things free, classic, and old that she is, wanted to give these worn bowls a good home.
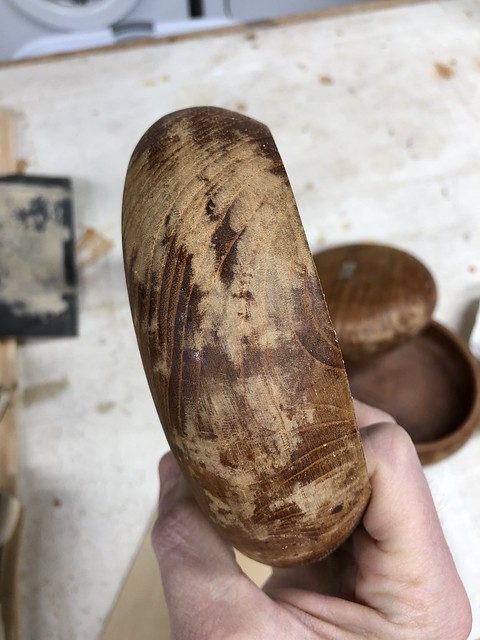
They were dry, scratched, gouged in a few places, and clearly a little worse for the wear. But this was primarily on the exterior, while the interior of the bowls looked pretty good.
more]]>2017-12-21T22:42:13.747-05:002017-12-21T22:42:13.747-05:00AlexAs many head to their childhood homes for the Christmas holiday, there's a good chance you may stumble on some forgotten yet classic home accessory treasures in your parents' basement just begging to be rescued.
If you're a child of the '80s or '90s, there's a distinct possibility that one of these magical findings may be a beaten and battered set of wooden bowls, a holdover from the '60s and '70s.
These bowls were so popular in the '60s and '70s and have that classic retro look to them. Can't you just picture them sitting on the table with a pot of bubbling fondue nearby? Many swore by the use of wooden bowls to enhance the flavor of salad, and after use, abuse, and outright neglect, they were often tossed in a pile with other misfit dish ware, never to be seen or eaten off of again. But the thing about these bowls of a bygone era is that they just need a little bit of love to be revived. When a free set of wooden bowls in need of a little TLC presented themselves, Wendy could not pass up the opportunity. Wendy, as the fan of all things free, classic, and old that she is, wanted to give these worn bowls a good home.
They were dry, scratched, gouged in a few places, and clearly a little worse for the wear. But this was primarily on the exterior, while the interior of the bowls looked pretty good.
Knowing that wood has the ability to rebound even when much further gone than these bowls, I decided to give wooden bowl rehab a shot. Let me just tell you, I had no real expectations for the outcome, and figured a little improvement would be very much appreciated, but I'm pretty blown away by the end results. Let's quickly go over the effort.
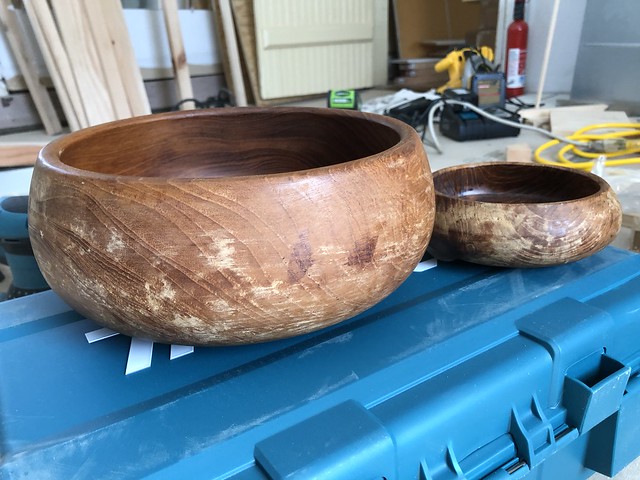
I started by sanding the exterior of the large bowl with 220 grit paper. I used my random orbit sander on a slow setting to take out as many of the major blemishes and marks as possible on the larger bowl.
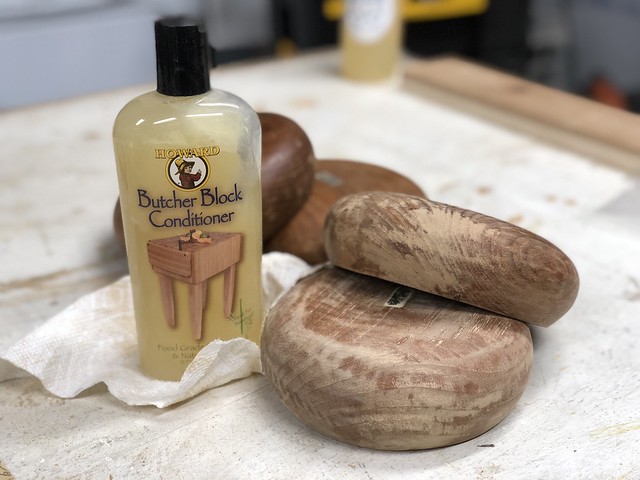
For the smaller bowls I just went ahead and hand sanded using the same 220 grit paper to give us a nice and smooth surface free of the rough patches that had covered the prior surface.
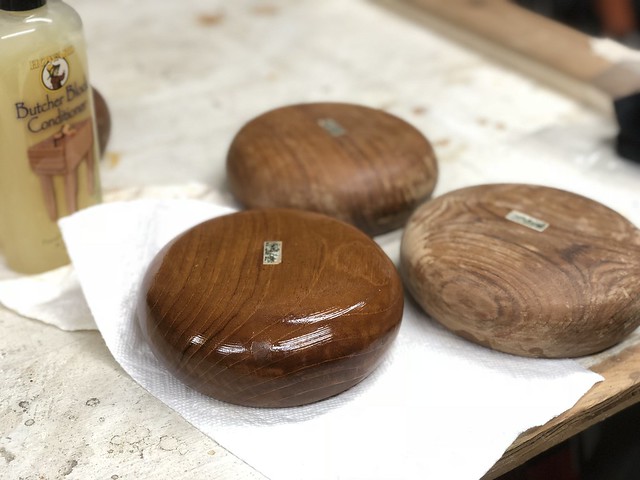
After wiping away the dust from the surface of of the bowl with a small cloth, I grabbed our favorite Howard Butcher Block Conditioner. It's a combination of mineral oil and beeswax and does an amazing job of rehydrating dry and thirsty wood.
The mineral oil works into the pores while the beeswax works to provide a sort of natural filler. We've used it for years on our butcher block counters, and have loved how it works.
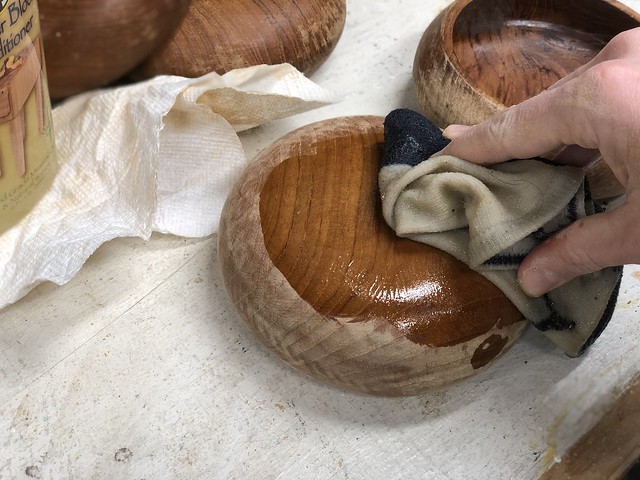
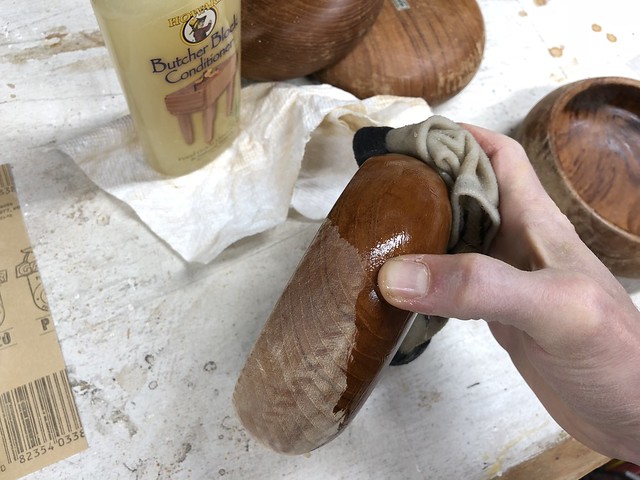
A little goes a long way, and we have an application rag we keep that's already saturated, so application is quick and easy.
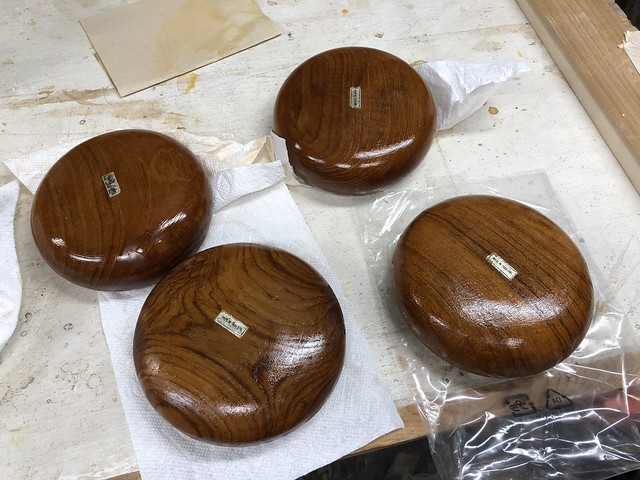
Just look at this jaw dropping side by side of the original bowl, sanded bowl, and bowl with oil/wax applied. It's amazing what this natural and food safe rejuvenating product can do for dry wood.
After application I just let the oil and wax sit for several hours to soak into the bowl and slowly dry. Once it's had a good couple of hours to really saturate the wood, come back with a dry cloth and wipe away excess while also buffing the remaining wax into the pores of the wood.
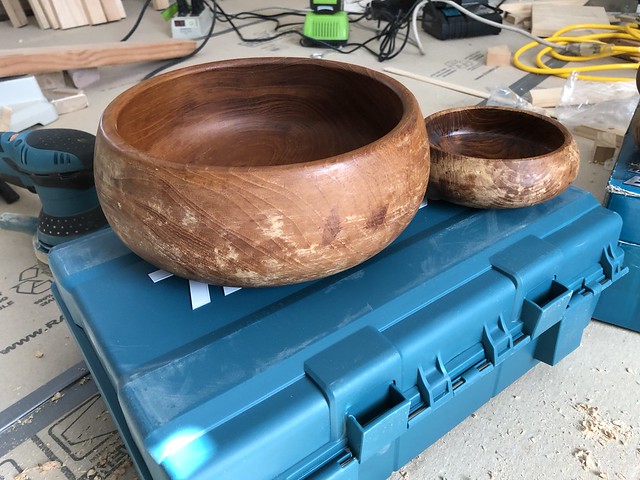
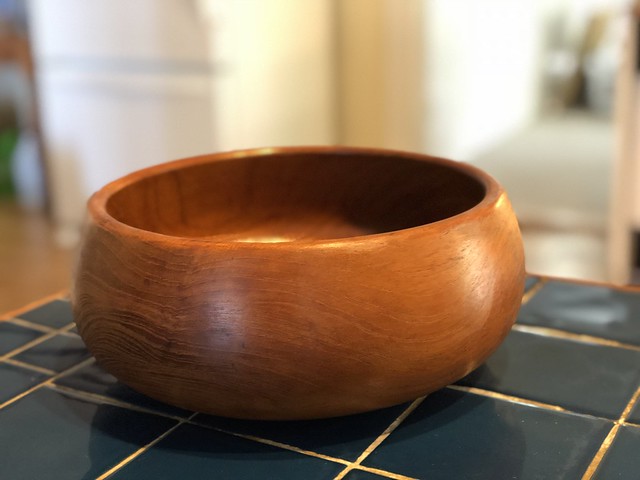
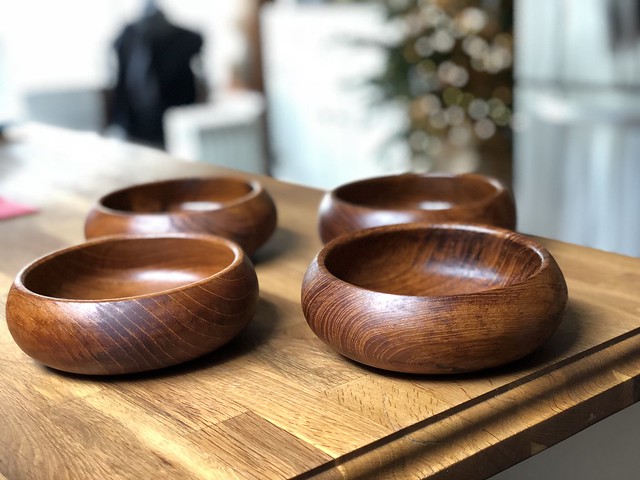
When we were done the end result is a beautiful and rich set of wooden bowls that were not only brought back from the brink, but will also be enjoyed for many more years to come. Just look at how warm and wonderful this looks after the oil has been allowed to breathe new life into the large serving bowl. Makes me want to turn on some Disco!
While these bowls may have had their first go-round in the 1960s and '70s, the warm tones and retro style will once again serve us for years to come.
And it's also a good reminder that a little bit of maintenance can go a long way when it comes to reviving an unexpected treasure. So if you're going to be home this weekend and into next week, or even if you find yourself picking through an antique shop, just remember to look beyond the distressed nature of what you might find, because everything that's old can often be new again.
We hope you have a wonderful holiday weekend of family, food, fun, and treasure hunting!
]]>https://c1.staticflickr.com/5/4597/25503329368_8267b0cd95_z.jpgPostImagemedia:thumbnaild38ca211-4f9a-4862-b5ab-2214c64df6a4https://www.oldtownhome.com/2017/10/20/Building-a-Spouse-Unapproved-Kayak-Rack-from-Driftwood/Building a Spouse Unapproved Kayak Rack from DriftwoodA few weeks ago I built a thing...and Wendy sort of hates it.
You see, when it comes to aesthetics, Wendy has an innate ability to determine what is appealing, and it's an ability that greatly exceeds my own in the same arena. I like a nicely finished project and will go to great lengths to ensure I’m doing the absolute best job I can. But at times I tend to focus more on function over form, sometimes leaving something to be desired when viewing the finished product. Some would call me practical, but Wendy begs to differ. After all, there’s often a better way that’s also pleasing to the eye.
Need an example? Just look back on the weather station debacle where I mounted it initially in an “unapproved” location. It had to be remedied lest we risk the wrath of the weather station police.
Well, we recently had a somewhat similar situation, but I think the outcome of this form over function aesthetic debate might just end up swinging my way.
We have two plastic kayaks (yes, the same ones used to change the weather station to a more acceptable location) at our Foursquare house. We can launch them right into the water next to our dock, they’re a ton of fun for us, visitors, and Lulu, and we very well may be adding to them by getting a tandem kayak next year.
more]]>2017-10-20T10:45:00.000-04:002017-10-20T10:45:00.000-04:00AlexA few weeks ago I built a thing...and Wendy sort of hates it.
You see, when it comes to aesthetics, Wendy has an innate ability to determine what is appealing, and it's an ability that greatly exceeds my own in the same arena. I like a nicely finished project and will go to great lengths to ensure I’m doing the absolute best job I can. But at times I tend to focus more on function over form, sometimes leaving something to be desired when viewing the finished product. Some would call me practical, but Wendy begs to differ. After all, there’s often a better way that’s also pleasing to the eye.
Need an example? Just look back on the weather station debacle where I mounted it initially in an “unapproved” location. It had to be remedied lest we risk the wrath of the weather station police.
Well, we recently had a somewhat similar situation, but I think the outcome of this form over function aesthetic debate might just end up swinging my way.
We have two plastic kayaks (yes, the same ones used to change the weather station to a more acceptable location) at our Foursquare house. We can launch them right into the water next to our dock, they’re a ton of fun for us, visitors, and Lulu, and we very well may be adding to them by getting a tandem kayak next year.
The problem with these kayaks is that they don’t have a home. When they aren’t in use (which is most of the time) they sit in the way. They sat on our porch all last year.
Once we painted our porch they sat in our yard most of this year.
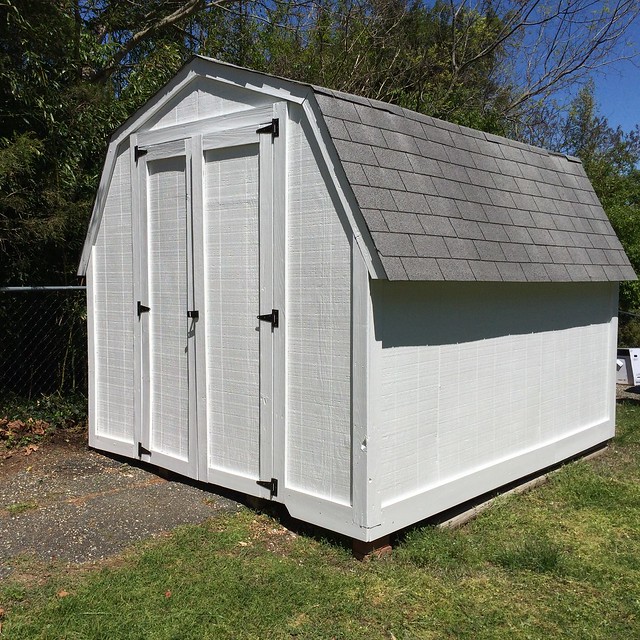
And in the winter last year we left one on the porch and put the other in a room inside, which is weird and cumbersome to deal with. Unfortunately, they are just too big for our shed.
So...what to do?
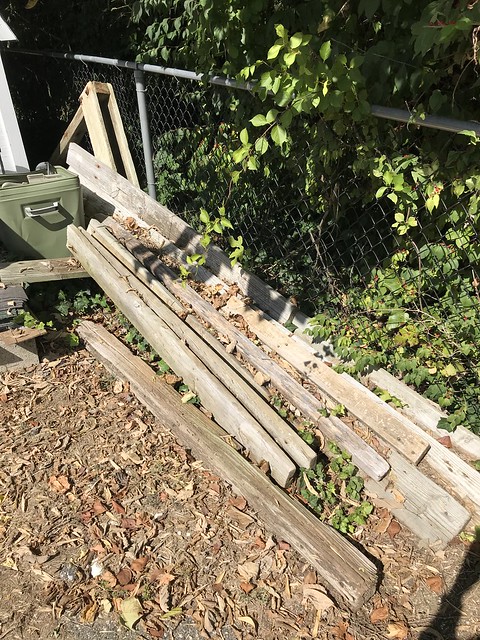
Well, over the last few years I’ve been collecting wood that has washed up in our yard during high tide periods. I always had this grand hoarder-esque thought process of “I should probably keep all of this because I’m totally going to use it one day.” While this was my justification, the voice in my head worried I was just being delusional and had taken the first steps on the very slippery path of filling our house with garbage bags full of Beanie Babies, mountains of Restoration Hardware catalogs, and limited edition Happy Meal toys.
I wanted to resist the urge to devolve into a reality TV “most disgusting” clips show where you'd find me debating some host about whether they could throw out an 8" length of grey 2x4, and instead use some leftover wood I had and the driftwood I'd collected to build us something useful. Like a shining beacon of trash, the opportunity had presented itself. Yep, you guessed it, a kayak holder, or a yak rack.
This project was meant to be a quick and dirty, very simple, rustic, and quick build. Did I mention it needed to be quick? I had an afternoon to put it together, and I really wanted to get the kayaks off the ground before all of the leaves began to fall.
My approach to the project was very improvised. I had two 8’ 4x4 pressure treated posts, a spare length of pressure treated 2x12 leftover from rebuilding some porch steps, and a hodge-podge of hoarder driftwood. I also had a bevy if Pinterest images swimming in my head that articulated the basic needs of a yak rack. Essentially that you needed arms to sit the kayaks on, and you have to make sure it won’t tip over.
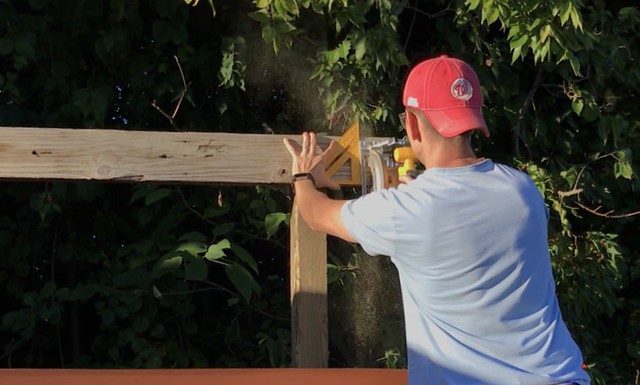
When it came to tools for the build I wanted to keep it simple. A circular saw, rafter square, drill, nail puller (to remove nails in the old wood so they didn’t destroy my saw blade), level, pencil, and tape measure.
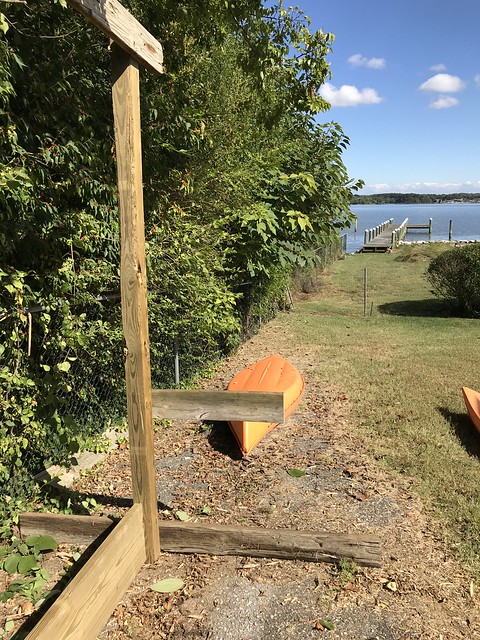
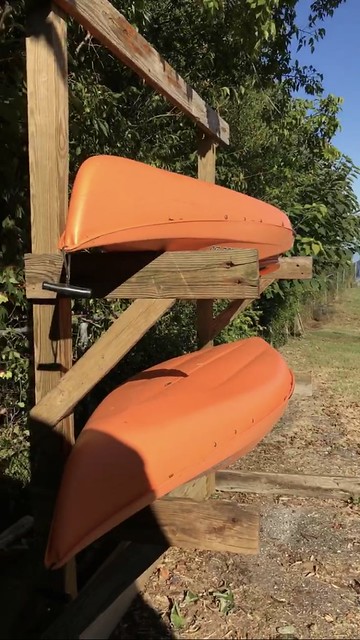
After measuring out the width the posts would need to sit apart from each other at about 7', I tied them together with the 2x12 and several 8” exterior lag screws. This gave me a substantial base that would support the whole thing. I also left the length of the 4x4 posts at 8’, which is what would later drive Wendy to label this a “monstrosity skyscraper that is now the only thing I can see.”
Once I had the basic structure of the frame in place, I turned my attention to the driftwood for the remainder of the build.
I used one of the ragged lengths of 2x6 to attach the two posts at the top of the rack, making a large rectangle that I could stand up on my own to attach the lower support. The key here was my ability to stand this up on my own, without calling Wendy for help. It was an unintentional avoidance of what would have been an imminent veto of the project, but I figured I was being a good spouse by not bothering my lovely wife with trivial details.
I left the top right "rustic," but that detail was removed due to request.
After cutting a few more lengths of 2x6 driftwood for the leg supports, I stood the large rectangle up and secured the supports with about 3' extending in front of the rack, and 2' extending behind. Since the kayaks will front load the rack we don't need quite as much support toward the rear of the stand.
Next I had to begin assembling the arms where the kayaks will ultimately rest. Using more 2x6 driftwood (I'm pretty sure we get a lot of 2x6 because it's material used for dock decking) I began cutting arms that would extend forward from the posts by about 24".
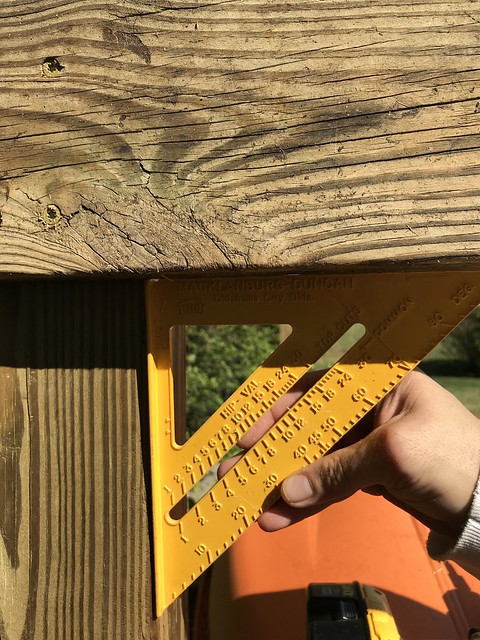
In each case I made sure the arms were square to the posts by using my cheapo plastic rafter square. I really need to get myself one of the much nicer metal and laser etched Empire rafter squares.
While these arms and the four screws I used to secure each one would have likely been sufficient to support the kayaks, I didn't want a situation where they began to sag over time. To brace these arms I used some 2x4 driftwood cut at a 45 degree angle at the top and bottom and screwed them to the arms and the posts.
Finally, to ensure the now very top heavy kayak rack wouldn't decide to tip forward, I cut two more 2x6 driftwood pieces and attached them at 45 degree angles to the posts toward the rear legs. I ended up attaching them only on the back and not on the front to allow for future expansion by way of an additional kayak placement near the bottom of the rack.
Weird camera angle, it's not propped up off the ground in the back.
I finished up the project, proudly marched inside and exclaimed to Wendy, "Come look! I finished up what I've been working on all afternoon!"
Wendy wasn't sure what I had been doing and walked over to the window. I proudly presented my finished rack, and my lovely wife simply said, "It's just so...tall?" I took that as a stamp of approval for a job well done.
The one thing that Wendy did ask was that I remove the jagged rustic detail I had originally left on the top right driftwood support. She felt it made it look too "janky." I felt it gave the whole thing a little character. I conceded and took my circular saw to the ruggedness and squared it off. Wendy was right.
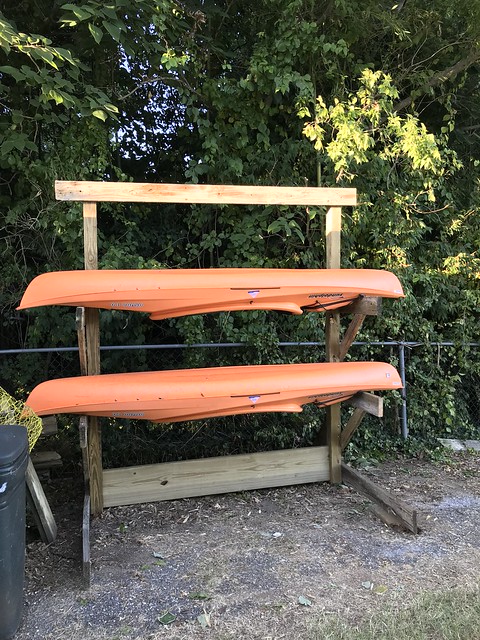
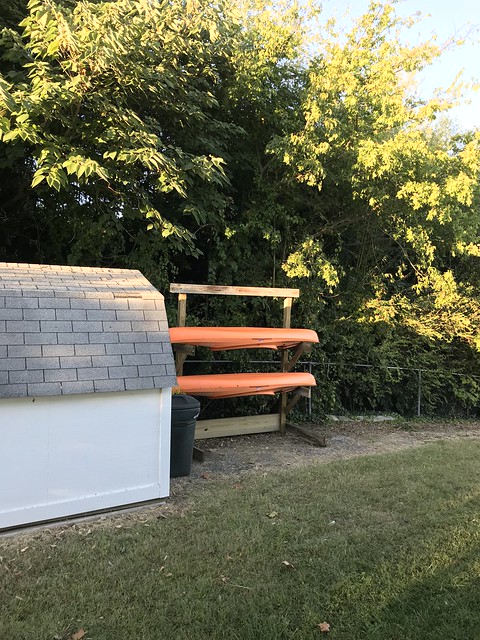
Ultimately Wendy does appreciate that the kayaks are no longer on the ground, but she wishes I'd maybe made the whole rack a little shorter. I wanted to leave room for a possible 4th kayak, or maybe a small shed roof. The jury is out on whether I'll be cutting this down a foot or two to shrink it a bit, or if I'll make some other modifications. But I know one thing for sure, that giant rack is a damn thing of beauty (and honestly, it's not that big).
In the end we have exactly what I set out to build, a kayak rack to store our two kayaks off the ground. Bonus points for having a little room for expansion. Should I be ashamed of my form over function aesthetic that resulted in building an unapproved structure in the sightline of my loving spouse? Should I shy away from my tendency to collect driftwood for future projects for fear of being labelled a hoarder by friends and family? Or should I throw caution to the wind, keep doing what I'm doing, and building the things that my soul wants to build (including giant and debatably ugly but adequately functional assemblies)?
]]>https://c1.staticflickr.com/5/4474/37554465200_4ee4f9c3ae_c.jpgPostImagemedia:thumbnailcf3f20c8-7a3b-49ce-ad29-b1b6da593710https://www.oldtownhome.com/2017/9/18/Curbside-Find---Transforming-Trash-into-a-Passthrough-Table/Curbside Find - Transforming Trash into a Passthrough TableWendy's love of trash to treasure makeovers is well documented throughout the years.
On several occasions throughout our history together my lovely wife has been known to spy a sad, lonely, and abandoned piece of furniture sitting curbside. When the situation is right, she's also well known to pull the car over or stop us in the midst of our evening walk to "rescue" the piece before the trash truck is able to seal its fate.
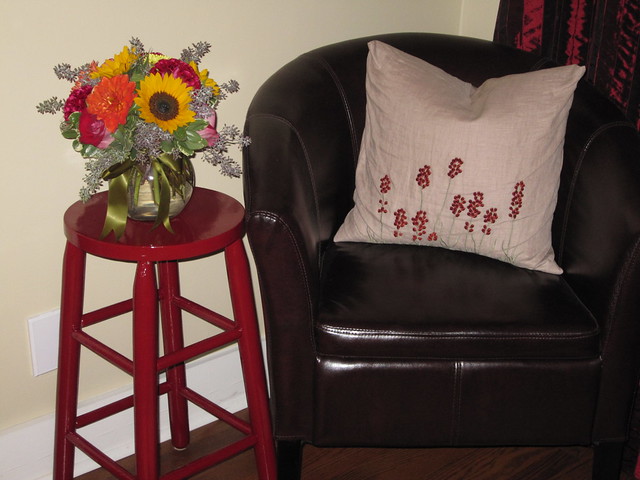
After all, this is exactly how we obtained several pieces of wood furniture, including our favorite little red stool that began life in our home with a much different look.
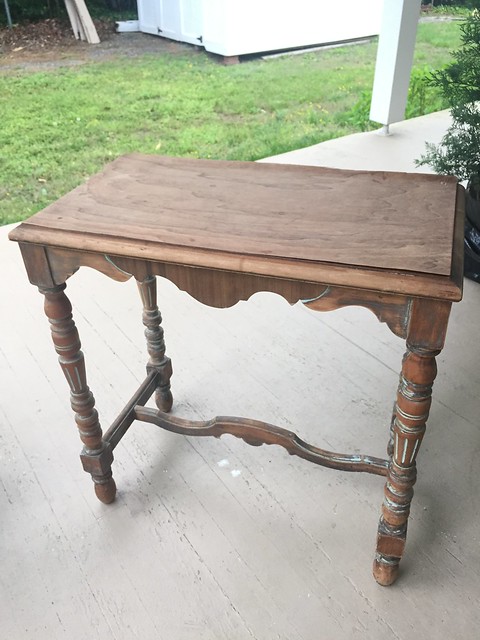
Earlier this summer Wendy's eagle eye for picking struck again, and she gleefully came home with a distressed little end table, left curbside in the rain in front of a home in Del Ray (a nearby neighborhood in Alexandria) and she had a grand vision for it.
more]]>2017-09-18T09:30:00.000-04:002017-09-18T09:30:00.000-04:00AlexWendy's love of trash to treasure makeovers is well documented throughout the years.
On several occasions throughout our history together my lovely wife has been known to spy a sad, lonely, and abandoned piece of furniture sitting curbside. When the situation is right, she's also well known to pull the car over or stop us in the midst of our evening walk to "rescue" the piece before the trash truck is able to seal its fate.
After all, this is exactly how we obtained several pieces of wood furniture, including our favorite little red stool that began life in our home with a much different look.
Earlier this summer Wendy's eagle eye for picking struck again, and she gleefully came home with a distressed little end table, left curbside in the rain in front of a home in Del Ray (a nearby neighborhood in Alexandria) and she had a grand vision for it.
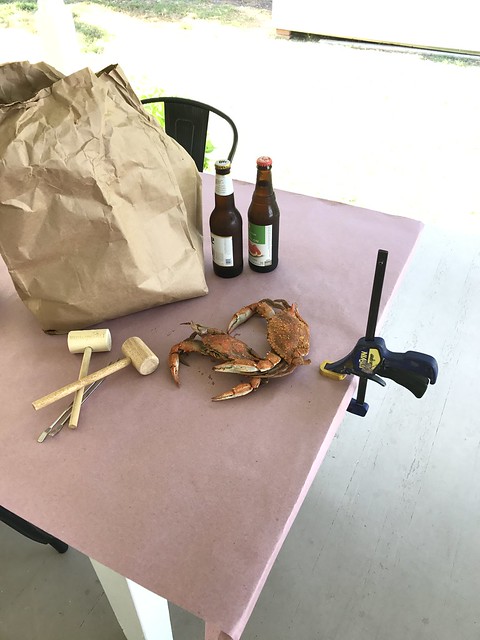
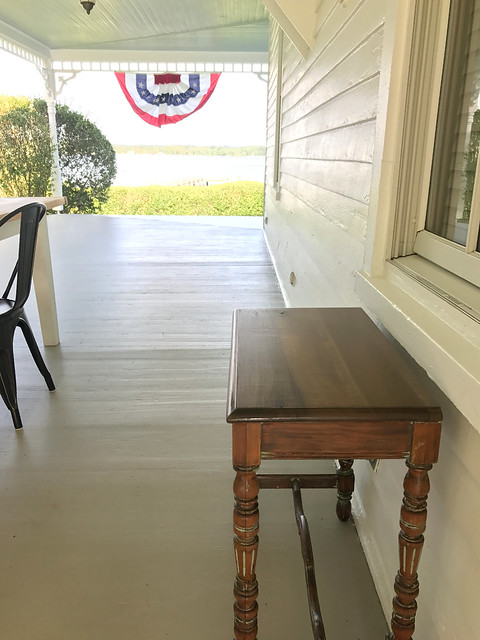
The side porch on our Foursquare is the perfect setting for some relaxing outdoor dining. We have a huge reclaimed dining table, 10 chairs, and many friends and family that have enjoyed everything from picking delicious blue crabs...
...to giant multi-course homemade meals. But one of the trickier parts of this set up is transferring everything from the kitchen to the outdoor dining table.
The doorways to the side porch are at either end of the porch, and multiple trips in and out take a good deal of time. We do have a window in the kitchen that looks out on the table, but passing things through this window require someone on either side.
That is until Wendy found this little table that happened to be the perfect height to act as a passthrough staging area.
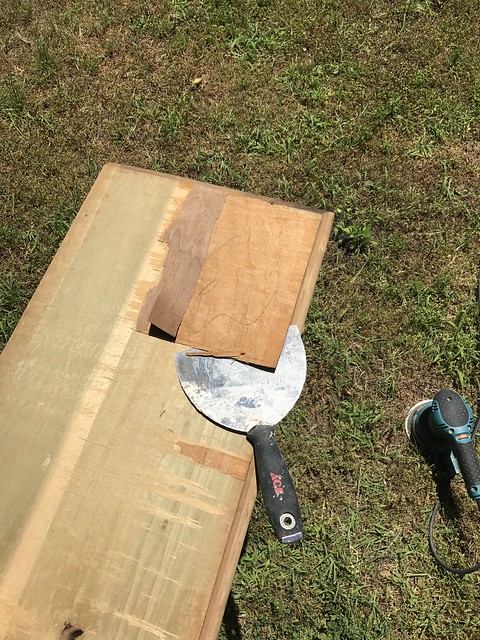
But as you can see, before we could really use this table for its intended purpose, we had to do a little work to clean it up.
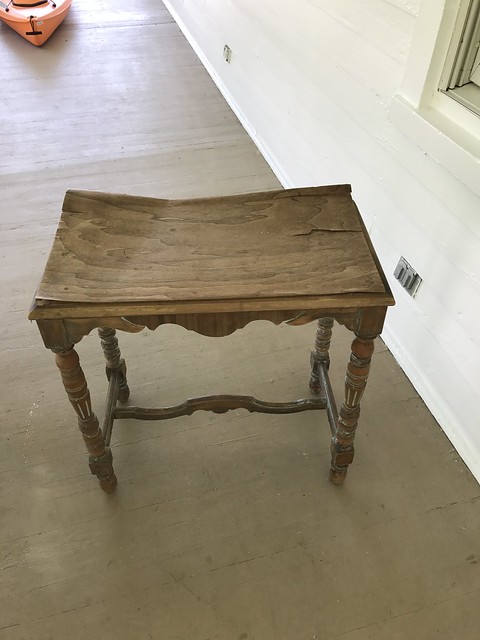
The first step was the removal of the veneer on the top of the table that was already buckling and failing. This was the single biggest visible problem on the table, but was easily removed with a taping knife since the adhesive was already giving up.
Some of the veneer was left after prying it off, so I grabbed our sander and 80 grit paper to take it all down to the bare wood, then again with 120 grit to smooth it all out.
After sanding the top, I didn't want to sand the rest and lose the patina and character, but as you can see, the top was a decidedly different color than the rest of the table.
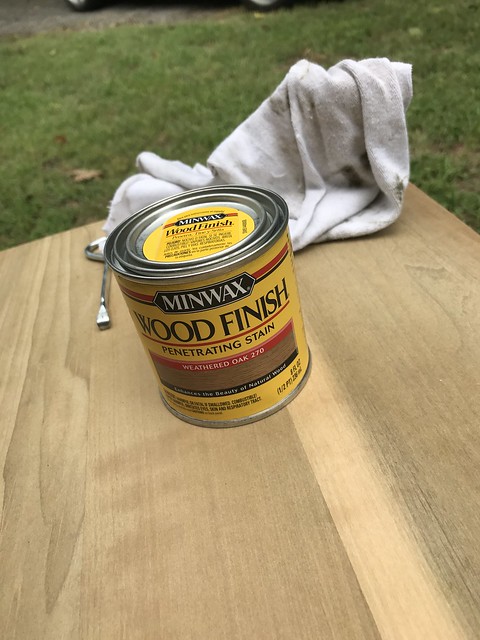
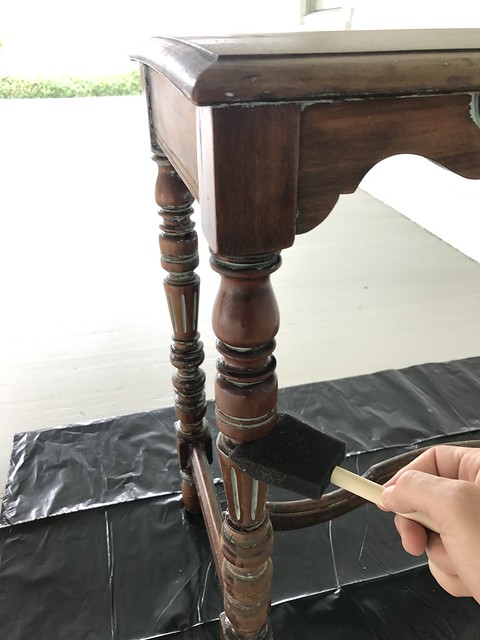
To remedy this situation we decided to stain the top before proceeding with any sealer. The rest of the table already had that slightly weathered look to it so we decided to use some MinWax stain in their Weathered Oak color.
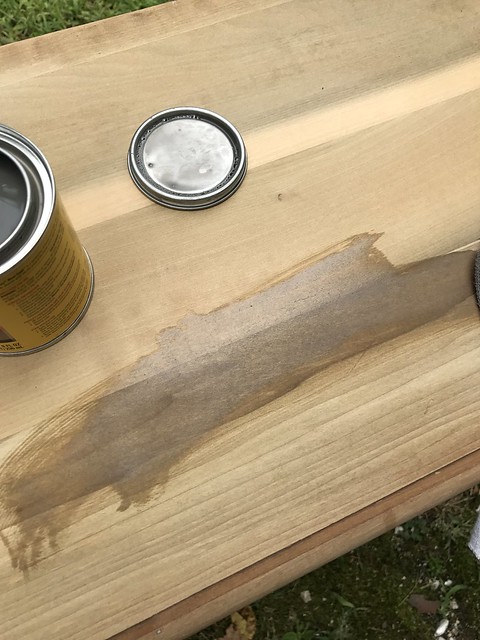
As we began applying the stain we immediately could see we chose the right color. The slight gray tint transformed the raw light color of the table's top to something far more similar to the aged base.
We applied two coats of stain using a foam brush and wiping it off after about 30 minutes. We also allowed a few hours between coats.
We had to take a long break on the project before continuing and ended up allowing the stain to cure for a week before moving into the top coat. We really only needed to give it 24 hours, but the six days likely didn't hurt.
After coming back to the table we were ready for the final step. Since this is an outdoor item that will need to withstand the elements, we decided to give it the same finish as we gave the outdoor dining table. The Waterlox Marine Sealer.
The first step in this process is applying the Waterlox Marine Sealer to prep the surface for the finish.
The Marine Sealer needs at least one coat and 24 hours before the finish coats can be applied, but we actually went with two for good measure. The whole Waterlox process does take a while due to cure time between coats, but it's a classic finish process and is well worth the time.
Another 24 hours of allowing the 2nd coat of sealer to dry (plus another week break away from the house) and we were finally ready to apply the Satin Waterlox finish coats.
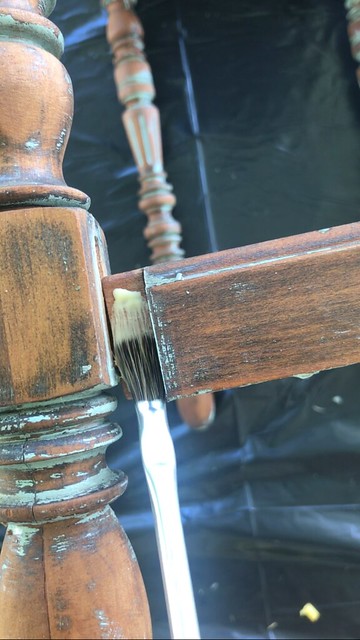
I did notice a small issue with one of the cross supports on one of the table's legs at this point (should have noticed earlier), so I quickly glued it back together to sure things up.
And did you notice in the photo above how the table was painted a beautiful shade of aqua at one point? Wendy likes this detail most of all, as it's a near match to the color of our exterior doors and wraparound porch ceiling.
But back to glueing. I clamped the joint while the glue set up and then moved onto applying the finish coats with a foam brush. You can see from the photo that the Waterlox finish does give the wood a richer but slightly yellow look. The stain we used was oil based and the Waterlox finish (and sealer) could be applied over the stain as long as it was fully cured. Given our week long breaks in the process, we were in good shape.
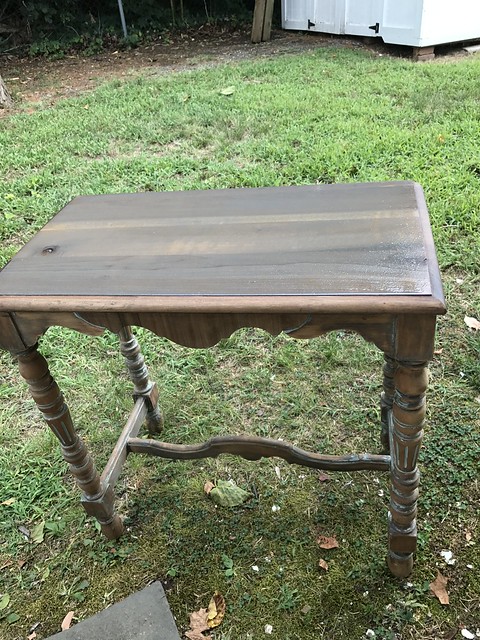
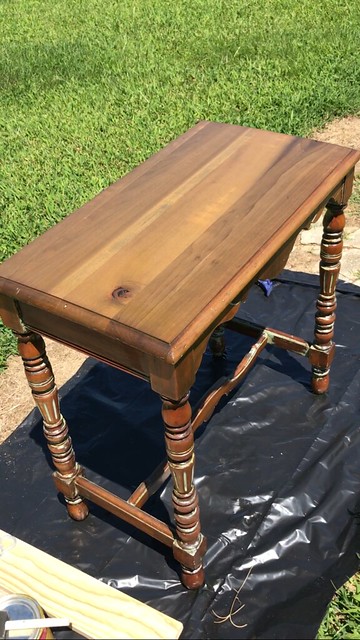
We applied two coats of the Waterlox Sating Marine Finish and allowed it to fully cure. It was looking great and was hard to believe Wendy had picked this broken, wobbly, and peeling piece of furniture from someone's trash pile.
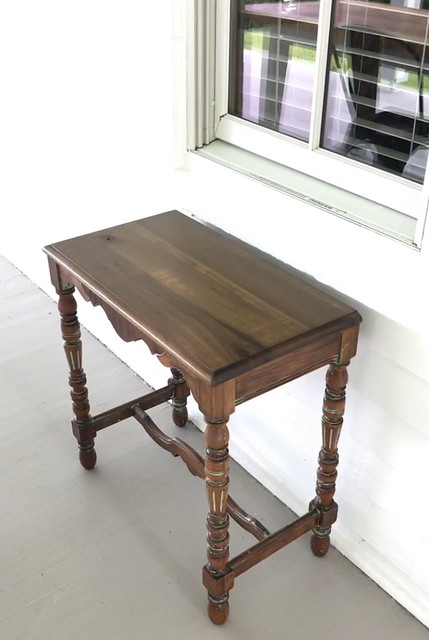
Once the Waterlox had fully cured we popped the little table on the porch below the window from the kitchen. Wendy's trash find is now our official passthrough table. As food, plates, drinks, and anything else is ready in the kitchen to come outside, we just open the window and set the items on the table where someone outside can grab it and place it on the large table.
It's a wonderfully convenient pass-through to get the outdoor party started. And since I'm pretty sure we eat outside as much as we eat inside, this free table will get a ton of use. We're really glad we went with the Waterlox Marine finish since we tend to place a lot of pitchers and drinks on this table and condensation tends to build on the surface. Using it for several weeks now we've not had any problems with rings or water stains.
I have to say, I may have my doubts when Wendy occasionally comes home and says "I found something cool on the side of the road on the way home and we're going to make it look awesome!" But now that it's happened several times, and she's always right, I need to keep my skepticism in check. I love how this table turned out and I'm so glad it's now sitting on our porch helping scenes like this play out so wonderfully.
Do you have a partner that's addicted to curbside finds? Perhaps you're the trash hunter? Would love to hear if you'd made any good scores from the curb lately.
]]>https://c1.staticflickr.com/5/4415/37318053165_1a27ba5fab_z.jpgPostImagemedia:thumbnail758b343f-8ee8-4eb8-af70-c84a95a68f2bhttps://www.oldtownhome.com/2012/12/19/Creating-a-Cutting-Board-from-Butcher-Block-Scrap/Creating a Cutting Board from Butcher Block ScrapI think we're all familiar with the saying, "Waste not, want not." It doesn't matter if I'm working on a whole room renovation or a tiny little task, I hate throwing out things that I can classify as "perfectly good." Sure, construction tends to have its fair share of destruction associated with it, and any level of true construction will ultimately generate a good amount of waste, but I'd say we've been pretty good about not throwing things out that still have a useful life beyond our immediate plans.
Sure, Wendy may sometimes lovingly refer to my penchant for protecting the things others may discard as "hoarding," but I'm sure she's not at all serious...right? I mean, our house may be small-ish, and our storage scarce-ish, but she understands that sometimes it's best to hold onto things that might be useful in the future. (Ahem, scrap wood.)
A perfect example of the benefits of holding onto something that many others might have thrown out actually came up on Sunday evening, but it all started several months ago. Back when we were working to replace our old and broken down counter tops with IKEA butcher block counters, we purchased three lengths of butcher block. After completing the project, we still had two short lengths of butcher block left over. These lengths were trimmed from the shorter counter top areas where the excess simply wasn't needed.
Rather than do what most normal people might do and throw the remnants out, I stashed the thick oak boards in the basement and hoped we'd eventually be able to use them for something else. Fast forward to this past weekend when Wendy suggested we might want to use the excess pieces as, well, butcher blocks. More specifically, butcher block cheese boards or cutting boards. This sounded perfect to me. I knew I'd be able to cut them to size without issue, they'd no longer take up room in the basement, and the pieces would have no problem doing their job as butcher block, since that's what they were born to do.
more]]>2012-12-19T10:45:00.000-05:002012-12-19T10:45:00.000-05:00AlexI think we're all familiar with the saying, "Waste not, want not." It doesn't matter if I'm working on a whole room renovation or a tiny little task, I hate throwing out things that I can classify as "perfectly good." Sure, construction tends to have its fair share of destruction associated with it, and any level of true construction will ultimately generate a good amount of waste, but I'd say we've been pretty good about not throwing things out that still have a useful life beyond our immediate plans.
Sure, Wendy may sometimes lovingly refer to my penchant for protecting the things others may discard as "hoarding," but I'm sure she's not at all serious...right? I mean, our house may be small-ish, and our storage scarce-ish, but she understands that sometimes it's best to hold onto things that might be useful in the future. (Ahem, scrap wood.)
A perfect example of the benefits of holding onto something that many others might have thrown out actually came up on Sunday evening, but it all started several months ago. Back when we were working to replace our old and broken down counter tops with IKEA butcher block counters, we purchased three lengths of butcher block. After completing the project, we still had two short lengths of butcher block left over. These lengths were trimmed from the shorter counter top areas where the excess simply wasn't needed.
Rather than do what most normal people might do and throw the remnants out, I stashed the thick oak boards in the basement and hoped we'd eventually be able to use them for something else. Fast forward to this past weekend when Wendy suggested we might want to use the excess pieces as, well, butcher blocks. More specifically, butcher block cheese boards or cutting boards. This sounded perfect to me. I knew I'd be able to cut them to size without issue, they'd no longer take up room in the basement, and the pieces would have no problem doing their job as butcher block, since that's what they were born to do.
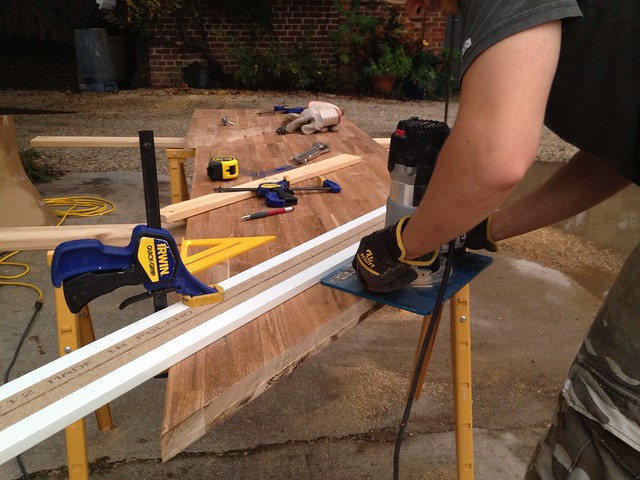
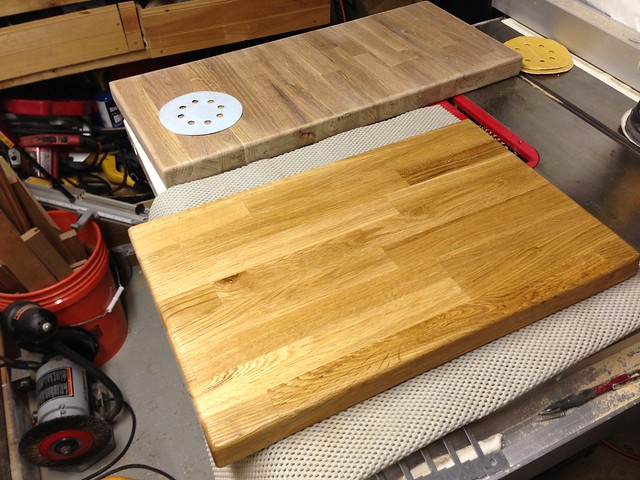
I started the task by assessing the sizes of the leftover pieces to determining the best possible dimensions for the block I was cutting. We had two remnant pieces of butcher block, the first was 25" x 11" and the second 25" x 20". After much debate, Wendy and I decided to keep the 25" x 11" as is, to use as a long cutting board/serving tray. The second we planned to cut in half, giving us two 20" x 12-1/2" boards.
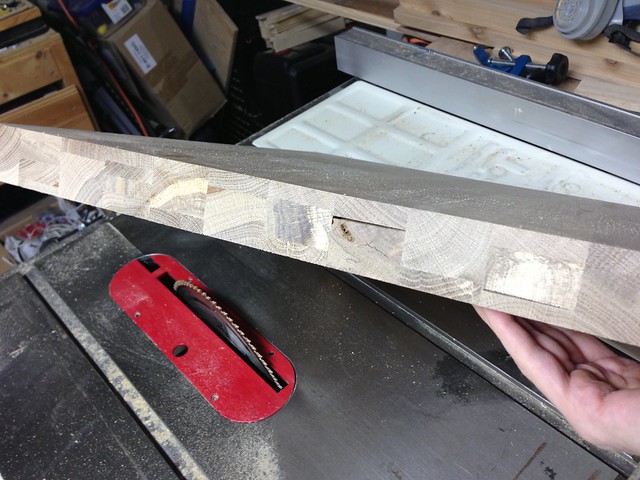
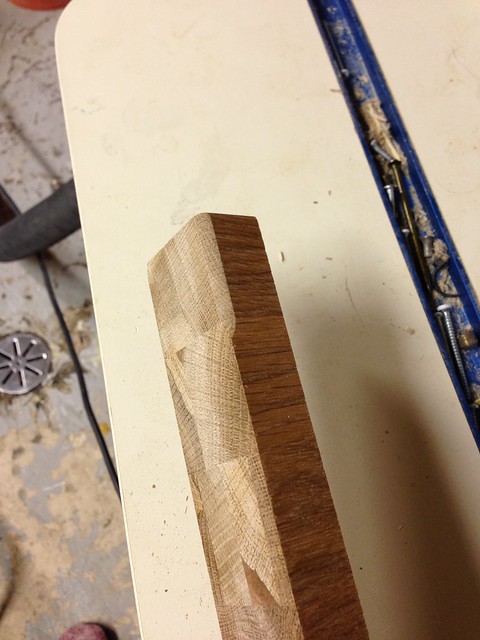
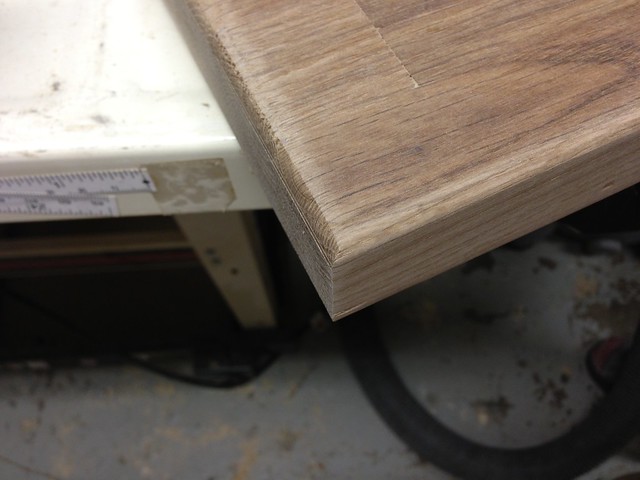
With our measurements determined, I squared up the first piece of block using the table saw. The work I had done over the summer left a badly burned and poorly cut edge on two of the pieces. I squared up and removed the burned areas simply by making a pass to shave off about 1/8" of material. Here's the nasty edge before...
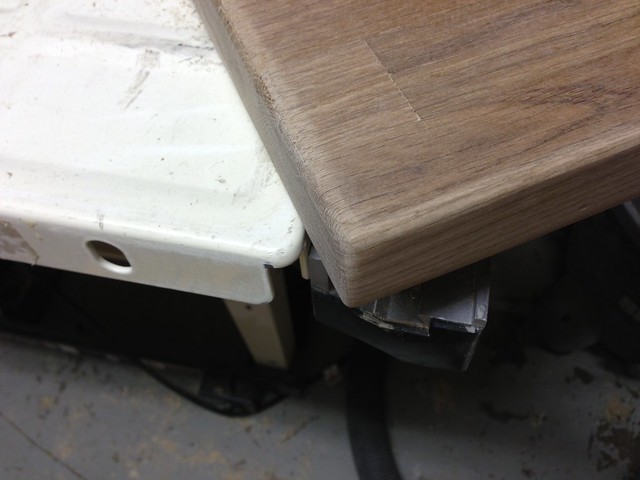
...and here it is after. A slight improvement, I'd say.
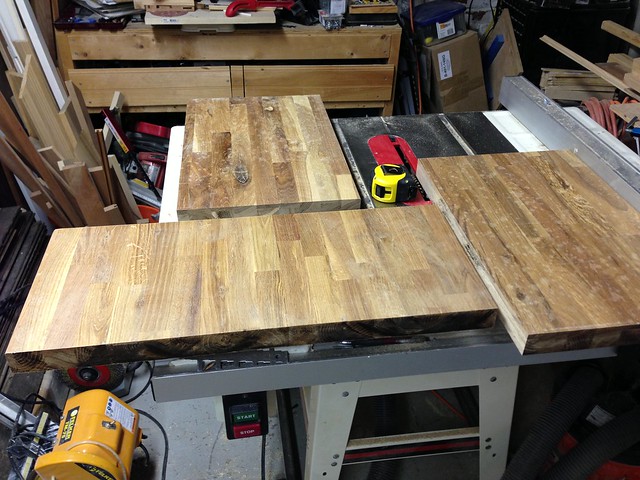
After a few cuts to square the material, and a single pass to slice the board in half, we were looking at the sizes of butcher block we'd end up with. It was perfect for a few pieces of remnant wood that many would have tossed into the trash.
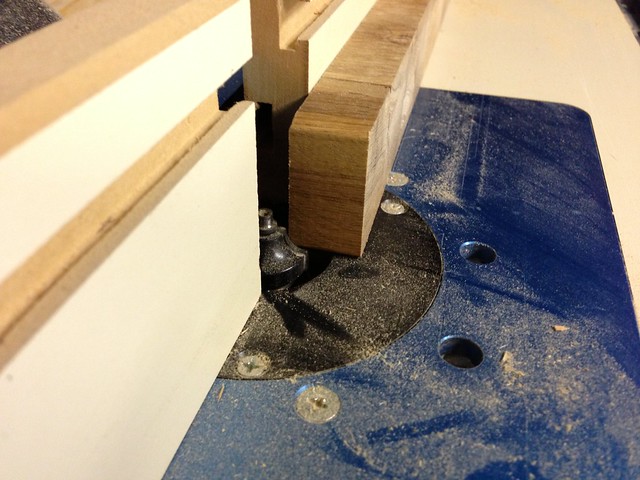
To enhance the look and make the boards look more finished, we turned our attention to the edges of the wood. We didn't want to do anything decorative or ornate as we had done to the butcher block in the kitchen. Instead, we wanted a standard and classic edge for these items, which is just a gentle rounded corner.
I first tried it out on a piece of scrap to be sure it was the profile I wanted.
Once I was happy with the look, I went ahead and routed the top and bottoms of all three pieces.
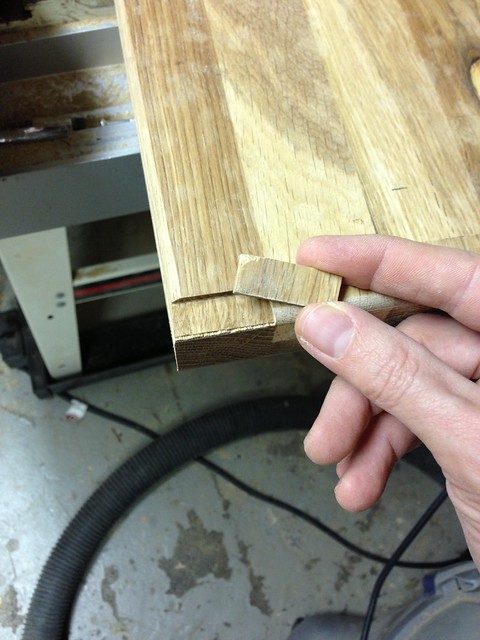
After removing the edges I had a small issue with one of the pieces. As I mentioned in our butcher block review, the IKEA butcher block is not made up of solid pieces of wood, but rather several pieces laminated. While cutting the edges one of the small pieces of material came loose.
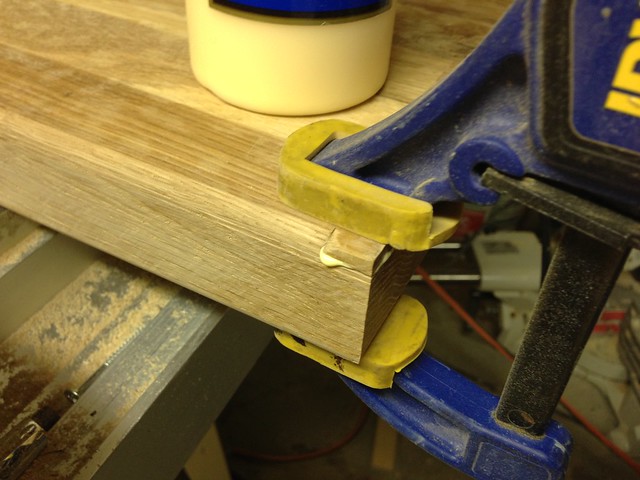
To correct this, I simply glued the back of the piece and clamped it to its original location. I just had to let the glue set up for about an our before trimming the piece again and completing the job.
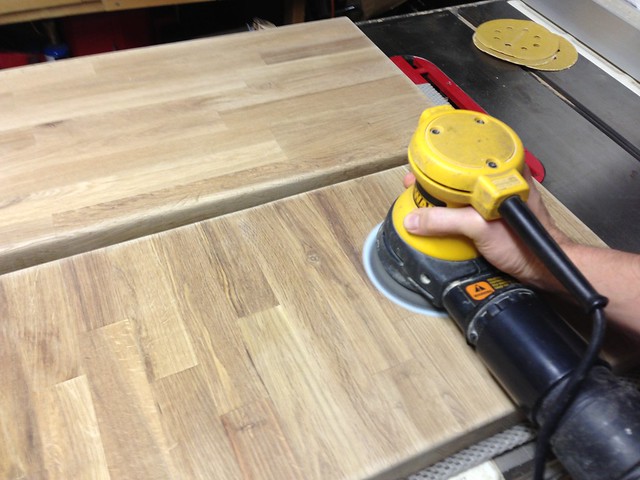
With all of the routing done, I grabbed my random orbital sander to begin the whole finishing process. Much like our counters, I began the sanding with an 80 grit paper. With this paper I thoroughly sanded every flat surface, edge, and corner.
The main thing about the sanding was to make the edges and corners look naturally worn and not machined. Using the orbital sander in a bit of a gentle manner, I worked my way around the edges of the whole thing. What started out as this...
...ended up looking like this.
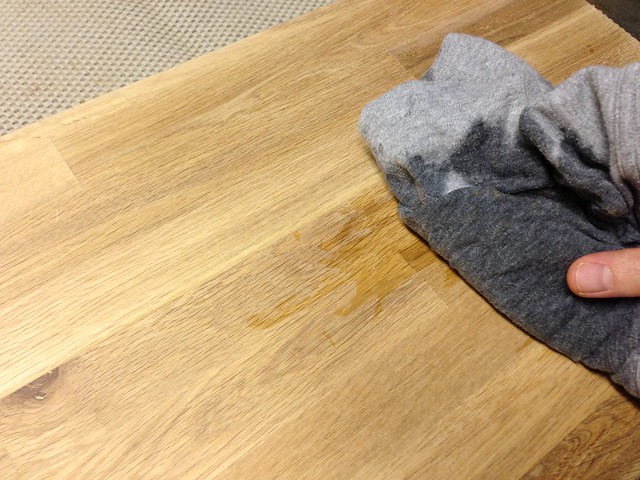
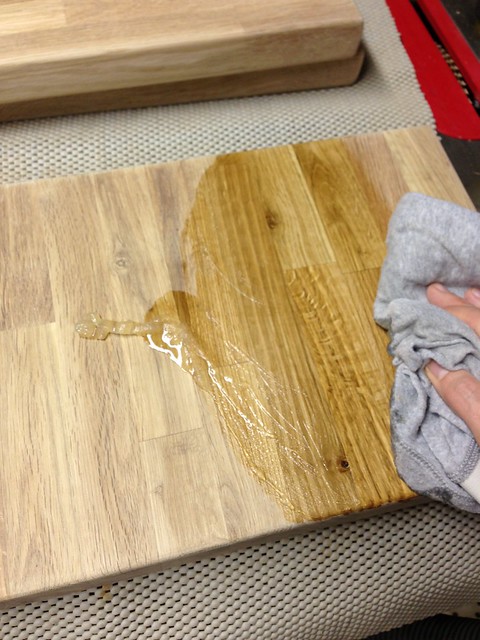
After sanding everything with the 80 grit paper, I dampened a rag and wiped down each of the pieces. This both clears the dust from the boards, and it also raises the grain of the wood.
It's amazing what the difference in color is after wiping it down with just water.
Once the slightly damp wood dries, it feels a bit fuzzy and is ready for the next sanding. The second sanding was done with a 120 grit paper. I made sure to really go over the whole thing with the 120 in a thorough manner. This step removed the last of any hard edges or lines. Once finished, I simply repeat the damp rag process, then sand a final time with a 220 grit paper.
What started as several remnant pieces of counter were effectively transformed into usable pieces of cutting board. To finish them off I decided to try a slight modification to our standard mineral oil approach. I figured I could try an alternate finishing method here, and if we liked it, we could use it on our counters as well.
I've heard good things about the Howard mineral oil and beeswax compound. It uses the mineral oil approach to nourish the butcher block, followed by the beeswax to fill gaps or voids on the surface and polish out to a smooth finish.
We'll have to do a more thorough write-up on this once we have more experience with it.
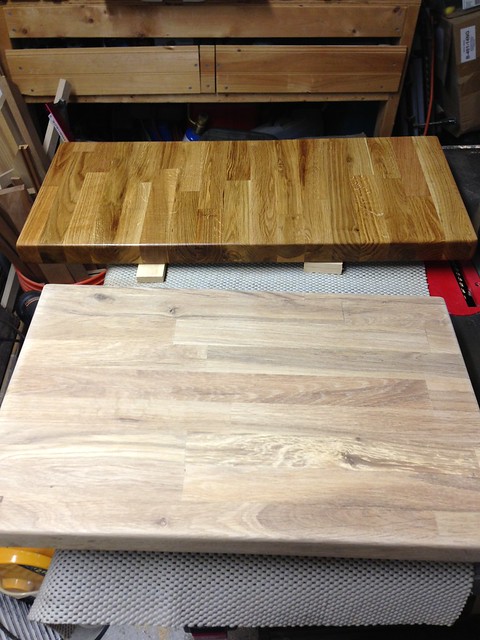
I began applying the mixture and could immediately see a difference in the added wax.
Look at the comparison from one coat of oil/wax applied to the back board, with nothing applied to the front board.
After spreading the mixture over all surfaces and sides if the cutting boards, I allowed it to sit overnight before using a rag to polish the excess away.
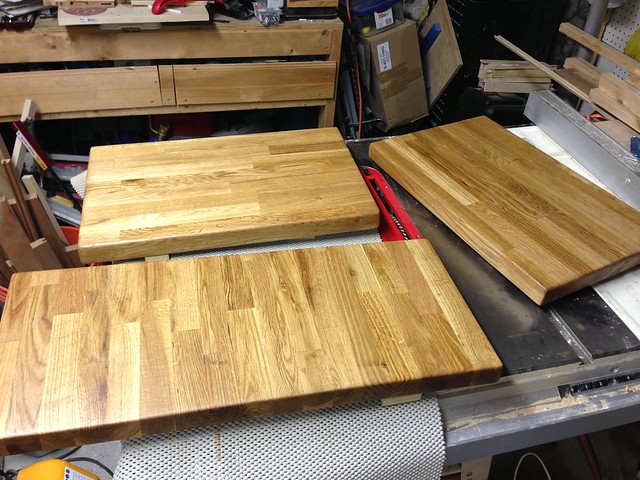
I applied three coats, since this is new unfinished butcher block, and was left with a smooth and shiny surface. This was absolutely perfect for what we were trying to achieve.
After an hour or two of effort and a few days of oiling, our excess wood--and what some might consider trash--had been transformed into a few perfectly sized cutting boards or cheese boards, just what you'd want for entertaining.
If you've ever installed butcher block anywhere and have excess laying around, this is a perfect use for it. And if you know someone installing butcher block, it might not hurt to ask them if they have any cut pieces they aren't planning on using. It might be the perfect way to turn someone else's trash into your treasure.
Do you have any great uses for items that most would typically just throw away? Or have you ever tossed an item in the garbage only to think at a later time "you know, that thing I trashed would have made a perfect..."? We'd love to hear.
]]>http://farm9.staticflickr.com/8359/8287172525_ec77a20196.jpgPostImagemedia:thumbnail6f476eab-96c9-48db-8215-2f20e3c9bc38https://www.oldtownhome.com/2012/3/12/Pinterest-Challenge-Breathing-New-Life-Into-Empty-Wine-Bottles/Pinterest Challenge: Breathing New Life Into Empty Wine BottlesIf you're a regular around here, a friend or family member of ours, or have a vague sense of who I am, you know that I love wine. Hmm, love might not be a strong enough word. Maybe LOVE is better. We've expressed this affinity towards wine (and the Napa Valley wine country) through a series of posts.
Well, we're back at it, but this time we're doing it in the name of the Pinterest Challenge.
If you're not familiar, the Pinterest Challenge is being hosted by Sherri & John at Young House Love, Katie at BowerPower, Erin at Hi Sugarplum, and Cassie at the Great Indoors. The goal is simple -- take something you've pinned that you find inspirational, do your own version, and put your own spin on it. Easy enough, right? Well, have you see how many cool and inspirational things there are on Pinterest? Just picking one thing to make might actually be the hardest thing about the challenge.
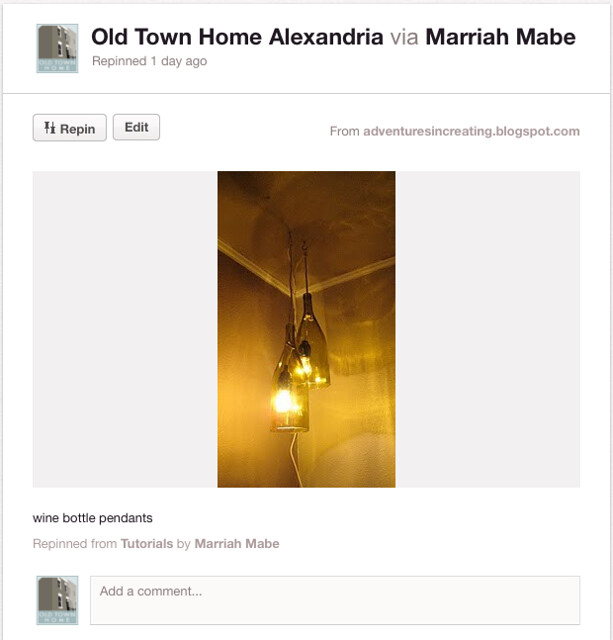
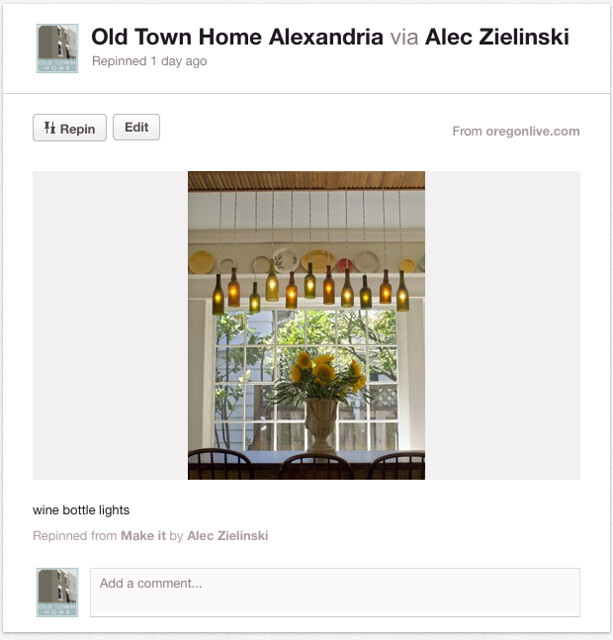
Over the past few months I've been pinning things with a wine bar/wine country feel to it on a pin board called "Cheers". (If you're not already following us on Pinterest, what are you waiting for? We have a ton of cool stuff we've shared.) It's my dream to have a functional and cool wine bar to entertain people and share a little wine with some friends. During my Pinterest perusing, one of the things that repeatedly caught my eye was the creative use of empty wine bottles.
In my opinion, wine bottles are quite elegant as far as containers go. Their shape, color, size, and look evoke memories of vacations, celebrations, fun times of the past, and good times to come. But after they're spent, I always feel a little bad throwing them in the recycling bin, especially the special bottles whose corks were popped for celebratory reasons.
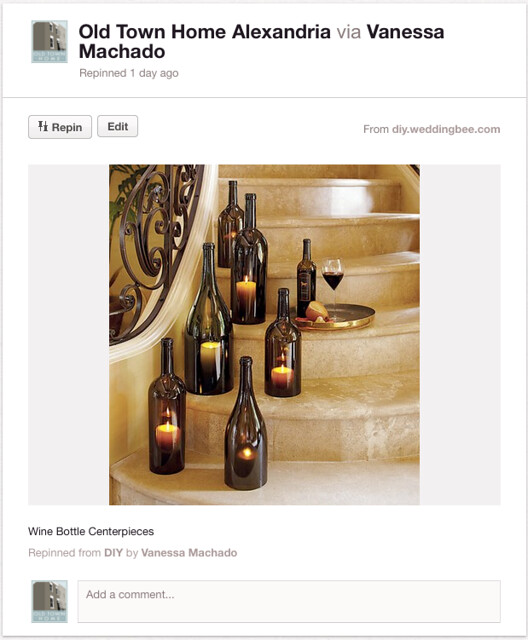
Though I absolutely loved the bottles I saw on Pinterest, and love love love the majority of the things in the Napa Style catalog (and I also love chef Michael Chiarello, but that's a different story), there were two major issues. The following pinned photo is originally from the catalog pages of Napa Style.
more]]>2012-03-12T11:41:00.000-04:002012-03-12T11:41:00.000-04:00WendyIf you're a regular around here, a friend or family member of ours, or have a vague sense of who I am, you know that I love wine. Hmm, love might not be a strong enough word. Maybe LOVE is better. We've expressed this affinity towards wine (and the Napa Valley wine country) through a series of posts.
Well, we're back at it, but this time we're doing it in the name of the Pinterest Challenge.
If you're not familiar, the Pinterest Challenge is being hosted by Sherri & John at Young House Love, Katie at BowerPower, Erin at Hi Sugarplum, and Cassie at the Great Indoors. The goal is simple -- take something you've pinned that you find inspirational, do your own version, and put your own spin on it. Easy enough, right? Well, have you see how many cool and inspirational things there are on Pinterest? Just picking one thing to make might actually be the hardest thing about the challenge.
Over the past few months I've been pinning things with a wine bar/wine country feel to it on a pin board called "Cheers". (If you're not already following us on Pinterest, what are you waiting for? We have a ton of cool stuff we've shared.) It's my dream to have a functional and cool wine bar to entertain people and share a little wine with some friends. During my Pinterest perusing, one of the things that repeatedly caught my eye was the creative use of empty wine bottles.
In my opinion, wine bottles are quite elegant as far as containers go. Their shape, color, size, and look evoke memories of vacations, celebrations, fun times of the past, and good times to come. But after they're spent, I always feel a little bad throwing them in the recycling bin, especially the special bottles whose corks were popped for celebratory reasons.
Though I absolutely loved the bottles I saw on Pinterest, and love love love the majority of the things in the Napa Style catalog (and I also love chef Michael Chiarello, but that's a different story), there were two major issues. The following pinned photo is originally from the catalog pages of Napa Style.
The first, size. The bottles Napa Style is selling start at the three liter sizes and go all the way up to six liters. Six! Our house is tiny, I can't imagine where a giant bottle like that would even fit without looking ridiculous.
The second issue is price. Starting at $99 and topping out at $249, these bottles, though very pretty, are well outside of my price range for used bottles. Call me crazy, but my preference on price is "free" or perhaps $0.05 cents in Michigan.
Rather than order large and expensive bottles, we set out to turn a few of our own smaller wine bottles into creative candle holders that could adorn our future wine bar or our outside entertaining area.
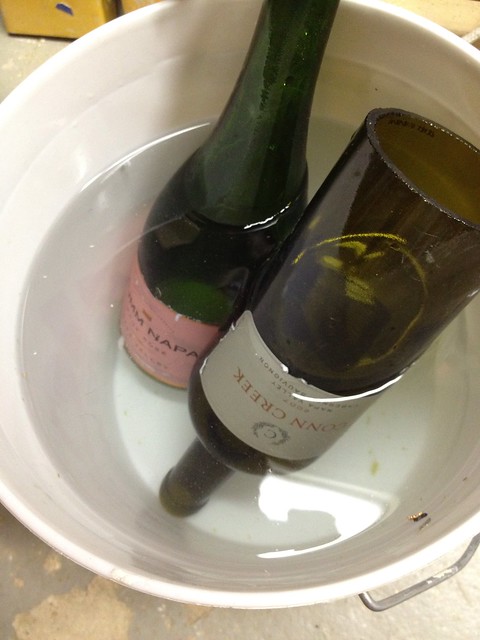
We started our project with two bottles, one standard 750ml wine bottle and one 750ml sparkling wine (champagne style) bottle. The goal was simple -- cut the bottom of the bottle off without shattering it into pieces and maiming ourselves. Though the bottles were full, we took it upon ourselves to drink them...in the name and spirit of the Pinterest Challenge.
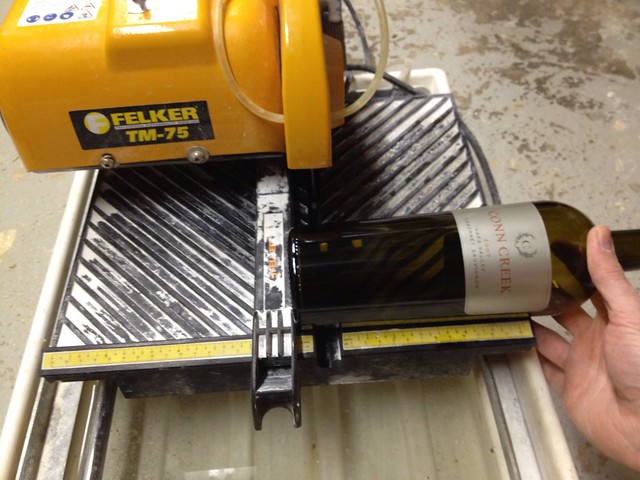
We had seen methods to cut bottles that included everything from scoring the bottles with a glass cutter to heating them with a blow torch and dipping them into a cold bucket of water, but all seemed less than exact and a little dangerous. For our project we decided to give the good ole wet saw a try. We did quite a bit of looking online but couldn't find definitive proof that a wet saw would do the job we wanted it to, so we figured we should figure it for ourselves.
The fist step was to set the fence on the wet saw to give us a good guide to rest the bottom of the bottle on. Our approach was to begin cutting the bottle and then slowly rotate it into the blade. The blade would take a little bit at a time from the bottle until it just dropped off...or at least that was the plan.
I love it when a plan comes together. It was a success, and at long last, here's the actual video evidence that it is possible to use a standard wet tile saw to cut a glass wine bottle.
I hope it goes without saying, but be sure to wear your eye protection when working with tools like this.
As you can see, you just need to take it slowly, rotate the bottle as evenly as possible, and you can easily remove the bottom from a wine bottle. Once the bottom is cut free, there's going to be a good amount of glass residue still inside the bottle. Using a bucket of water, simply rinse out the inside of the bottle so you don't end up getting any glass pieces on your hands.
Because of the shape of the bottle there was a small bit of a glass bump left on the cut line. We used a tile file to shave it down a bit and were left with a nice and smooth cut line that wasn't sharp or dangerous.
Next we let the bottles soak in the bucket of water in order to loosen the labels.
After a quick wash and thorough dry, we were in business.
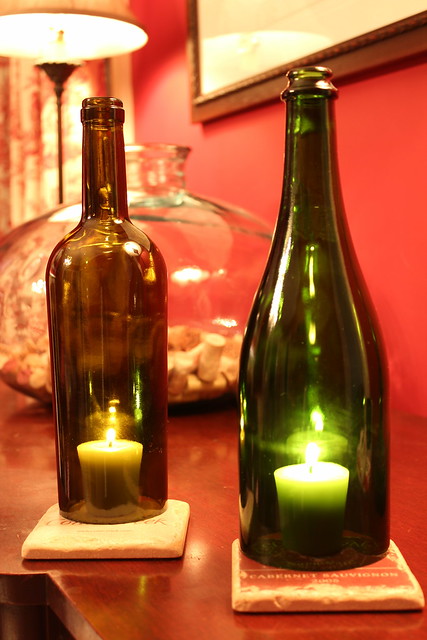
With our bottles ready, we set them on our dining room buffet with small candles.
We breathed a sigh of relief, figuring that the hard part was over and now all we had to do is set the bottles over the candles.
Wait a second, not so fast.
After lighting the candles and putting the bottles over them we hit our first small speed bump with the project. To this point we've only seen this type of thing with much larger format bottles, like the 3+ liter bottles. It seems the necks on the large format bottles are large enough to let the heat of the flames out while allowing fresh air in for the flame (remember, fire needs oxygen). However, these 750ml bottles have a bit more difficult time letting the candle breathe, causing the flame to go out after about 30 seconds.
We solved this by allowing the back of the bottle to sit just off of a coaster it was sitting on, allowing air to circulate. Once this was done the candles stayed lit without issue. I also think this will work well on our slatted outdoor table, or in a garden where the ground the bottle is sitting on is uneven.
You don't need much of an air gap at all to make it work. Making a quick and easy base with two pieces of 1/4" thick wood will also solve the problem. It would elevate the bottle enough and allow air in between the two pieces of material.
These bottles will also make excellent candle holders outdoors on breezy nights, the flame fully protected from the weather to ensure it won't go out.
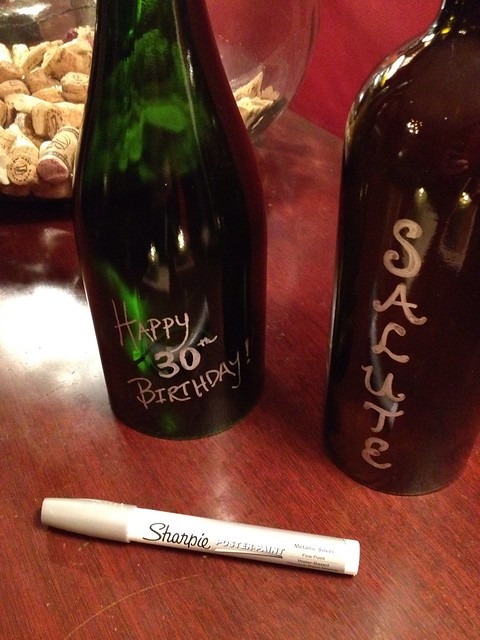
One final step we took to put our little twist on the project was to personalize the bottles using a Posterpaint Sharpie. Depending on the occasion, you could write a message on the bottles.
These can be anything from wine inspired greetings to a note about a celebration associated with the given bottle. You can use them to denote what is being served from a table, as seating cards, or just as a way to spice up a gathering. And best of all, you can wipe the messages off and alter them to your heart's content.
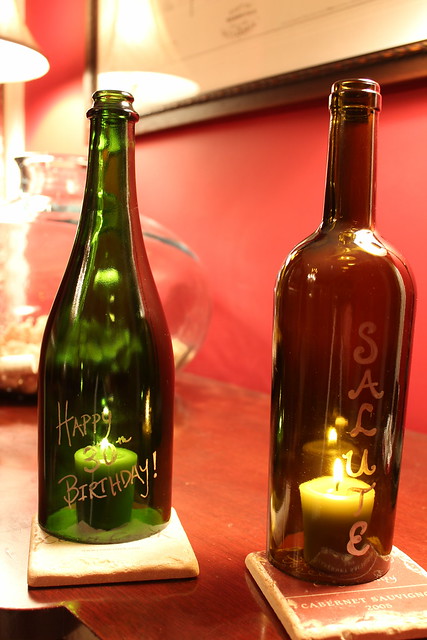
So there you have it, our Pinterest and Napa Style inspired "wine bottle candle holders." Overall, a project that was not too difficult, quite inexpensive (I'll actually go ahead and say "Free" since we already had all items on hand), and one that will work well for a variety of events and settings. I just can't wait until the weather starts to get nice and we can have people over for a wine evening in our garden. Maybe we'll make a large collection of these candle holders in various sizes and colors and decorate our back yard and patio with them. I'm not sure what I like better, the end result or the journey to consume the necessary amount of wine to make the project a reality.
And in case you're wondering, the wet saw does a pretty good job of cutting, but it doesn't leave a nice and finished edge (at least not with our blade). So you really couldn't use it to create wine bottle drinking glasses without a bit of grinding and polishing.
So what do you think of our wine bottle candle holders? Not too shabby of a little project. And best of all, we're reusing something that would otherwise be a recyclable!
Are you currently inspired by anything on Pinterest that you absolutely need to try for yourself? Maybe you're even taking part in this very same Pinterest Challenge? Share some of your ideas and likes with us, we'd love to see what you're working on.