Whether we’re talking about the ability to actually see what you’re working on, safely use power tools, or spot imperfections before it’s too late, good lighting is more than critical, it’s essential.
Over the last several weeks I’ve been testing out some of Milwaukee’s newest offerings in their personal lighting line. This series of battery powered headlamps, flashlights and an extremely versatile personal floodlight were a highlight of their new tool unveiling event earlier this year. And ever since I laid eyes on them I was eager to give them a try as I suspected they’d all be real winners.

Now that I’ve had some serious hands-on time with these new products, I can confirm that many of these lighting options should be a “must add” to quite a few people’s holiday shopping lists this year. So if you’re looking for that perfect gift to round out your tool obsessed family member’s stocking, the TL;DR of this post is simple. Everything we've been using have been pretty fantastic, I really like all of them, and I think they are completely worth buying!
more]]>
Whether we’re talking about the ability to actually see what you’re working on, safely use power tools, or spot imperfections before it’s too late, good lighting is more than critical, it’s essential.
Over the last several weeks I’ve been testing out some of Milwaukee’s newest offerings in their personal lighting line. This series of battery powered headlamps, flashlights and an extremely versatile personal floodlight were a highlight of their new tool unveiling event earlier this year. And ever since I laid eyes on them I was eager to give them a try as I suspected they’d all be real winners.
Now that I’ve had some serious hands-on time with these new products, I can confirm that many of these lighting options should be a “must add” to quite a few people’s holiday shopping lists this year. So if you’re looking for that perfect gift to round out your tool obsessed family member’s stocking, the TL;DR of this post is simple. Everything we've been using have been pretty fantastic, I really like all of them, and I think they are completely worth buying!

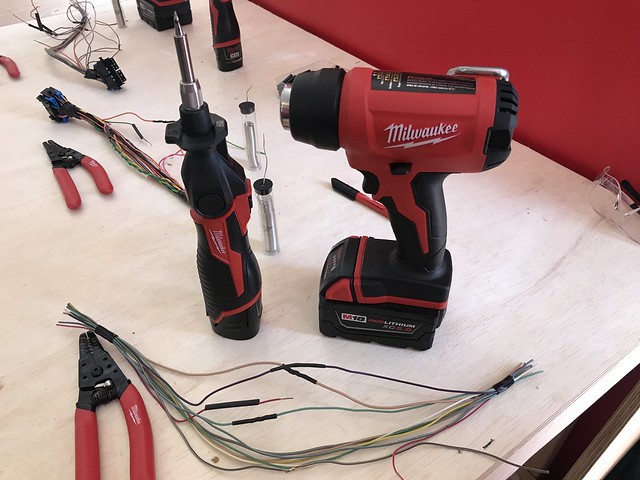
There are two primary options of personal lighting, an alkaline battery headlamp and pen light, and a series of USB rechargeable lithium-ion lights based on the Milwaukee REDLITHIUM platform. I’ve liked using all of these lights, but I’m going to focus on the rechargeable line for this review.
Headlamp
My past relationship with other headlamps has been somewhat contentious. The headlamps I’ve used in the past seem to die at the worst possible time and without warning. If they provide enough light it seems like they’re way too big and heavy (which means uncomfortable), or their battery life is insufficient. And even worse, it seems like the lightweight and compact headlamps are never really quite bright enough, like a frustrating dream where you just can’t quite get the light you need. (You’ve had these dreams, right?)
Well this Milwaukee headlamp has addressed all of my major disappointments in prior headlamps, and made some significant improvements where I didn’t even know they were needed.
Let's get one thing out of the way, this is technically a hardhat headlamp but it's really far more versatile than that. It’s meant to be clipped to hard hats on job sites (via the elastic band and a few provided plastic clips), but that doesn’t really apply to us DIYers. The only drawback about this is that the backing on the headlamp is a harder rubber and not a nice and comfortably padded foam to rest against your forehead. The rubber works fine against your forehead, but I also overcame this by wearing a backwards baseball hat when I was using the headlamp. Problem solved.
So far my favorite uses for this light has been when using it to provide ample light while cleaning out our shed in otherwise pitch black darkness after the sun had set...

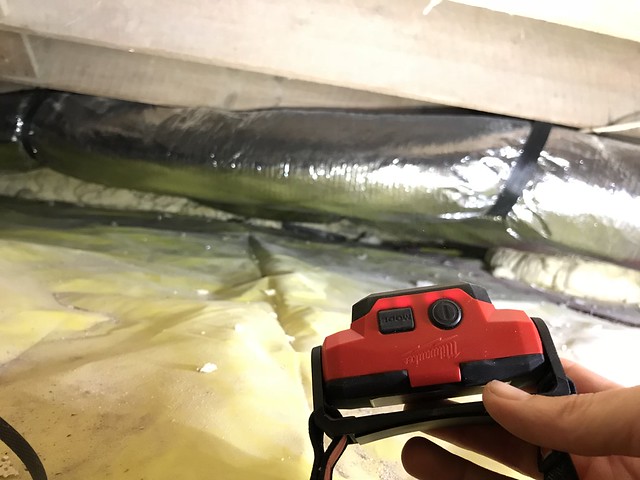
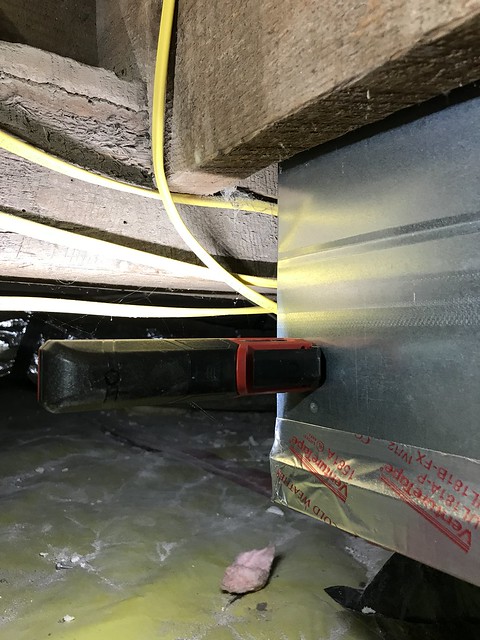
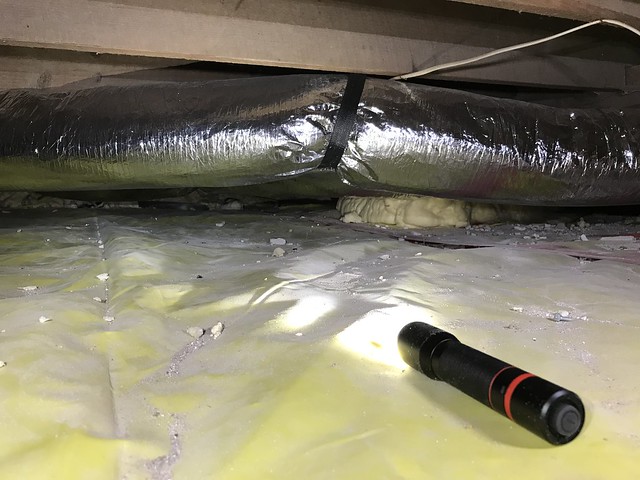
...lighting up a completely darkened crawl space while doing some electrical work...
...providing a bright light on trim painting without any shadows from my own body/head in front of a worksite light, making it much easier to cut in with accuracy...

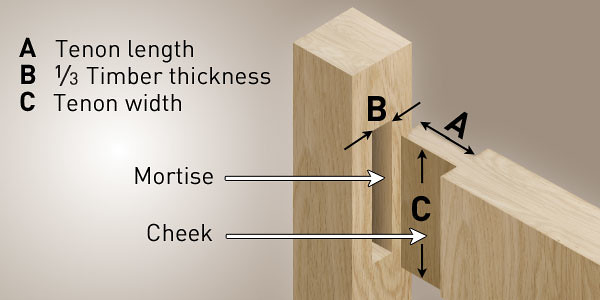
...attaching it to my jigsaw to provide better light to cut by (kind of a hack but extremely useful), and really highlighting the details of our window sash that still needed to have paint removed or damaged mortise and tenon pegs that needed to be dug out.

I even used it as my headlight for biking home in the dark, but had to turn down the brightness a bit so I didn't blind other riders or cars on the road.

It seems like every time I turn around I’m popping this thing on my forehead to get a better look at my work.

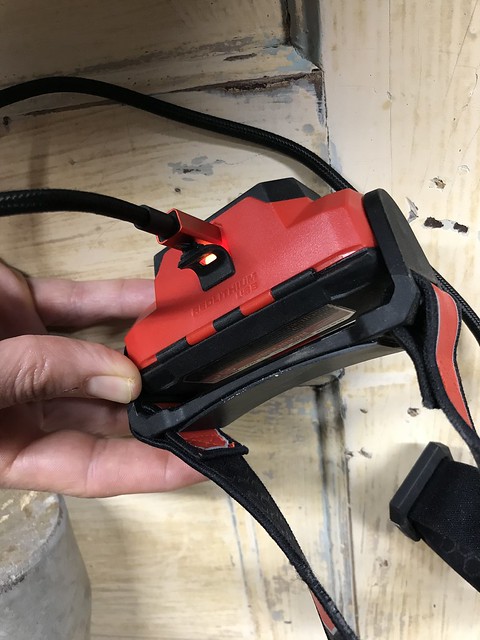
During use, the headlamp (and actually all of the REDLITHIUM personal lighting options) will flash several times when the battery charge/time remaining goes below 50%. Beyond convenience and or warning, I assume this is so you know when you should turn around if you’re hiking in the woods with this light on. If it’s at or below 50% right when you turn it on, it will flash immediately to alert you to the low charge. And when it finally reaches the end of its charge, it does not slowly dim away, instead it gives a final few flashes and shuts off immediately.

The charger port is covered with a rubber cover to keep any dirt out, and the power button and mode button are rubber and located on the opposite side of the headlamp. When charging, the small battery LED shows red, orange, flashing green, and then solid green to indicate the level of charge the battery has achieved. This is a great way to know just how far from a full charge you may be when you need to grab it off the cord and go. When charging you're looking at a full charge in about two hours and a 50% charge in under 30 minutes.
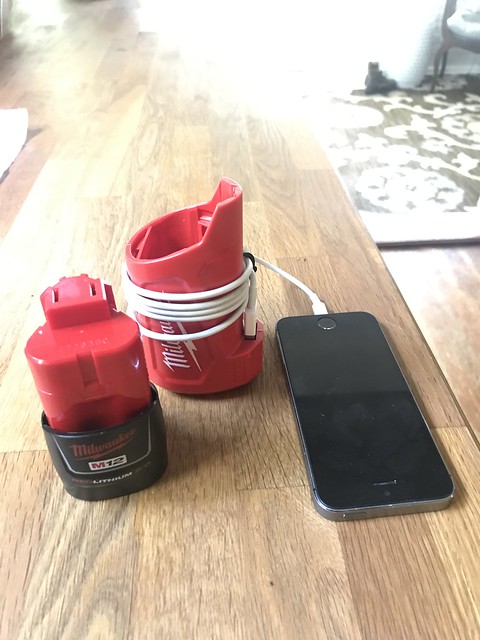
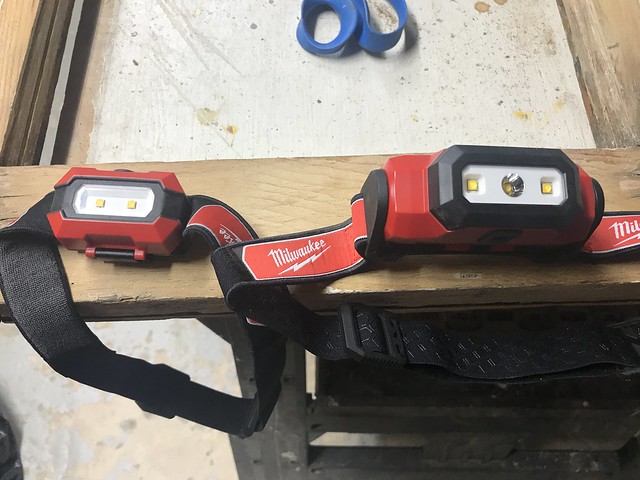
Compared to the smaller 3x AAA battery powered headlamp to its left, you can see that the larger headlamp is certainly heavier, but also offers over 50% more lumens (475 on the brightest settings compared to 300 for the smaller headlamp). There are five different brightness settings, and the brightness you choose will allow the headlamp to run anywhere from two hours to an astounding 31 hours on a full charge, just depends on how bright you need the light to be.
This is really a fantastic headlamp and I haven't been able to find anything that would dissuade me from recommending it. The only thing I can say is that if you're using this near your spouse, resist the urge to look at them if they are talking to you, as it will surely give them a headache if they keep having to stare into this extremely bright light. Trust me. I speak from experience.
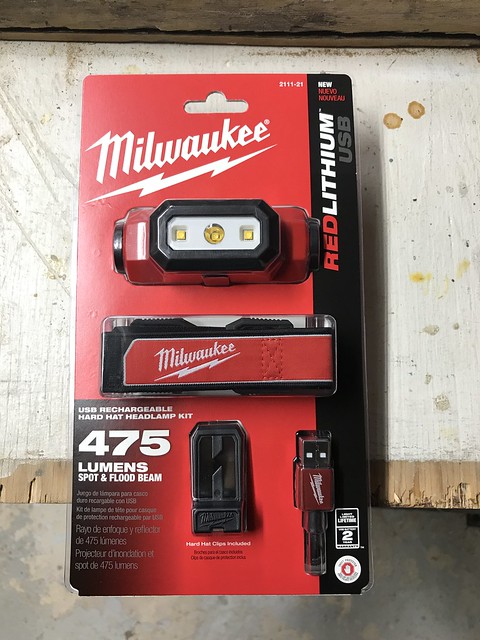
Check out Milwaukee's site for more information complete specs on their USB Rechargeable Hard Hat Headlamp. Currently on sale in many stores for $59.00.
Rover Floodlight
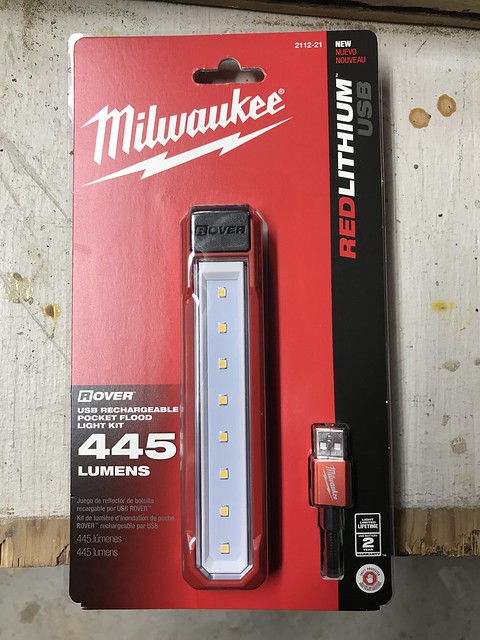
The second of these mighty little lights may surprise you. It’s called the Rover personal flood light and consists of eight LEDs in a compact and easily carried plastic case.
This little light has been the buzz of many HVAC, electrical, and plumbing pros since its release due to its ability to light tight spaces in creative ways. What that means for the hobbyist is exactly the same. This light is perfect for lighting under the sink, in dark corners of the basement, or in those hard to reach areas in the attic.
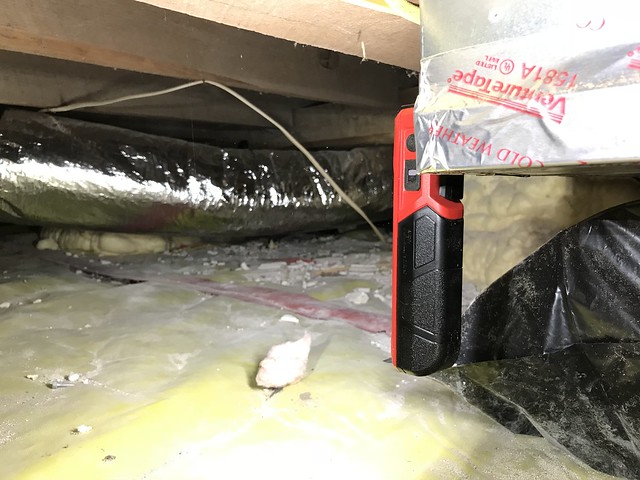
One of the coolest features of this light is the relatively strong magnet built into the end and side of the plastic case. This allows you to easily place it on duct work, your electrical panel, or anything else made of metal, and know that it will stay put.
Like the headlamp, the charging port is covered by a little rubber gasket when not in use. It seems sturdy and not likely to tear off after use.
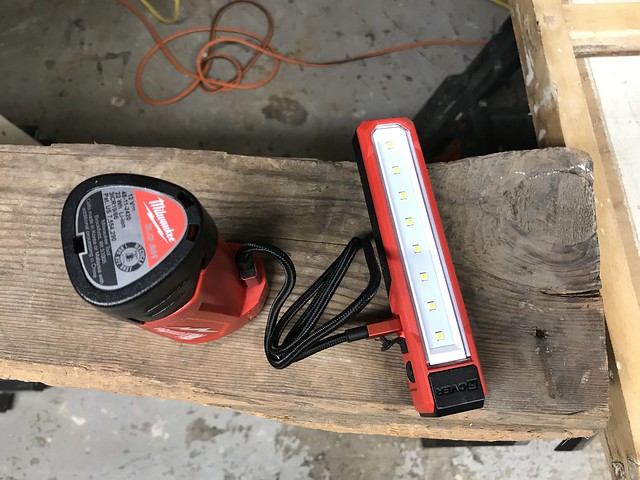
The light this little floodlight puts out is clean and crisp, but also relatively warm for an LED. This is thanks to something Milwaukee calls "TRUEVIEW." It aims to provide crisp and natural light so you're getting a true and accurate look at the area you're lighting.
Check out Milwaukee's site for more information complete specs on their USB Rechargeable Rover Pocket Flood Light. Currently on sale in many stores for $59.00.
Flashlight
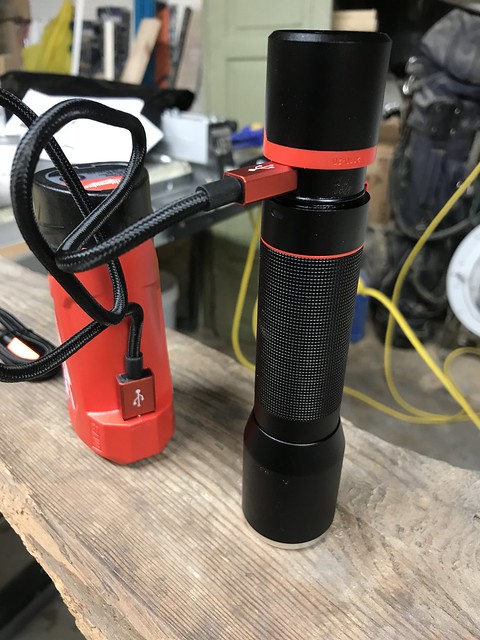
Finally, the USB rechargeable flashlight rounds out the current line. This compact but extremely solid aluminum LED flashlight is what you’d expect based on what I’ve said about the headlamp and the Rover. It’s the brightest of the USB rechargeable options at up to 700 lumens, charges quickly, warns at half charge and low charge, and allows you to recharge via a standard USB power cable.
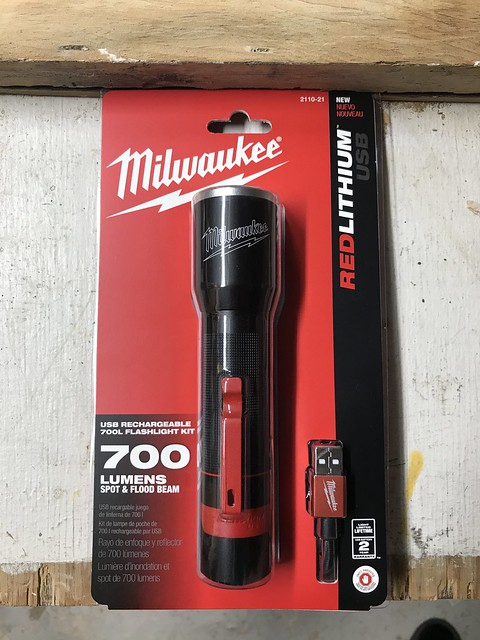
Beyond the similarities it shares with its siblings, this flashlight is rugged, waterproof, dust proof, drop resistant, and has a convenient twist and lock to access the USB charging port when you need it, but to keep dirt and debris out of the port when not in use.
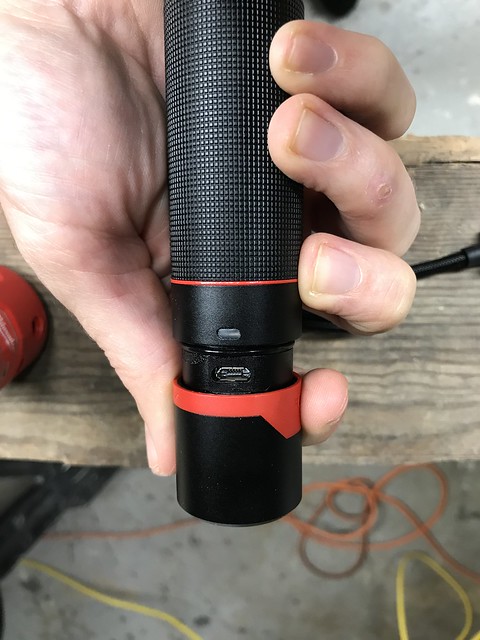
If you’re anything like me, this flashlight will end up rolling around in your toolbox until you need it and keeping the charging port free of crud is a must.
When in use this flashlight has three different power settings: a high, low, and flash/alert, and does an amazing job lighting even distant areas. The rubber power button on the back is solid and easy to use with a very positive feel. You won't accidentally end up turning the light on or off.
This flashlight has replaced the prior flashlight in my toolbox because it's compact, brighter, tougher, and USB rechargeable. One very minor issue I noticed is that the power button on the back end means you can't sit the flashlight on its end on the ground or a flat surface. However, if you twist the back as if you're going to charge it, the end slides over the power button and you can sit it on its end without issue.

Check out Milwaukee's site for more information complete specs on their USB Rechargeable 700L Flashlight. Currently on sale in many stores for about $69.00.
Accessories
While these lights come with a Milwaukee branded anodized USB cable for charging, I’m finding that I’d prefer the ability to quickly swap batteries when they get low, rather than needing to plug in the light for a recharge.

Although we didn’t receive any extra batteries or a charger to test, it seems like a no-brainer to pick one up if you’re going to be using any of these lights regularly. That way you can keep your spare battery charged and when you’re running low, just quickly swap them out. I've seen the battery charger kit with an extra battery in several stores for about $40.
Overall these lights as accessories address many of the shortcomings of prior personal lighting solutions I've used. No more dealing with dead batteries and hunting for replacements, no more low and fading light, and no more breakage after a minor drop. Now that we've been using these lights for a good while, we can absolutely say we're fans.
Like I said earlier, these lighting solutions would make a pretty killer addition to your holiday shopping lists. What better way to make someone's Christmas morning than by putting a 475 lumen headlamp, 445 lumen Rover, or 700 lumen flashlight under the tree? And maybe they could double as a way to add a little extra up light to the Christmas tree if you're feeling creative. And remember, a better method for lighting can only help the overall success of a project, so we think it's a winning combo all around.
Did you enjoy reading this post? Want to learn more about our first-hand experiences with other tools, devices or items used throughout our renovation? If so, check out our complete list of product reviews in our Toolbox Tuesday section.
Note: We were provided samples of the tools to try but we weren't compensated for this review. We simply want to share good products when we see them, and hope that learning from our experiences and/or mistakes can help save you time, money and frustration.
]]>