<?xml version="1.0" encoding="utf-8"?>
<feed xmlns="http://www.w3.org/2005/Atom" xmlns:media="http://search.yahoo.com/mrss/">
  <title>Old Town Home Category: 'Kitchen'</title>
  <updated>2014-07-25T10:53:35.400-04:00</updated>
  <id>http://www.oldtownhome.com/kitchen/index.atom</id>
  <link rel="alternate" href="http://www.oldtownhome.com/kitchen/index.atom" />
  <author>
    <name>Alex and Wendy</name>
    <uri>http://www.oldtownhome.com/</uri>
    <email>wendy@oldtownhome.com</email>
  </author>
  <entry>
    <guid>7b5900b6-ca0c-4370-8c61-105046f51e73</guid>
    <id>https://www.oldtownhome.com/2014/7/25/IKEA-Butcher-Block-Counters-2-Years-Later---What-Do-We-Think/</id>
    <title>IKEA Butcher Block Counters 2 Years Later - What Do We Think?</title>
    <summary type="html"><![CDATA[<p>We get quite a few questions here on Old Town Home, but one of our blog's most frequently asked questions is:</p><p><em>"So, now that you've had your IKEA butcher block counters for a while now, what do you think?"</em></p><p><em>
</em></p><div class="MediaContainer PhotoContainer"><em><a href="https://farm9.staticflickr.com/8332/8095416726_75c6169e40_z.jpg" rel="PhotoPopup" popupheight="427" popupwidth="640"><img alt="" src="https://farm9.staticflickr.com/8332/8095416726_75c6169e40.jpg" width="500" height="333" style="border-width: 0px; border-style: solid;"></a></em></div><p>Whether its being asked by someone considering IKEA butcher block (or a butcher block counter of any type) that would like our take on the surface, or by someone who already has it installed and wants to see if our opinions align with their thoughts, we receive quite a few emails and comments regarding our install and how it's been holding up.</p><p>
</p><div class="MediaContainer PhotoContainer"><a href="https://farm4.staticflickr.com/3837/14740332754_cdb579ccbd_z.jpg" rel="PhotoPopup" popupheight="427" popupwidth="640"><img alt="" src="https://farm4.staticflickr.com/3837/14740332754_cdb579ccbd.jpg" width="500" height="333" style="border-width: 0px; border-style: solid;"></a></div><p>Besides, how often do you see information about how wonderful a new product or finish is but never hear an update on how it's holding up to the daily wear and tear as an item that's actually used in a home?</p> <a href="https://www.oldtownhome.com/2014/7/25/IKEA-Butcher-Block-Counters-2-Years-Later---What-Do-We-Think/">more</a>]]></summary>
    <published>2014-07-25T10:53:35.400-04:00</published>
    <updated>2014-07-25T10:53:35.400-04:00</updated>
    <link rel="alternate" href="https://www.oldtownhome.com/2014/7/25/IKEA-Butcher-Block-Counters-2-Years-Later---What-Do-We-Think/" />
    <author>
      <name>Alex</name>
    </author>
    <content type="html"><![CDATA[<p>We get quite a few questions here on Old Town Home, but one of our blog's most frequently asked questions is:</p>
<p><em>"So, now that you've had your IKEA butcher block counters for a while now, what do you think?"</em></p>
<p><em>
</em></p>
<div class="MediaContainer PhotoContainer"><em><a href="https://farm9.staticflickr.com/8332/8095416726_75c6169e40_z.jpg" rel="PhotoPopup" popupheight="427" popupwidth="640"><img alt="" src="https://farm9.staticflickr.com/8332/8095416726_75c6169e40.jpg" width="500" height="333" style="border-width: 0px; border-style: solid;" /></a></em></div>
<p>Whether its being asked by someone considering IKEA butcher block (or a butcher block counter of any type) that would like our take on the surface, or by someone who already has it installed and wants to see if our opinions align with their thoughts, we receive quite a few emails and comments regarding our install and how it's been holding up.</p>
<p>
</p>
<div class="MediaContainer PhotoContainer"><a href="https://farm4.staticflickr.com/3837/14740332754_cdb579ccbd_z.jpg" rel="PhotoPopup" popupheight="427" popupwidth="640"><img alt="" src="https://farm4.staticflickr.com/3837/14740332754_cdb579ccbd.jpg" width="500" height="333" style="border-width: 0px; border-style: solid;" /></a></div>
<p>Besides, how often do you see information about how wonderful a new product or finish is but never hear an update on how it's holding up to the daily wear and tear as an item that's actually used in a home?</p>
<p>Really, like many things home related, and especially things related to our home, there's a short answer and a long answer to this question. </p>
<h3>The Short Answer</h3>
<p>Overall, our response is very positive. Wendy loves them, and I love that she loves them. Happy wife, happy life. Am I right?! I'd definitely do it again, but there are a few things we would have liked to have known then that we know now. </p>
<h3>The Long Answer</h3>
<p>Let's start at the beginning, going back to what our kitchen looked like in 2003 when we purchased our home:</p>
<p>
</p>
<div class="MediaContainer PhotoContainer"><a href="https://farm6.staticflickr.com/5182/5643395548_cfeceac779_z.jpg" rel="PhotoPopup" popupheight="480" popupwidth="640"><img alt="" src="https://farm6.staticflickr.com/5182/5643395548_cfeceac779.jpg" width="500" height="375" style="border-width: 0px; border-style: solid;" /></a></div>
<p>
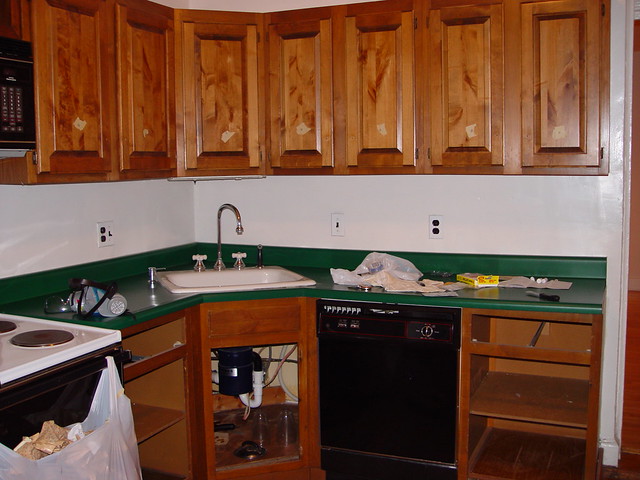
Shortly after we moved into our house, with little money available to begin our whole house overhaul, we decided to<a href="http://www.oldtownhome.com/2011/11/3/Quick-Kitchen-Counter-Update---With-Textured-Spray-Paint/"> spray paint the very 1980s green laminate counters</a> with a "stone look" treatment. </p>
<p>
</p>
<div class="MediaContainer PhotoContainer"><a href="https://farm6.staticflickr.com/5050/5642855653_a20cd370ca_z.jpg" rel="PhotoPopup" popupheight="480" popupwidth="640"><img alt="" src="https://farm6.staticflickr.com/5050/5642855653_a20cd370ca.jpg" width="500" height="375" style="border-width: 0px; border-style: solid;" /></a></div>
<p>
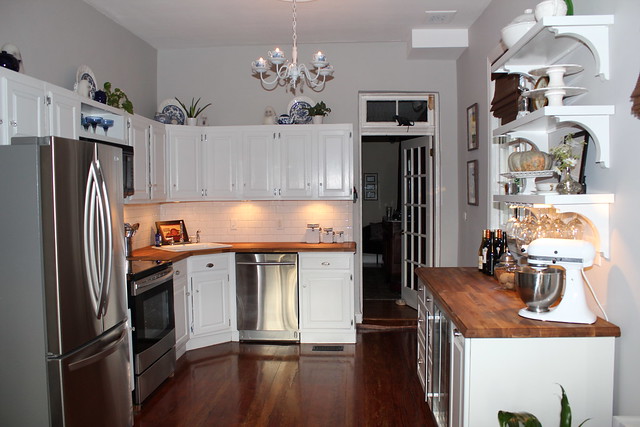
Coupled with painting the cabinets white and a little bit of under cabinet lighting, our kitchen was transformed into something respectable for very little cash. </p>
<p>
</p>
<div class="MediaContainer PhotoContainer"><a href="https://farm6.staticflickr.com/5022/5643158625_75f035fa7f_z.jpg" rel="PhotoPopup" popupheight="480" popupwidth="640"><img alt="" src="https://farm6.staticflickr.com/5022/5643158625_75f035fa7f.jpg" width="500" height="375" style="border-width: 0px; border-style: solid;" /></a></div>
<p>
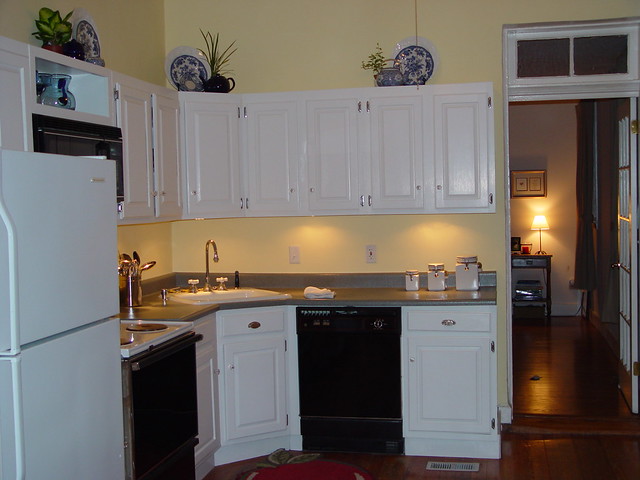
That stone textured spray paint covered by many layers of polyurethane held up well over the following nine years with only the occasional chip or ding. Best of all, it helped us bridge the gap between wanting to replace our counters, and having both the money, time, and DIY expertise to actually execute that project.</p>
<p>
</p>
<div class="MediaContainer PhotoContainer"><a href="https://farm9.staticflickr.com/8441/7863479844_a63d470a44_z.jpg" rel="PhotoPopup" popupheight="480" popupwidth="640"><img alt="" src="https://farm9.staticflickr.com/8441/7863479844_a63d470a44.jpg" width="500" height="375" style="border-width: 0px; border-style: solid;" /></a></div>
<p>After our long wait, just shy of two years ago, Wendy and I decided to replace our long suffering spray painted kitchen countertops with something just a little bit nicer. But since our kitchen updates would not be the end all, be all kitchen renovation we hope for in our home (yep, we'll eventually do a major update, but given our schedule perhaps sometime in 2025), we didn't want to totally blow the bank on counters &amp; appliances.</p>
<p>
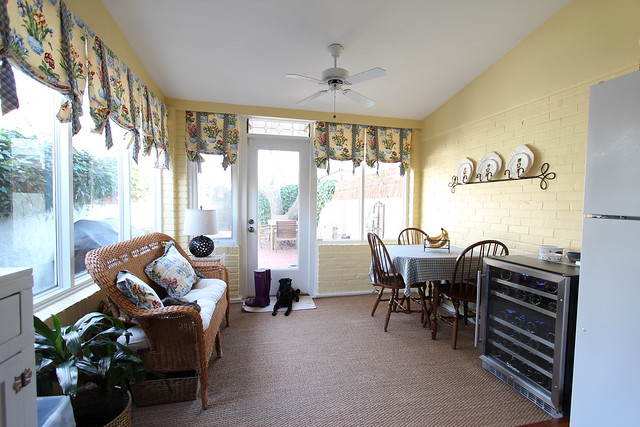
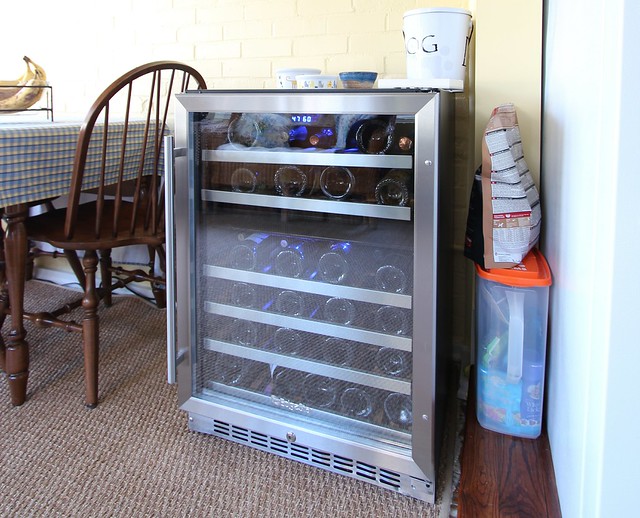
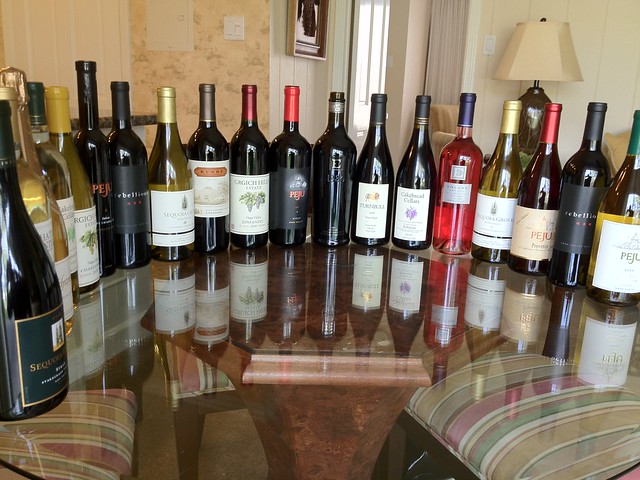
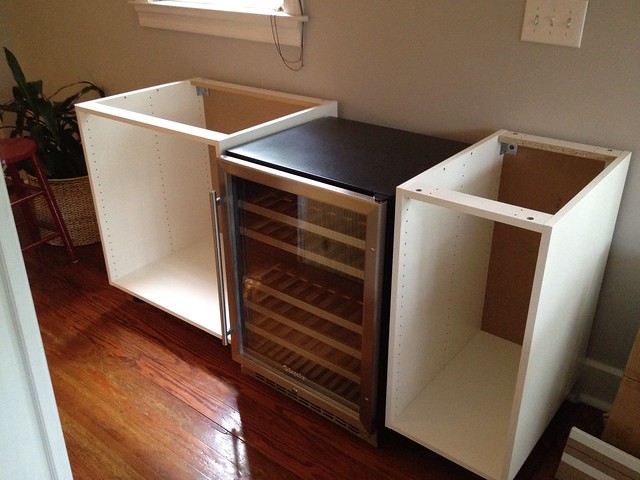
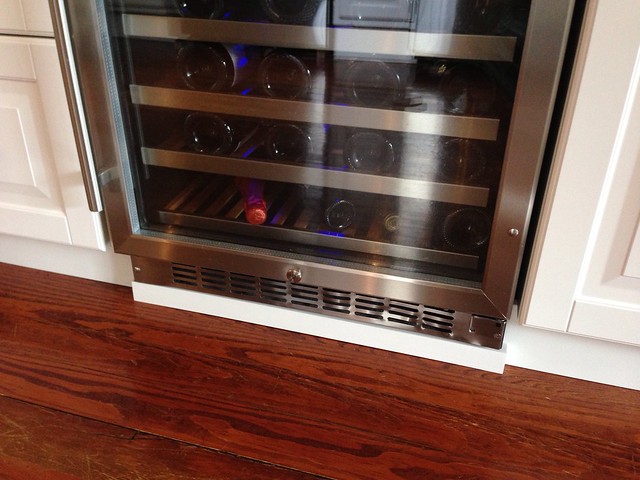
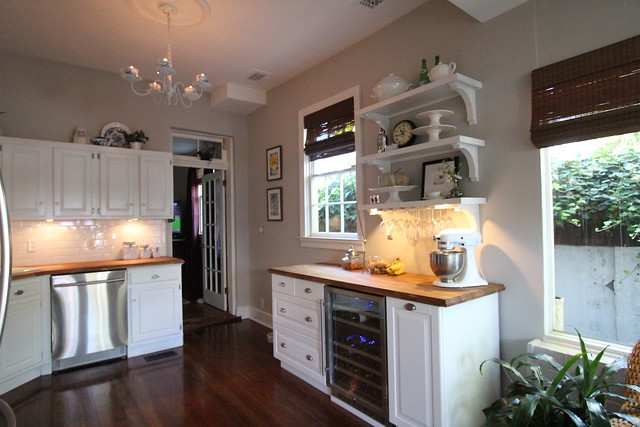
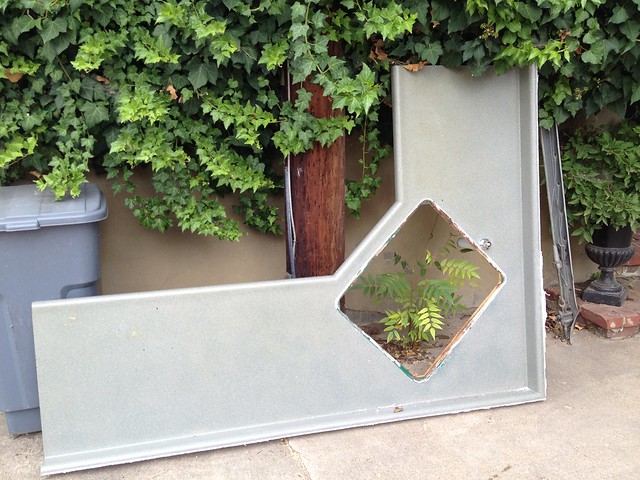
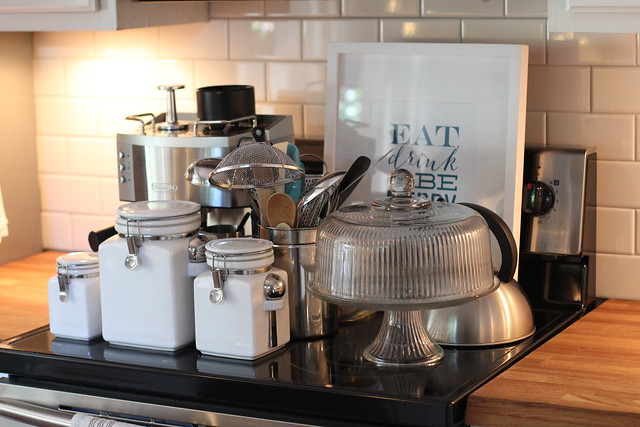
So we decided to install IKEA butcher block Numerar counters along with an IKEA cabinet set to become our "wine bar" with custom open shelving, a tile backsplash, and new stainless appliances thanks to a Labor Day sale and Wendy's runaway project that was supposed to just be <a href="http://oldtownhome.com/2012/5/14/Sun-Porch-Makeover-Gone-Wrong/">a new rug in the sun porch</a>. </p>
<p>
</p>
<div class="MediaContainer PhotoContainer"><a href="https://farm9.staticflickr.com/8465/8099934089_1b52e2507e_z.jpg" rel="PhotoPopup" popupheight="427" popupwidth="640"><img alt="" src="https://farm9.staticflickr.com/8465/8099934089_1b52e2507e.jpg" width="500" height="333" style="border-width: 0px; border-style: solid;" /></a></div>
<p><strong>So the big question. Now that we're two years in, what do we think?</strong></p>
<p>Well, as I said with the short answer, we love them and would do it again in a heartbeat! But there's a big but.</p>
<p>We had a whole bunch of major concerns going into the project and were sort of taking a leap of faith with our purchase. We didn't know anyone who had IKEA butcher block installed in their home, and we had serious reservations about the butcher block's ability to coexist with a corner sink.</p>
<p>We also heard horror stories about butcher block warping after install, the maintenance you have to perform by way of constant oiling, and the inevitable water rings, stains, and imperfections that will ultimately litter the surface of the delicate wood. </p>
<p>However, on a wing and a prayer (and the thought that the whole thing would be just about $400 for counters) we went ahead and made the leap. </p>
<h3>Purchase</h3>
<p>The shopping for and purchase of our counters was, well, a typical major IKEA trip. We walked in expecting to buy counters, and we walked out with over $1000 of stuff, including a few new cabinets and about 22 feet of Numerar oak butcher block counter.&nbsp;</p>
<p>
</p>
<div class="MediaContainer PhotoContainer"><a href="https://farm9.staticflickr.com/8306/7819095994_565ec61ef7_z.jpg" rel="PhotoPopup" popupheight="480" popupwidth="640"><img alt="" src="https://farm9.staticflickr.com/8306/7819095994_565ec61ef7.jpg" width="500" height="375" style="border-width: 0px; border-style: solid;" /></a></div>
<p>If we were doing this again, I would have definitely gotten delivery or rented a ZipVan. It all fit in our car, but Wendy's life was threatened the entire time, and I allowed the whole cart to tip over and crash to the ground while loading the stuff...which is what I believe caused one major area of split in our counters.</p>
<p>
</p>
<div class="MediaContainer PhotoContainer"><a href="https://farm9.staticflickr.com/8008/7819110320_ec85249fc4_z.jpg" rel="PhotoPopup" popupheight="640" popupwidth="480"><img alt="" src="https://farm9.staticflickr.com/8008/7819110320_ec85249fc4.jpg" width="375" height="500" style="border-width: 0px; border-style: solid;" /></a></div>
<p>The trip home was slightly less than desirable.
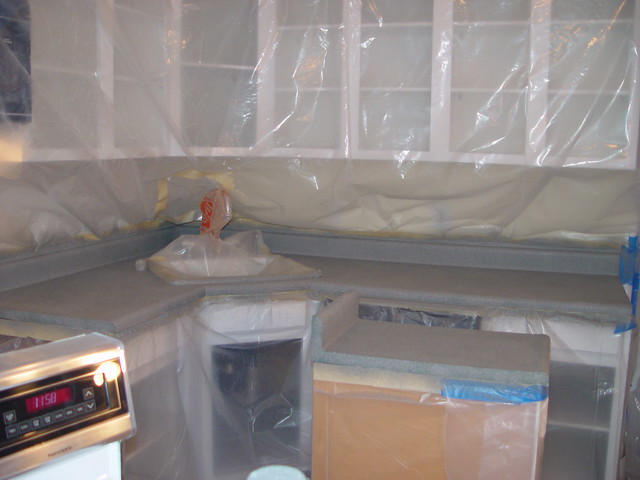
&nbsp;</p>
<h3>Install</h3>
<p>Overall our install was relatively straight forward, but did require some massive modifications to the existing base cabinets to ensure a properly supported and level install. In retrospect, this was an absolutely critical aspect of the overall success of our counter install...and overall happiness of my lovely wife.  Had I not leveled the base cabinets properly, or ensured even support, I'm certain it wouldn't be in good shape today. </p>
<p>
</p>
<div class="MediaContainer PhotoContainer"><a href="https://farm8.staticflickr.com/7273/7872126140_399730ff59_z.jpg" rel="PhotoPopup" popupheight="640" popupwidth="480"><img alt="" src="https://farm8.staticflickr.com/7273/7872126140_399730ff59.jpg" width="375" height="500" style="border-width: 0px; border-style: solid;" /></a></div>
<p>Throughout the process we both had a therapeutic opportunity to repeatedly curse the previous owner who installed our counters and cabinets. Perhaps they were trying to simulate a rocking ship of some sort? Maybe a gravity defying house? That's the only logical explanation. But after working on a house that's over 125 years old for more than a decade now, we've grown used to the wonky walls and out of square everything.</p>
<h3>Decorative Edge</h3>
<p>One of the things we added to the counters was a decorative edge more fitting of our home's style. It was a pretty simple approach using your basic router and a little patience. Our technique was actually featured on <a href="http://www.ikeahackers.net/2012/11/numerar-akurum-diy-chic-wine-bar.html" target="_blank">Ikea Hackers</a>&nbsp;and <a href="http://www.apartmenttherapy.com/ikea-butcher-block-countertop-upgrade-give-it-an-edge-old-town-home-181226" target="_blank">Apartment Therapy</a> at different times since our install, and many people on those websites had the odd concern that tons of food and junk would get caught in the detail.&nbsp;</p>
<p>
</p>
<div class="MediaContainer PhotoContainer"><a href="https://farm9.staticflickr.com/8441/7863408620_b7ae857c04_z.jpg" rel="PhotoPopup" popupheight="640" popupwidth="480"><img alt="" src="https://farm9.staticflickr.com/8441/7863408620_b7ae857c04.jpg" width="375" height="500" style="border-width: 0px; border-style: solid;" /></a></div>
<p>
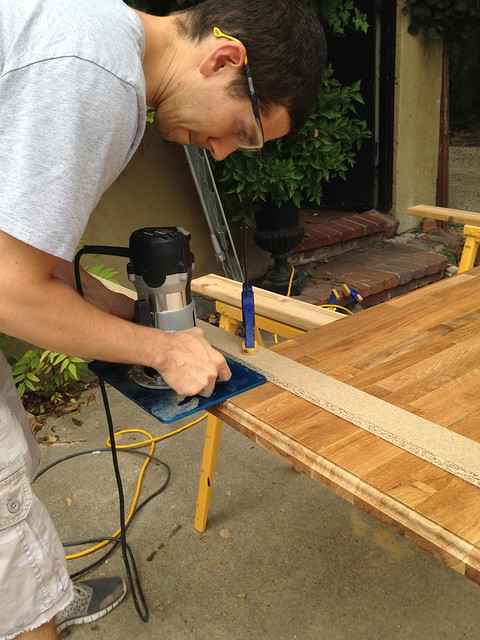
I'm very happy to report that we do not have gobs of cheese and fungus growing from these decorative edges, and that it's actually remained very clean and one of our favorite aspects of the counters. This is something we'd definitely do again as it does make the otherwise utilitarian surface a bit more fancy and typical of a Victorian era home.</p>
<p>
</p>
<div class="MediaContainer PhotoContainer"><a href="https://farm9.staticflickr.com/8179/7893751672_9e216915a4_z.jpg" rel="PhotoPopup" popupheight="480" popupwidth="640"><img alt="" src="https://farm9.staticflickr.com/8179/7893751672_9e216915a4.jpg" width="500" height="375" style="border-width: 0px; border-style: solid;" /></a></div>
<h3>
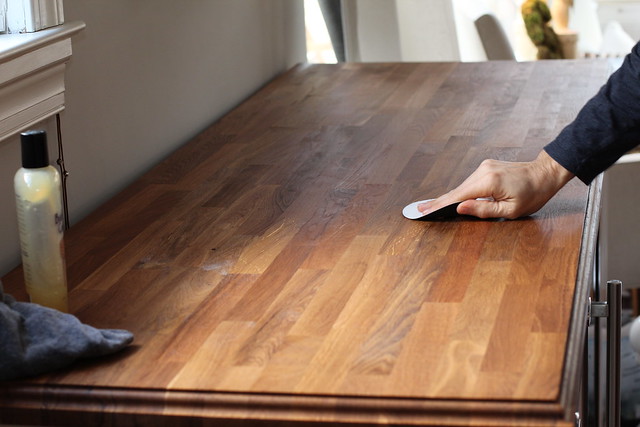
Conditioning/Maintenance</h3>
<p>Ah yes, the overall conditioning, maintenance, and care for the butcher block. This is numero uno when it comes to both the success of a butcher block. If you're thinking about installing a butcher block countertop anywhere in your house and you don't want to be bothered with periodic (ideally monthly) oiling and surface prep, butcher block counters are probably not for you. I mean, you have to live with collecting everything from your counters into a small area while you oil.</p>
<p>
<div class="MediaContainer PhotoContainer"><a href="https://farm4.staticflickr.com/3866/14556029300_345263a796_z.jpg" rel="PhotoPopup" popupheight="427" popupwidth="640"><img alt="" src="https://farm4.staticflickr.com/3866/14556029300_345263a796.jpg" width="500" height="333" style="border-width: 0px; border-style: solid;" /></a></div>
</p>
<p>
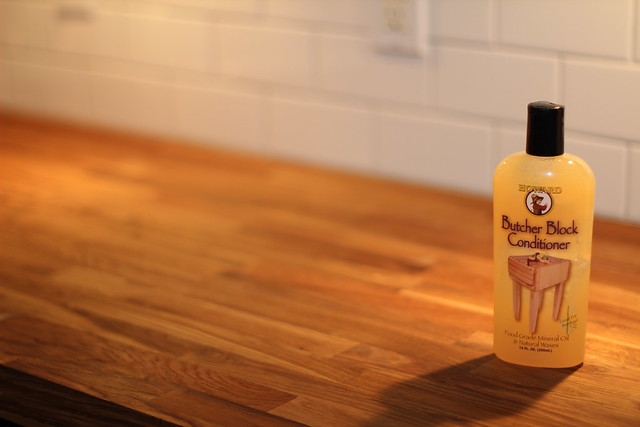
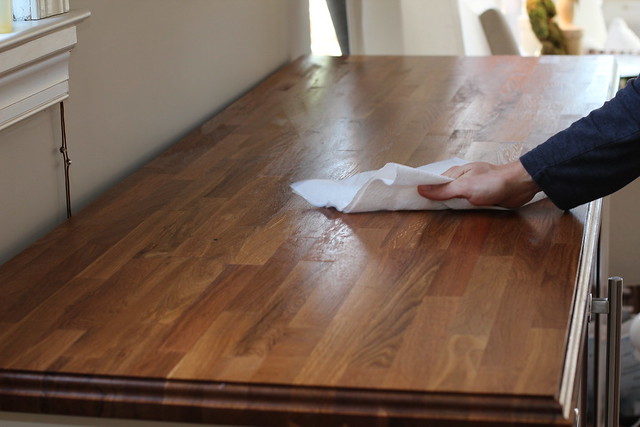
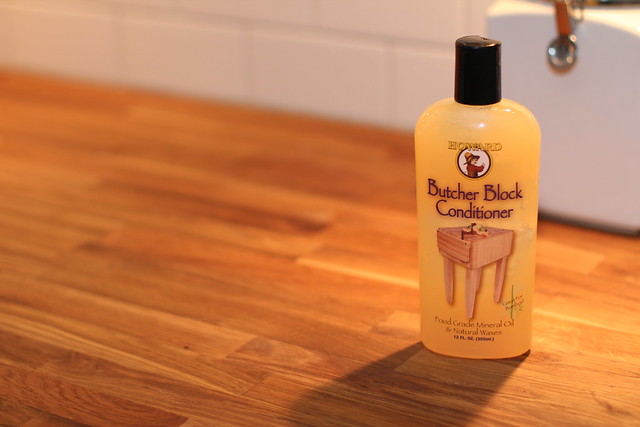
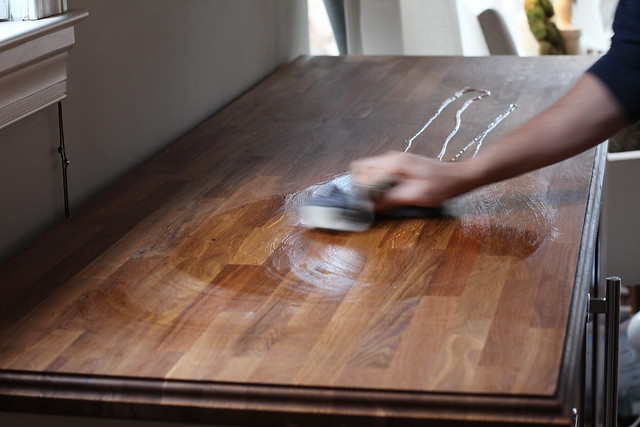
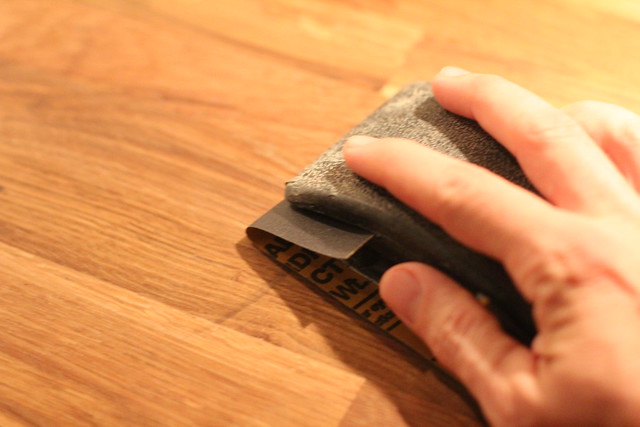
However, if you don't mind the occasional removal of everything from your counters, a quick hand sand of problem areas with 400 grit sand paper, and the application of a good penetrating oil with sealer (<a href="http://www.oldtownhome.com/2013/1/11/Wax-On-Wax-Off---Butcher-Block-Oil-Treatment-Update/">we really like using the Howard's Oil and Wax combo product</a>), followed by an overnight dry and a thorough wipe down, then this is probably a good surface choice for you.</p>
<p>
</p>
<div class="MediaContainer PhotoContainer"><a href="https://farm9.staticflickr.com/8224/8292302541_8b08531a7f_z.jpg" rel="PhotoPopup" popupheight="427" popupwidth="640"><img alt="" src="https://farm9.staticflickr.com/8224/8292302541_8b08531a7f.jpg" width="500" height="333" style="border-width: 0px; border-style: solid;" /></a></div>
<p>
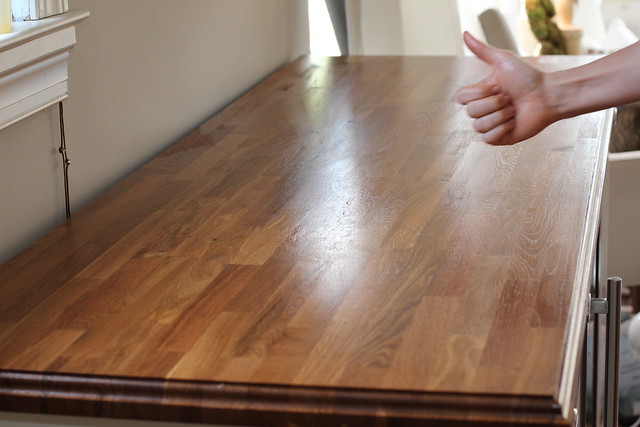
We went with the old "after install, oil your counters once a day for the first week, once a week for the first month, then once a month for the rest of their life" approach. This has worked well to keep the counters quenched and they've not dried, shrunk, or cracked.&nbsp;</p>
<p>
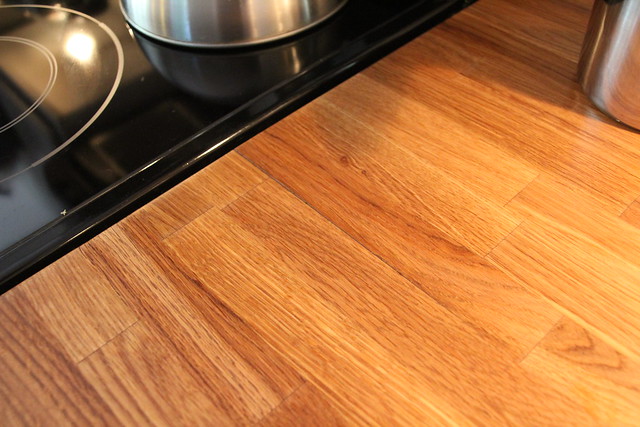
Now that we've been doing it for nearly two full years the counters are started to get really smooth and have darkened a little bit. I think the wax does go a long way in filling in the natural porousness of the wood and I'm pretty surprised with how much the oak texture has faded with each wax/oil application.</p>
<p>
</p>
<div class="MediaContainer PhotoContainer"><a href="https://farm9.staticflickr.com/8075/8363869041_7d9c3dae01_z.jpg" rel="PhotoPopup" popupheight="427" popupwidth="640"><img alt="" src="https://farm9.staticflickr.com/8075/8363869041_7d9c3dae01.jpg" width="500" height="333" style="border-width: 0px; border-style: solid;" /></a></div>
<p>
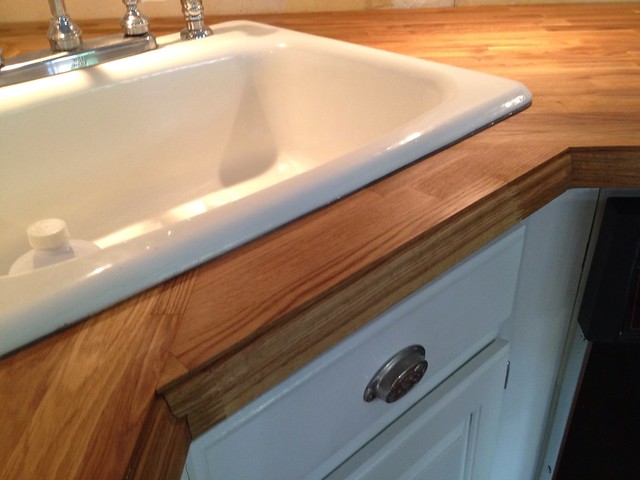
The biggest problem area we have to pay attention to is the area about the top corner of our sink. Our sponge rests there and water often sits on this area more than other areas of our counters. When this happens, the counter starts to gray/whiten a little bit. This is usually our indicator that the entire counter is ready for another coat of oil.</p>
<p>
</p>
<div class="MediaContainer PhotoContainer"><a href="https://farm6.staticflickr.com/5595/14556034788_513ac058b5_z.jpg" rel="PhotoPopup" popupheight="427" popupwidth="640"><img alt="" src="https://farm6.staticflickr.com/5595/14556034788_513ac058b5.jpg" width="500" height="333" style="border-width: 0px; border-style: solid;" /></a></div>

<p>To resolve this, and any water stains that have showed up after washed dishes have sat too long and left rings, glasses have been left too long, or anything that's caused a blemish, you just need a little sanding and a little oil/wax.
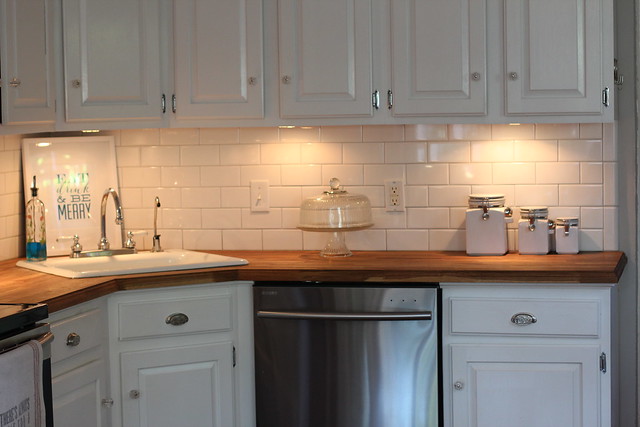
</p>
<h3>Our Counters Today</h3>
<p>Well, what can I say? We still like them.</p>
<p>
</p>
<div class="MediaContainer PhotoContainer"><a href="https://farm6.staticflickr.com/5556/14742399752_a1e18de791_z.jpg" rel="PhotoPopup" popupheight="640" popupwidth="427"><img alt="" src="https://farm6.staticflickr.com/5556/14742399752_a1e18de791.jpg" width="333" height="500" style="border-width: 0px; border-style: solid;" /></a></div>

<p>We've been diligent about oiling/conditioning our counters, consistent with lightly sanding out imperfections, fastidious about keeping stains away, and accepting that some dings, gouges, or scratches may occur from time to time.&nbsp;</p>
<p>
</p>
<div class="MediaContainer PhotoContainer"><a href="https://farm4.staticflickr.com/3863/14742695445_0807a38443_z.jpg" rel="PhotoPopup" popupheight="427" popupwidth="640"><img alt="" src="https://farm4.staticflickr.com/3863/14742695445_0807a38443.jpg" width="500" height="333" style="border-width: 0px; border-style: solid;" /></a></div>
<p>There is one small split area near our stove that is likely due to the fact that I foolishly allowed the whole cart to tip over while loading it into our car. That's my bad on that one, and it's not gotten worse since install.&nbsp;</p>
<p>
</p>
<div class="MediaContainer PhotoContainer"><a href="https://farm4.staticflickr.com/3895/14556381727_1ac65123f7_z.jpg" rel="PhotoPopup" popupheight="427" popupwidth="640"><img alt="" src="https://farm4.staticflickr.com/3895/14556381727_1ac65123f7.jpg" width="500" height="333" style="border-width: 0px; border-style: solid;" /></a></div>

<p>If it ever gets worse we'll likely glue in the gap and screw something to the underside of the counter to keep it all held together.</p>
<p>
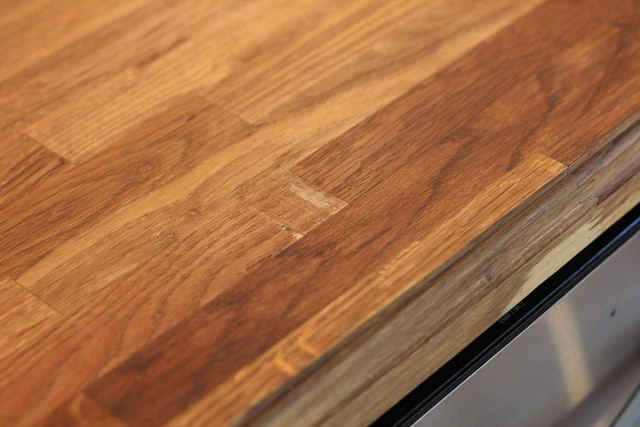
There's also that odd blemish area that I knew was going to be an issue right when we installed. It's a strange white glue area right in the middle of our counter. We've resigned ourself to the fact that this will always be there and we just have to live with it. But I still wish every day that I had seen it before install so I could have changed the layout a little bit to hide it (or even returned it for a new piece from the store).</p>
<p>
</p>
<div class="MediaContainer PhotoContainer"><a href="https://farm4.staticflickr.com/3878/14762554593_e905b05550_z.jpg" rel="PhotoPopup" popupheight="427" popupwidth="640"><img alt="" src="https://farm4.staticflickr.com/3878/14762554593_e905b05550.jpg" width="500" height="333" style="border-width: 0px; border-style: solid;" /></a></div>
<p>But as a whole, the counters still look great, still do their job, and due to our consistent sanding and conditioning, should stand the test of time.</p>
<p>
</p>
<div class="MediaContainer PhotoContainer"><a href="https://farm4.staticflickr.com/3906/14556205869_746348dbd9_z.jpg" rel="PhotoPopup" popupheight="427" popupwidth="640"><img alt="" src="https://farm4.staticflickr.com/3906/14556205869_746348dbd9.jpg" width="500" height="333" style="border-width: 0px; border-style: solid;" /></a></div>

<p>A lot of people wonder how the corner sink, joined areas, and wood filler are standing up to the water and daily use. In short, pretty great! We used waterproof wood glue, exterior wood filler (but not epoxy), and had some pretty straight edges that were joined together, so there's really not much opportunity for the water to get into the joint. I think this has helped a lot with keeping the corner looking good.</p>
<p>It would be our preference to not have a corner sink at all, because we sort of think it's a waste of space for our kitchen layout, but that change would have required a much more in-depth approach to the overhaul that we weren't ready to take on.</p>
<h3>What Would We Do Differently?</h3>
<p>If given the opportunity to do the whole project over again knowing what we know now, there are a few major things we'd do a bit differently.</p>
<ol>
    <li>First, the use of the individual pieces would have been better planned. The minor but center stage lighter blemish could have been avoided if we had taken each piece out or its box, laid them out, inspected them for issues, and then planned where each piece would live. Had we, out of dumb luck, rotated the piece with an issue 180 degrees when we took it out of the package, the issue would have been either hidden by the sink, or removed altogether when we cut the sink hole. We just left too much to chance without realizing the variability in the wood. So definitely a need for better planning.<br />
    <br />
    </li>
    <li>Next, we would have likely applied something more significant and permanent to the underside of the counter near the dishwasher as a vapor block. We've not had any issues with drying or cracking in this area, but we have a small foil tape vapor barrier that seems to come free too easily due to the oiling of the counters. If doing this over, I would have bought some thin gage stainless steel that I could have screwed or nailed to the underside of the counter above the dishwasher. But this is the only change we would make to the underside. <br />
    <br />
    A lot of people ask if we treated the underside of the counters with anything. We didn't, and we wouldn't if doing it again. As long as your counters are level, you don't have excess moisture, and you're securing the counter to the base with screws, the open underside lets the counter breathe evenly. This assumes you're not sealing the top either, but instead using an oil/natural coating.<br />
    <br />
    </li>
    <li>The final thing we might do differently, but I'm not even 100% certain still, has to do with the type of maintenance finish we're applying. As I mentioned, we are using the Howard's Oil/Wax combo as a natural solution with repeated application. But this is a base of mineral oil. There's a possibility we would want to apply a walnut oil in the future, rather than a mineral oil. The walnut oil is a finish that will soak in and harden over time, whereas the mineral oil doesn't dry. I'm not certain how the walnut oil might affect the texture or color of the counters, but the idea of building up a hardening surface in the otherwise porous material sounds like it might be a good plan.</li>
</ol>
<p>Other than those items, our IKEA Numerar butcher block countertop is in pretty great shape and has performed like a champ. We've had friends install butcher block since we installed ours, some using IKEA, while others have used wood from Lumber Luiquidators, and everyone reports roughly the same overall success as long as they are diligent about performing the routine maintenance.&nbsp;</p>
<p>There are quite a few people that ask us about sanding, and how aggressive to be with sanding out imperfections. Really, it's all up to the sander/owner of the butcher block. If you don't mind the patina that comes with imperfections, don't sand as much. If you want a smooth and blemish free counter, feel free to sand away.&nbsp;</p>
<p>
</p>
<div class="MediaContainer PhotoContainer"><a href="https://farm4.staticflickr.com/3731/9213984977_5ac4edd036_z.jpg" rel="PhotoPopup" popupheight="427" popupwidth="640"><img alt="" src="https://farm4.staticflickr.com/3731/9213984977_5ac4edd036.jpg" width="500" height="333" style="border-width: 0px; border-style: solid;" /></a></div>
<p>And to the people who are concerned you might just sand right through to the other side? The butcher block is thick, and you're using a fine grained paper. If you sand through enough to cause an issue you probably need to become a professional athlete of some sort.</p>
<h3>What About Butcher Block in the Next Kitchen?</h3>
<p>So this is the really big question. When we're building our actual big major kitchen in 2032 (see, the timeline slipped just while writing this blog post), would we use butcher block as our countertop surface?&nbsp;</p>
<p>This is the difficult question. We like it in our current kitchen, certainly. It's forgiving, soft, natural, and has a great look to it, but it is consistent maintenance and can have issues around sinks and wet areas. We can't sit hot items on them without protection, and we can't cut directly on them unless we don't mind the knife scars. So I think the answer is a yes and a no.&nbsp;</p>
<p>Yes, we'd likely use butcher block somewhere in our major kitchen overhaul.</p>
<p>No, we'd likely not use butcher block throughout the entire kitchen assuming our budget will allow for a more expensive material.</p>
<p>We think it's more reasonable to select an area where we'll use it, perhaps on an island or within a prep area, but keep the rest of the counters a stone surface, possibly a honed granite, marble, or soapstone. But as I said, we probably won't have to worry about that decision for a few long time to come.</p>
<p>We hope our IKEA butcher block experience can help you make the decision on whether or not to move forward with your purchase. It was a good experience as a whole and, as I said, we're so happy to have removed that spray painted green laminate and replaced it with something more fitting for our home.</p><p><a href="https://www.oldtownhome.com/2014/7/25/IKEA-Butcher-Block-Counters-2-Years-Later---What-Do-We-Think/">Read Full Post</a></p>]]></content>
    <category term="Butcher Block Counters" />
    <category term="Header Image" />
    <category term="Kitchen" />
    <category term="Review" />
    <PostImage>https://farm4.staticflickr.com/3882/14556461547_27fac99c02.jpg</PostImage>
    <media:thumbnail url="https://farm4.staticflickr.com/3882/14556461547_27fac99c02_t.jpg" />
    <ExtensionElements>
      <Item>PostImage</Item>
      <Item>media:thumbnail</Item>
    </ExtensionElements>
  </entry>
  <entry>
    <guid>1d3458f0-b322-4fef-87de-d77221e6cc85</guid>
    <id>https://www.oldtownhome.com/2013/8/12/When-Your-Kitchen-Faucet-Becomes-a-Water-Feature/</id>
    <title>When Your Kitchen Faucet Becomes a Water Feature</title>
    <summary type="html"><![CDATA[<p>Back in 2004 Wendy and I were relatively poor and relatively new homeowners with a fixer upper of a house and we possessed relatively paltry home improvement skills. When we were faced with one of our kitchen sink's faucet knobs fracturing in our hand as we suggested the faulty knob turn the flow of water off, we were left using a wrench to operate the kitchen sink. This left us feeling a bit dejected, as if we had been magically transformed into a couple of urban hillbillies.  </p><p class="MediaContainer PhotoContainer"><a href="http://farm7.staticflickr.com/6108/6326879825_0976f63660_z.jpg" rel="PhotoPopup" popupheight="309" popupwidth="640"><img alt="" src="https://farm7.staticflickr.com/6108/6326879825_0976f63660.jpg" width="500" height="241" style="border-width: 0px; border-style: solid;"></a></p><p class="MediaContainer PhotoContainer"><em>This faucet died a hero.</em></p><p>A few days after our inherited faucet busted, we ventured out and purchased a reasonably priced replacement that would work in our existing sink, would operate reliably, and wouldn't look like it was more appropriate in a building outfitted in the classical stylings of Donald Trump than in our 19th century home. We knew this wasn't our "forever" faucet, so we just needed something that worked, but we didn't want it sticking out like a sore thumb.</p><p>The Price Pfister pfaucet we purchased has pfunctioned nearly pflawlessly since the pfateful day when we pforced ourselves to take the bull by the horns and pfinally learn some much needed plumbing skills. </p><p>After installing the faucet we felt like two very accomplished DIYers. This wasn't just painting something, this was correcting an issue with our home that would have caused many to call a plumber. It was a victory in a very minor battle in the DIY war, but it felt great nonetheless. </p> <a href="https://www.oldtownhome.com/2013/8/12/When-Your-Kitchen-Faucet-Becomes-a-Water-Feature/">more</a>]]></summary>
    <published>2013-08-12T11:45:00.000-04:00</published>
    <updated>2013-08-12T11:45:00.000-04:00</updated>
    <link rel="alternate" href="https://www.oldtownhome.com/2013/8/12/When-Your-Kitchen-Faucet-Becomes-a-Water-Feature/" />
    <author>
      <name>Alex</name>
    </author>
    <content type="html"><![CDATA[<p>Back in 2004 Wendy and I were relatively poor and relatively new homeowners with a fixer upper of a house and we possessed relatively paltry home improvement skills. When we were faced with one of our kitchen sink's faucet knobs fracturing in our hand as we suggested the faulty knob turn the flow of water off, we were left using a wrench to operate the kitchen sink. This left us feeling a bit dejected, as if we had been magically transformed into a couple of urban hillbillies.  </p>
<p class="MediaContainer PhotoContainer"><a href="http://farm7.staticflickr.com/6108/6326879825_0976f63660_z.jpg" rel="PhotoPopup" popupheight="309" popupwidth="640"><img alt="" src="https://farm7.staticflickr.com/6108/6326879825_0976f63660.jpg" width="500" height="241" style="border-width: 0px; border-style: solid;"></a></p>
<p class="MediaContainer PhotoContainer"><em>This faucet died a hero.</em></p>
<p>A few days after our inherited faucet busted, we ventured out and purchased a reasonably priced replacement that would work in our existing sink, would operate reliably, and wouldn't look like it was more appropriate in a building outfitted in the classical stylings of Donald Trump than in our 19th century home. We knew this wasn't our "forever" faucet, so we just needed something that worked, but we didn't want it sticking out like a sore thumb.</p>
<p>The Price Pfister pfaucet we purchased has pfunctioned nearly pflawlessly since the pfateful day when we pforced ourselves to take the bull by the horns and pfinally learn some much needed plumbing skills. </p>
<p>After installing the faucet we felt like two very accomplished DIYers. This wasn't just painting something, this was correcting an issue with our home that would have caused many to call a plumber. It was a victory in a very minor battle in the DIY war, but it felt great nonetheless. </p>
<p>Today, nearly 10 years after installing our "not a forever faucet," it's worked relatively reliably for being a decidedly bargain purchase. Well, that is until a few weeks ago when our little faucet that could decided he was too good for our simple kitchen sink and would much rather begin performing in Vegas at the Bellagio as one of their world renowned fountains. </p>
<p>
</p>
<div class="MediaContainer VideoEmbed"><iframe width="560" height="349" src="http://www.youtube.com/embed/CsX3Iu6hWnU?wmode=transparent&amp;hd=1" frameborder="0" allowfullscreen="true"></iframe></div>
<p>When I posted the video on <a href="http://www.instagram.com/oldtownhome/" target="_blank">Instagram</a> I joked that we'd be setting it to music and incorporating a light show, but as the leak kept getting worse, I realized the faucet must have heard me and thought it was its big faucet break. Each time we used the kitchen sink we were spraying water all over the kitchen counter. This spray led to a leak beneath the kitchen sink, which began to soak <a href="http://www.oldtownhome.com/2012/9/6/Intervention-Fail-An-Update-on-the-Bag-Basement-Situation/">Wendy's bag hoard</a>, causing this disaster over the weekend. </p>
<p><em>Oh the humanity!!!!</em></p>
<p><em>
</em></p>
<div class="MediaContainer PhotoContainer"><em><a href="http://farm4.staticflickr.com/3815/9496106452_5c312fe60e_z.jpg" rel="PhotoPopup" popupheight="640" popupwidth="447"><img alt="" src="https://farm4.staticflickr.com/3815/9496106452_5c312fe60e.jpg" width="349" height="500" style="border-width: 0px; border-style: solid;"></a></em></div>
<em>
</em>
<p>I didn't want to drop the cash on another "not-a-forever" faucet, but it seemed as if we had no other option. I'd attempted to reseat the O-ring seal I felt was the culprit, but it was to no avail, the water kept flowing from around the base of the faucet neck, casting a blanket of shame on our DIY house. </p>
<p>Curious what it begins to look like in a home where one inhabitant loves to cook, the bathroom sink is too small to do dishes, and you are unable to use the kitchen faucet for an extended period of time? Here you go. </p>
<p>
</p>
<div class="MediaContainer PhotoContainer"><a href="http://farm6.staticflickr.com/5488/9495389404_07faa14d8d_z.jpg" rel="PhotoPopup" popupheight="640" popupwidth="480"><img alt="" src="https://farm6.staticflickr.com/5488/9495389404_07faa14d8d.jpg" width="375" height="500" style="border-width: 0px; border-style: solid;"></a></div>
<p>Our adventure in our first steps to hoarding was not enjoyable. We couldn't allow this to go on. If this is what it looks like after a few hours, what will it be after a week? A month? A year? As <a href="http://5decisionsaway.com/" target="_blank">Matt Paxton</a> of the television show Hoarders says, "We're all only four or five bad decisions away from taking a shit in a bucket."</p>
<p>
</p>
<div class="MediaContainer PhotoContainer"><a href="http://farm4.staticflickr.com/3730/9495838096_e5180a59d9_z.jpg" rel="PhotoPopup" popupheight="450" popupwidth="600"><img alt="" src="https://farm4.staticflickr.com/3730/9495838096_e5180a59d9.jpg" width="500" height="375" style="border-width: 0px; border-style: solid;"></a></div>
<p>Unwilling to accept our ultimate fate of taking to toilet buckets and jars around our house as we hop gingerly from pile to pile of soiled and stacked clothing, Beanie Babies, news papers, and trash, I pushed forward and attempted to fix our nagging issue over the weekend. </p>
<p>This fix, though minor in the eyes of many, was not for the benefit of us humans alone. I did it for Mel, who had glanced over at me with a knowing feline glint in his cheshire eyes, almost as if to say, "Don't you dare let some clutter cleaner discover me beneath a mound of creepy baby dolls and National Geographic magazines! You owe me more than that!!!" He was right, the cat had a point, and we had to take care of our issues, he had already endured too much in his life to be subject to the additional humiliation of hoarder parents.</p>
<p>
</p>
<div class="MediaContainer PhotoContainer"><a href="http://farm6.staticflickr.com/5066/5646379952_1825b754a3_z.jpg" rel="PhotoPopup" popupheight="480" popupwidth="640"><img alt="" src="https://farm6.staticflickr.com/5066/5646379952_1825b754a3.jpg" width="500" height="375" style="border-width: 0px; border-style: solid;"></a></div>
<p>With a goal in mind, I ventured to the big box on a classic Sunday evening supplies run, racing against the clock of the slightly earlier closing time, and hoping to pick up tiny parts necessary to fix the leak as well as a new faucet, just in case. The plan was to make the fix if possible, but if that proved too difficult (or impossible), just replace the whole darn thing. Best case, we'd just return the new faucet, worst case, we admit defeat and retreat, head in hands.</p>
<p>When I arrived in the vacant Sunday evening aisles, the polished cement floor glistened like a recently cleaned welcome mat for those without a weekend life. The first thing I saw on my way to the aisle marked "Plumbing (Plomeria)" was a stack of 5 gallon buckets. Was this a sign? An omen? A message relaying my eventual failure? I sternly carried on and proceeded to my destination, undeterred by this cosmic obstacle attempting to shroud my mind in a fog of self doubt.</p>
<p>I reached the display of faucets and began to peruse the selection. They hung above me like a police lineup of polished chrome and oil rubbed bronze culprits, waiting to be fingered for their crime. What were they accused of? Looking terrible and costing too much, that's what.</p>
<p>Among the goose necks with space aged handles, giant "restaurant style" pull downs, and weird looking monolith lever based devices, nothing looked even remotely appropriate for our home. Don't even get me started on the price tags. Our bargain faucet 10 years ago set us back about $50, today you can't get out of the aisle for less than $112! I think they are charging extra for all of the ugly they've successfully added to the products.</p>
<p>Defeated, I opted to venture to the parts and supplies aisle in the hopes I'd be able to find a replacement for the mangled and random O-ring I had removed from the innards of our faltering little faucet-that-could.</p>
<p>As I rounded the corner and entered the aisle I saw four other members of the nomadic Sunday shoppers in the barren desert of the big box aisles. All surely there for similar purposes as I. There they stood, futilely studying the backs of the packages they happened to be holding, trying in vain to understand the various instructions scribbled on the back of the box, instructions which appear at first blush to be written for the the layman, but upon reading are so obviously intended only for the Illuminati or those that have endured the "3rd degree." The pensive looks on their faces all said the same "Will this work in my case? Will this fix my problem? Will this make my wife happy?" Alone in their respective areas, united in their silence, defiant in the face of failure, we were all slaves to the big box inventory.</p>
<p>
</p>
<div class="MediaContainer PhotoContainer"><a href="http://farm8.staticflickr.com/7316/9493259525_b92e929f5b_z.jpg" rel="PhotoPopup" popupheight="272" popupwidth="640"><img alt="" src="https://farm8.staticflickr.com/7316/9493259525_b92e929f5b.jpg" width="500" height="212" style="border-width: 0px; border-style: solid;"></a></div>
<p>I found the prerequisite pegboard stacked with little plastic package after little plastic package of washers, nuts, O-rings, and trinkets. All items with a random purpose, all with an intended home, but none meeting the exacting dimensions of the worn and crooked O-ring I had removed from our fountain of a faucet. </p>
<p>As is the law of big box land, I found a store tag for the O-ring we needed, but a   blank stock position just below. All other items were fully stocked, but this one item, the one that we absolutely required, was glaringly absent. </p>
<p>I fumbled around the other in stock items, searching desperately for an errantly placed box of O-rings lurking in an unsuspecting location. Nearly giving up hope and thinking back on where I had seen the 5 gallon buckets, knowing that was fast becoming my future, my salvation was presented when I stumbled on what appeared to be the last and only box of #17 O-rings in the store, and perhaps, on the planet.</p>
<p>With bounty in hand I turned and nodded to my nomadic shopping partners, with whom I'd formed a silent bond. Bidding them a head cock loaded with a fond farewell and wishes of good home improvement fortune, I whisked the packet of O-rings to the self checkout. I resisted the siren call of free paint samples knowing I had <a href="http://www.oldtownhome.com/2013/7/3/Creating-Patriotic-Paint-Chip-Place-Cardsat-my-Husbands-Expense/">pushed my luck too far with that venture in the past</a>, and instead focused on my task at hand, hopeful the little rubber doodads I had selected would work in our particular situation.</p>
<p>
</p>
<div class="MediaContainer PhotoContainer"><a href="http://farm8.staticflickr.com/7436/9492589761_9e5f0e8561_z.jpg" rel="PhotoPopup" popupheight="640" popupwidth="480"><img alt="" src="https://farm8.staticflickr.com/7436/9492589761_9e5f0e8561.jpg" width="375" height="500" style="border-width: 0px; border-style: solid;"></a></div>
<p>When I arrived home I nervously begin my 30 second fix. The new O-rings were decidedly of a thicker variety than the old one, but was this because the old one had decayed over time, or was it because the new ones were simply the wrong size? Oh how I hoped it was the earlier of the two scenarios.</p>
<p>
</p>
<div class="MediaContainer PhotoContainer"><a href="http://farm8.staticflickr.com/7376/9495383900_309a83d78b_z.jpg" rel="PhotoPopup" popupheight="640" popupwidth="480"><img alt="" src="https://farm8.staticflickr.com/7376/9495383900_309a83d78b.jpg" width="375" height="500" style="border-width: 0px; border-style: solid;"></a></div>
<p>I packed the O-ring into the barren faucet spout and re-secured the faucet neck and hope for the best possible results. The moment of truth had arrived. I nervously proceeded with caution as I expected to watch as the first twist of the would undoubtedly result in a torrent of water sprayed like a fire hose all over the room. Flashes of devolving into the depths of hoarding flashed before my eyes. Grotesque visions of Wendy and I standing in front of our home as our life's possessions are carelessly tossed into an industrial sized dumpster, our toothless mouths agape. The images that ran through my head quickly faded as the water flowed only from the faucet's intended spout, rather than from the base.</p>
<p>
</p>
<div class="MediaContainer PhotoContainer"><a href="http://farm3.staticflickr.com/2875/9495377592_0621c6cd43_z.jpg" rel="PhotoPopup" popupheight="640" popupwidth="480"><img alt="" src="https://farm3.staticflickr.com/2875/9495377592_0621c6cd43.jpg" width="375" height="500" style="border-width: 0px; border-style: solid;"></a></div>
<p>Ah-ha!!! Success! I would be able to do dishes once again! We would not be relegated to the train wreck of reality TV. People would not have the opportunity to watch our horrid lives through the fingers of their hands covering their eyes. We were once again victorious in this "Battle of O-ring" in our DIY war! Victory was ours!!!</p>
<p>
</p>
<div class="MediaContainer VideoEmbed"><iframe width="560" height="349" src="http://www.youtube.com/embed/Np4-4OcZeEs?wmode=transparent&amp;start=10" frameborder="0" allowfullscreen="true"></iframe></div>
<p>As I laid my head on my pillow knowing that I would fight another day in our DIY war, I reflected on the events of the day, and how much differently they could have played out. What would have happened if the O-ring had not fit? How would we have done dishes? What would our home have looked like after another month of a kitchen faucet that was essentially non-functioning? Then I remembered that our gutter downspout is still a flexible dryer vent hose, we still have storm windows partially completed, our guest bed's box spring mattress sits directly on the floor, and our master bathroom remains a distant mirage of water in this barren Sahara of home improvement. My mind wandered, my eyelids grew heavy, and I drifted off to sleep thinking of the battles in our DIY war we had yet to fight, worried we might not be victorious in the future. </p><p><a href="https://www.oldtownhome.com/2013/8/12/When-Your-Kitchen-Faucet-Becomes-a-Water-Feature/">Read Full Post</a></p>]]></content>
    <category term="Header Image" />
    <category term="Kitchen" />
    <category term="Plumbing" />
    <PostImage>http://farm4.staticflickr.com/3815/9496135300_b743a4e641.jpg</PostImage>
    <media:thumbnail url="https://farm4.staticflickr.com/3815/9496135300_b743a4e641_t.jpg" />
    <ExtensionElements>
      <Item>PostImage</Item>
      <Item>media:thumbnail</Item>
    </ExtensionElements>
  </entry>
  <entry>
    <guid>11d51355-2c61-43b4-a8f6-94c88a691c2f</guid>
    <id>https://www.oldtownhome.com/2013/2/19/Pouring-our-Efforts-into-Finding-a-Wine-Fridge/</id>
    <title>Pouring our Efforts into Finding a Wine Fridge</title>
    <summary type="html"><![CDATA[<p>Since we completed our <a href="https://www.oldtownhome.com/2012/8/30/Completing-Our-Wine-Bar-In-Spite-of-IKEAs-Slow-Shipping/index.aspx">wine bar area in the kitchen last year</a>, we find ourselves using the additional storage and counter space for many items beyond simply serving wine. From a place to drop the mail after it's delivered, to a prep area for baked goods, having the additional counter space has been absolutely wonderful. But one of things about our wine bar that we've not really noticed, mostly because of how perfectly it's integrated, is how the wine refrigerator is now a part of the room rather than something in our room that we need to work around.&nbsp;</p><p>
</p><div class="MediaContainer PhotoContainer"><a href="https://farm9.staticflickr.com/8347/8202043104_daa46faaa6_z.jpg" rel="PhotoPopup" popupheight="640" popupwidth="520"><img alt="" src="https://farm9.staticflickr.com/8347/8202043104_daa46faaa6.jpg" width="406" height="500" style="border-width: 0px; border-style: solid;"></a></div><p>Prior to our kitchen upgrades, the wine bar sat in the middle or in the corner of our sun porch. It stuck out like a sore thumb. It looked like an afterthought, or even a temporary placement until we found a better spot for it.&nbsp;</p><p>
</p><div class="MediaContainer PhotoContainer"><a href="https://farm8.staticflickr.com/7022/6620341159_d0840e7419_z.jpg" rel="PhotoPopup" popupheight="427" popupwidth="640"><img alt="" src="https://farm8.staticflickr.com/7022/6620341159_d0840e7419.jpg" width="500" height="333" style="border-width: 0px; border-style: solid;"></a></div><p>Now that we integrated it into our kitchen design, a lot of our home's guests have been taking notice and asking questions, as have several blog readers that have emailed us. The primary question that we've received about our wine fridge has been a bit of a comment and question at the same time. "It looks so good there and looks built-in. What kind of wine fridge is it and how did you choose it?" We've also seen quite a few people here on the blog have been searching for "Wine Fridge", "Refrigerator for Wine", and "Wine Fridge Brand" to determine what brand and model we selected for our kitchen. I figure we should take the hint and write up a little post on our lovely wine fridge and why we chose this brand/model over all of the other options available on the market.</p><p>
</p> <a href="https://www.oldtownhome.com/2013/2/19/Pouring-our-Efforts-into-Finding-a-Wine-Fridge/">more</a>]]></summary>
    <published>2013-02-19T09:58:33.013-05:00</published>
    <updated>2013-02-19T09:58:33.013-05:00</updated>
    <link rel="alternate" href="https://www.oldtownhome.com/2013/2/19/Pouring-our-Efforts-into-Finding-a-Wine-Fridge/" />
    <author>
      <name>Alex</name>
    </author>
    <content type="html"><![CDATA[<p>Since we completed our <a href="https://www.oldtownhome.com/2012/8/30/Completing-Our-Wine-Bar-In-Spite-of-IKEAs-Slow-Shipping/index.aspx">wine bar area in the kitchen last year</a>, we find ourselves using the additional storage and counter space for many items beyond simply serving wine. From a place to drop the mail after it's delivered, to a prep area for baked goods, having the additional counter space has been absolutely wonderful. But one of things about our wine bar that we've not really noticed, mostly because of how perfectly it's integrated, is how the wine refrigerator is now a part of the room rather than something in our room that we need to work around.&nbsp;</p>
<p>
</p>
<div class="MediaContainer PhotoContainer"><a href="https://farm9.staticflickr.com/8347/8202043104_daa46faaa6_z.jpg" rel="PhotoPopup" popupheight="640" popupwidth="520"><img alt="" src="https://farm9.staticflickr.com/8347/8202043104_daa46faaa6.jpg" width="406" height="500" style="border-width: 0px; border-style: solid;" /></a></div>
<p>Prior to our kitchen upgrades, the wine bar sat in the middle or in the corner of our sun porch. It stuck out like a sore thumb. It looked like an afterthought, or even a temporary placement until we found a better spot for it.&nbsp;</p>
<p>
</p>
<div class="MediaContainer PhotoContainer"><a href="https://farm8.staticflickr.com/7022/6620341159_d0840e7419_z.jpg" rel="PhotoPopup" popupheight="427" popupwidth="640"><img alt="" src="https://farm8.staticflickr.com/7022/6620341159_d0840e7419.jpg" width="500" height="333" style="border-width: 0px; border-style: solid;" /></a></div>
<p>Now that we integrated it into our kitchen design, a lot of our home's guests have been taking notice and asking questions, as have several blog readers that have emailed us. The primary question that we've received about our wine fridge has been a bit of a comment and question at the same time. "It looks so good there and looks built-in. What kind of wine fridge is it and how did you choose it?" We've also seen quite a few people here on the blog have been searching for "Wine Fridge", "Refrigerator for Wine", and "Wine Fridge Brand" to determine what brand and model we selected for our kitchen. I figure we should take the hint and write up a little post on our lovely wine fridge and why we chose this brand/model over all of the other options available on the market.</p>
<p>
</p>
<div class="MediaContainer PhotoContainer"><a href="https://farm9.staticflickr.com/8231/8488484017_7e3b5467ac_z.jpg" rel="PhotoPopup" popupheight="518" popupwidth="640"><img alt="" src="https://farm9.staticflickr.com/8231/8488484017_7e3b5467ac.jpg" width="500" height="405" style="border-width: 0px; border-style: solid;" /></a></div>
<p>We actually started searching for a wine fridge several years ago. We noticed that with each trip we were taking out to <a href="https://www.oldtownhome.com/napa-valley-itinerary/index.aspx">California's Napa Valley</a>, we were bringing back several good quality bottles of wine. Many of these bottles are the type you should store away for a few years before they reach their optimal drinking window. While I'm not nearly sophisticated enough to know when we should or shouldn't drink a wine, there's an app for that, and many of the bottles we have shouldn't be opened up for least another three to ten years. Let me tell you, that's much easier said than done.</p>
<p>
</p>
<div class="MediaContainer PhotoContainer"><a href="https://farm8.staticflickr.com/7234/7141110449_1d672c8fdf_z.jpg" rel="PhotoPopup" popupheight="480" popupwidth="640"><img alt="" src="https://farm8.staticflickr.com/7234/7141110449_1d672c8fdf.jpg" width="500" height="375" style="border-width: 0px; border-style: solid;" /></a></div>
<p>As we brought back these nice bottles of wine, we were sticking them in our basement for safe keeping. And while the temperature in the basement is at least somewhat consistent, it gets a little too hot in the middle of the summer, and a little too cold in the middle of the winter to keep the bottles at their best and consistent desired temperature. Besides, if we were keeping all of our wine in the basement, how likely would we be to remember what we have and don't have when it comes time to drink? The last thing I want to be doing is digging through boxes in the basement when friends come over and we want to enjoy a bottle of vino.</p>
<p>When I started looking for the fridge I thought, "Oh, this'll be easy, I'll just buy a nice and cheap fridge and pop our wine in there." It was about ten minutes into researching that I realized it wouldn't be a very simple task to find the wine fridge that would work best for us and work with our budget.</p>
<p>Wendy and I enjoy red wine, white wine, and sparkling wines (aka champagne made in places other than the Champagne region of France) equally. The problem is that each should be stored in a different temperature range.Sparkling should be the coldest, whites are nearby the sparkling temps, and reds in a warmer range. So if we bought a wine fridge that is a simple refrigerator without the ability to control the temperature, we'd end up with some of our wine either too hot or too cold. It's like the Goldilocks of wine storage.</p>
<p>
</p>
<div class="MediaContainer PhotoContainer"><a href="https://farm8.staticflickr.com/7139/6994895612_1a0dfee660_z.jpg" rel="PhotoPopup" popupheight="640" popupwidth="480"><img alt="" src="https://farm8.staticflickr.com/7139/6994895612_1a0dfee660.jpg" width="375" height="500" style="border-width: 0px; border-style: solid;" /></a></div>
<p>To solve this issue, I narrowed our search to dual zone wine fridges where I can control the temperature of the various zones of storage independently  This way we can have a white/sparkling storage zone, and a red zone, without worrying about how one temp would affect the other wines.</p>
<p>
</p>
<div class="MediaContainer PhotoContainer"><a href="https://farm8.staticflickr.com/7222/7141010843_6a6b55f429_z.jpg" rel="PhotoPopup" popupheight="480" popupwidth="640"><img alt="" src="https://farm8.staticflickr.com/7222/7141010843_6a6b55f429.jpg" width="500" height="375" style="border-width: 0px; border-style: solid;" /></a></div>
<p>Once you get into this point in the research you will find a mix of somewhat inexpensive fridges, and insanely expensive fridges. From all of the various reviews I read and research I conducted (we're talking many nights sitting on the couch with the laptop and scouring websites about wine fridges) I found two consistent opinions: </p>
<ol>
    <li>Whether they're the top end or the lower end, almost all dual zone wine fridges are essentially created equal.</li>
    <li>Many have issues with long term reliability.</li>
</ol>
<p>Given these issues, and our likely budget, I was able to throw out any fridge from the competition where the price tag was greater than about $800. This eliminated the very sexy looking (yes, wine fridges can be sexy) Sub-Zero and Viking style dual zone fridges (who were coming to the party at anywhere from $1500-$2500). </p>
<p>
</p>
<div class="MediaContainer PhotoContainer"><a href="https://farm9.staticflickr.com/8232/8489617598_1b40d150d1_z.jpg" rel="PhotoPopup" popupheight="534" popupwidth="400"><img alt="" src="https://farm9.staticflickr.com/8232/8489617598_1b40d150d1.jpg" width="375" height="500" style="border-width: 0px; border-style: solid;" /></a></div>
<p>Once I narrowed the field significantly based on price and dual zone features, I needed to next define the capacity for which we were looking. Since this fridge was going to be serving as our primary wine storage -- and Wendy's drunken habit of joining of wine clubs while we are on vacation means our bottle supply would continue to grow as time went on -- we were looking for a capacity in the range of more than 36 bottles. But on the flip side, we were looking for a "counter height" version that would sit beneath a kitchen&nbsp;counter top, so the giant 100 plus behemoths were out of the question (both from a size and price standpoint).</p>
<p>
</p>
<div class="MediaContainer PhotoContainer"><a href="https://farm8.staticflickr.com/7264/7850890578_047c1101cd_z.jpg" rel="PhotoPopup" popupheight="480" popupwidth="640"><img alt="" src="https://farm8.staticflickr.com/7264/7850890578_047c1101cd.jpg" width="500" height="375" style="border-width: 0px; border-style: solid;" /></a></div>
<p>We established a good range of bottle storage between 40 and 50. If we could fit 40-50 bottles in our wine fridge, we figured we'd be more or less sitting pretty.</p>
<p>
</p>
<div class="MediaContainer PhotoContainer"><a href="https://farm8.staticflickr.com/7015/6620396491_bf65e3f406_z.jpg" rel="PhotoPopup" popupheight="427" popupwidth="640"><img alt="" src="https://farm8.staticflickr.com/7015/6620396491_bf65e3f406.jpg" width="500" height="333" style="border-width: 0px; border-style: solid;" /></a></div>
<p>All of these criteria narrowed our candidates to just a handful, five or six to be exact. The price range of these candidates were all between about $400 and $800. All were in the 42 to 52 bottle storage range, all were dual zone, and all were&nbsp;counter top&nbsp;height. Since this wasn't a casual "go to the store and pick up a $100 fridge" type of purchase but rather a more significant investment, we decided to give this fridge to each other as our eighth wedding anniversary present. In our world, this is the&nbsp;epitome&nbsp;of romance.</p>
<p>The next major factor in all of our research came down to reliability. As I mentioned, reliability is a major factor with wine refrigerators, especially dual zone units. The dual zone units have twice the number of units that can go bad or fail. If you doubt me on the reliability issues, just read a handful of user reviews on Amazon or similar online retailers.
</p>
<p>I spent days upon days poring over the various reviews. As soon as I'd feel I had one selected for possible purchase, I'd uncover a repository of people crying out about how they had their unit working for three days then it crapped out. The worst story I read was about a guy who went on vacation and the fridge started cooling and wouldn't shut off. He came back to a disaster where all of the wine had frozen and the bottles broken all over the place. Wine was everywhere and all were ruined. Talk about worst case scenario.</p>
<div class="ToolItem">
<iframe src="https://rcm-na.amazon-adsystem.com/e/cm?t=oltoho-20&amp;o=1&amp;p=8&amp;l=as1&amp;asins=B007PZKB5M&amp;IS1=1&amp;ref=qf_sp_asin_til&amp;fc1=3A3128&amp;lt1=_blank&amp;m=amazon&amp;lc1=61838A&amp;bc1=FAFAF8&amp;bg1=FAFAF8&amp;f=ifr" style="width: 120px; height: 240px;" scrolling="no" marginwidth="0" marginheight="0" frameborder="0"></iframe>
</div>
<p>After reviewing all of the various possible brands, we opted for an EdgeStar brand refrigerator. We went this way for several reasons. Primarily, I saw the fewest number of poor reviews for this brand and I saw no "catastrophic" issues. Any of the bad items were simply "the pump stopped running and I had to get it repaired." Secondly, the time we were in Napa prior to this purchase we noticed that a lot of the smaller wine shops in the area were using EdgeStar fridges in their stores. That's the vote of confidence I like to see. And the third item we really liked about it was the style. Wood front shelves, stainless surround, and a handle that looks good and doesn't stand out too much. There's even a few blue LEDs that light the interior and a digital thermostat for each zone with a readout.</p>
<p>I found an online retailer that's now defunct that I was able to order through. Luckily, I was able to get free shipping and a nice discount, bringing the total on the purchase to just about $600. Today, you can order this brand and model on Amazon or through other various online retailers, but the deals aren't as quite as good as what we found.</p>
<p>Now that we've been using the wine fridge for a little over two years, we're very pleased with it overall. It's not particularly loud, and is now even quieter once we installed it with a&nbsp;counter top&nbsp;above and cabinets on either side. It looks great in our kitchen, and it's worked really well at keeping our wines at an optimal temperature.</p>
<p>There are really only three small complaints/issues we've had.</p>
<ol>
    <li>The shelves are only tall enough for a very standard sized bottle of wine. As more vineyards use more odd shaped bottles, the bottles often get stuck and are not as easy to take out as they should be. When this happens, the shelves can't slide out without a little jimmying. It's not horrible, but worth mentioning. I assume it's like this to max out the amount of space in the fridge for more bottles.</li>
    <li>The thermostat settings do not have a battery or memory. This means if you lose power it resets the temps in the two zones and you have to set it back at your desired temps.</li>
    <li>The guard on the&nbsp;kick plate&nbsp;arrived slightly damaged (crinkled). <br />
    <br />
    <div class="MediaContainer PhotoContainer"><a href="https://farm9.staticflickr.com/8052/8095348718_08bdda843e_z.jpg" rel="PhotoPopup" popupheight="480" popupwidth="640"><img alt="" src="https://farm9.staticflickr.com/8052/8095348718_08bdda843e.jpg" width="500" height="375" style="border-width: 0px; border-style: solid;" /></a></div>
    <br />
    Though I contacted the company about a replacement part, and was even told one had been shipped on several occasions, now 2+ years later we still don't have the replacement part. I did my best to roll out the dents, and it's not horribly noticeable, but I know it's there.</li>
</ol>
<p>Beyond those issues, we've been more than happy. One alteration we made to the unit was the removal of the "EdgeStar" logo on the glass front area. I always hate when logos or brand names are on things, I don't know why. After I complained about it for several years, Wendy took care of it while we were moving it into the kitchen from the sun porch. She used a razor and zipped the&nbsp;stick-on&nbsp;letters right off.</p>
<p>
</p>
<div class="MediaContainer PhotoContainer"><a href="https://farm9.staticflickr.com/8458/7937171030_2650d1c607_z.jpg" rel="PhotoPopup" popupheight="640" popupwidth="480"><img alt="" src="https://farm9.staticflickr.com/8458/7937171030_2650d1c607.jpg" width="375" height="500" style="border-width: 0px; border-style: solid;" /></a></div>
<p>With the letters a distant memory, we may get more questions about what brand we chose, but we'd rather answer that simple question rather than have it proudly displayed on the front of the unit.</p>
<p>Eventually, we'll probably move the fridge to the basement many years down the road when we finish it (and maybe make a hidden wine cellar room), but for now it looks great in its new home in our wine bar area. It took a lot of research but I'm very happy with our decision, and I think we got a pretty good dual zone wine cooler as a result of our efforts.</p>
<p>
</p>
<div class="MediaContainer PhotoContainer"><a href="https://farm9.staticflickr.com/8485/8200960181_3ec405c44b_z.jpg" rel="PhotoPopup" popupheight="640" popupwidth="430"><img alt="" src="https://farm9.staticflickr.com/8485/8200960181_3ec405c44b.jpg" width="336" height="500" style="border-width: 0px; border-style: solid;" /></a></div>
<p>Do you have a wine fridge? If so, what kind? Did you do as much research as we did when purchasing it, or did you just pick the one you first saw? Or are you a person who has been wanting a wine cooler and simply hasn't pulled the trigger yet (like we were for several years)? Let us know and maybe our experiences can help you in your search. </p><p><a href="https://www.oldtownhome.com/2013/2/19/Pouring-our-Efforts-into-Finding-a-Wine-Fridge/">Read Full Post</a></p>]]></content>
    <category term="Entertaining:Entertaining" />
    <category term="Header Image" />
    <category term="Kitchen" />
    <category term="Projects:Recipes Cocktails Entertaining" />
    <category term="Wine Bar" />
    <PostImage>http://farm9.staticflickr.com/8372/8488662209_f124488ab1.jpg</PostImage>
    <media:thumbnail url="https://farm9.staticflickr.com/8372/8488662209_f124488ab1_t.jpg" />
    <ExtensionElements>
      <Item>PostImage</Item>
      <Item>media:thumbnail</Item>
    </ExtensionElements>
  </entry>
  <entry>
    <guid>78392ca2-00aa-42cf-a246-a7bed3d5937e</guid>
    <id>https://www.oldtownhome.com/2013/2/8/A-Tall-Drink-of-Water-Installing-a-Filtered-Water-System/</id>
    <title>A Tall Drink of Water: Installing a Filtered Water System</title>
    <summary type="html"><![CDATA[<p><em>Feeling lucky? Check out our current Reader Reward giveaway related to this post. <a href="http://www.oldtownhome.com/2013/2/8/Reader-Reward-Under-Sink-Water-Filtration-Kit-from-Filtrete/index.aspx">Head on over to this page for a chance to win.</a></em></p><p><em>Okay, enough of that, on with the show!</em></p><p>More than the wine we love to consume, more than the happy hour specials we enjoy with friends, more than the late night whiskey, bourbon, and other various mixed drinks our Instagram feed seems to suggest we are always partaking in lately (really, we don't drink as much as it seems we do...), Wendy and I consume a lot more water than any other beverage. A declaration like this would make the eight year old version of me cringe in despair, but it's the absolute truth. (Don't worry eight year old Alex, though you won't eat meat and will work to limit sweets so a middle aged gut doesn't suddenly sneak up on you, you can eat raw cookie dough pretty often and even have pancakes for dinner somewhat frequently, it's not all bad.) Personally, I don't really drink much other than water on a regular basis. I've not had a single soda for several years now, and we tend to stay away from sugary fruit drinks. For us, our large Brita pitcher and filter has been a mainstay in our home's fridge from day one. </p><p>
</p><div class="MediaContainer PhotoContainer"><a href="http://farm8.staticflickr.com/7202/6969695341_6bf419b191_z.jpg" rel="PhotoPopup" popupheight="640" popupwidth="478"><img alt="" src="https://farm8.staticflickr.com/7202/6969695341_6bf419b191.jpg" width="374" height="500" style="border-width: 0px; border-style: solid;"></a></div><p>As reliant as we've become on our filtered water, it hasn't been without its issues. We've had to purchase three different pitcher-based filters over the years due to leaks, it is slower than I'd prefer in filtering the water, and the pitcher is often left with too little water for the next person who wants to fill their glass. I'm going to go ahead and blame Lulu and Mel for this last item, I'd obviously not be quite so inconsiderate.</p><p>
</p> <a href="https://www.oldtownhome.com/2013/2/8/A-Tall-Drink-of-Water-Installing-a-Filtered-Water-System/">more</a>]]></summary>
    <published>2013-02-08T13:00:00.000-05:00</published>
    <updated>2013-02-08T13:00:00.000-05:00</updated>
    <link rel="alternate" href="https://www.oldtownhome.com/2013/2/8/A-Tall-Drink-of-Water-Installing-a-Filtered-Water-System/" />
    <author>
      <name>Alex</name>
    </author>
    <content type="html"><![CDATA[<p><em>Feeling lucky? Check out our current Reader Reward giveaway related to this post. <a href="http://www.oldtownhome.com/2013/2/8/Reader-Reward-Under-Sink-Water-Filtration-Kit-from-Filtrete/index.aspx">Head on over to this page for a chance to win.</a></em></p>
<p><em>Okay, enough of that, on with the show!</em></p>
<p>More than the wine we love to consume, more than the happy hour specials we enjoy with friends, more than the late night whiskey, bourbon, and other various mixed drinks our Instagram feed seems to suggest we are always partaking in lately (really, we don't drink as much as it seems we do...), Wendy and I consume a lot more water than any other beverage. A declaration like this would make the eight year old version of me cringe in despair, but it's the absolute truth. (Don't worry eight year old Alex, though you won't eat meat and will work to limit sweets so a middle aged gut doesn't suddenly sneak up on you, you can eat raw cookie dough pretty often and even have pancakes for dinner somewhat frequently, it's not all bad.) Personally, I don't really drink much other than water on a regular basis. I've not had a single soda for several years now, and we tend to stay away from sugary fruit drinks. For us, our large Brita pitcher and filter has been a mainstay in our home's fridge from day one. </p>
<p>
</p>
<div class="MediaContainer PhotoContainer"><a href="http://farm8.staticflickr.com/7202/6969695341_6bf419b191_z.jpg" rel="PhotoPopup" popupheight="640" popupwidth="478"><img alt="" src="https://farm8.staticflickr.com/7202/6969695341_6bf419b191.jpg" width="374" height="500" style="border-width: 0px; border-style: solid;"></a></div>
<p>As reliant as we've become on our filtered water, it hasn't been without its issues. We've had to purchase three different pitcher-based filters over the years due to leaks, it is slower than I'd prefer in filtering the water, and the pitcher is often left with too little water for the next person who wants to fill their glass. I'm going to go ahead and blame Lulu and Mel for this last item, I'd obviously not be quite so inconsiderate.</p>
<p>
</p>
<div class="MediaContainer PhotoContainer"><a href="http://farm9.staticflickr.com/8369/8409133899_ff0226c597_z.jpg" rel="PhotoPopup" popupheight="427" popupwidth="640"><img alt="" src="https://farm9.staticflickr.com/8369/8409133899_ff0226c597.jpg" width="500" height="333" style="border-width: 0px; border-style: solid;"></a></div>
<p>Last year, while we were <a href="http://www.oldtownhome.com/2012/10/18/Final-Kitchen-Details-Our-Big-Kitchen-Reveal/">spending a few months giving our kitchen a nice little facelift</a>, we reached a point where we had to assess what needed to stay and what needed to go as we moved into our new but much smaller refrigerator. We looked at our filter pitcher and after much debate said "it takes up a lot of space and we'd love to get something else, but we need it, so it's staying for now."</p>
<p>
</p>
<div class="MediaContainer PhotoContainer"><a href="http://farm9.staticflickr.com/8245/8455297479_cf2e2ce5ff_z.jpg" rel="PhotoPopup" popupheight="640" popupwidth="427"><img alt="" src="https://farm9.staticflickr.com/8245/8455297479_cf2e2ce5ff.jpg" width="333" height="500" style="border-width: 0px; border-style: solid;"></a></div>
<p>As we quickly tired of the space hog pitcher in the refrigerator door, we came up with a decent idea. Our kitchen sink has a non functioning side sprayer next to the faucet that could possibly be replaced with something to solve our filtered water dilemma. </p>
<p>
</p>
<div class="MediaContainer PhotoContainer"><a href="http://farm9.staticflickr.com/8362/8442811616_936a3c6f26_z.jpg" rel="PhotoPopup" popupheight="427" popupwidth="640"><img alt="" src="https://farm9.staticflickr.com/8362/8442811616_936a3c6f26.jpg" width="500" height="333" style="border-width: 0px; border-style: solid;"></a></div>
<p>The side sprayer has been broken for at least six years. We're talking 100% non functional here. From our experience, it seems side sprayers  (or at least the ones like the one we own) have a problem working correctly when they get wheat bread clogged in them when someone happens to do a plumbing project and runs out of white bread to put in the pipes (stupid mistake I won't make again). Yes, that's right, I shoved wheat bread into our plumbing and then proceeded to use the sprayer before flushing the bread. The end result is some fiber heavy bread in the supply line and a sprayer that won't spray. Crazy, I know. You know what else I know? I know that removing the handle lever from the back of the sprayer does nothing to fix it. In fact, it sort of breaks it a little more. I'm a font of useful knowledge I tell you.</p>
<p>
</p>
<div class="MediaContainer PhotoContainer"><a href="http://farm9.staticflickr.com/8218/8441722227_6bdf86c05f_z.jpg" rel="PhotoPopup" popupheight="427" popupwidth="640"><img alt="" src="https://farm9.staticflickr.com/8218/8441722227_6bdf86c05f.jpg" width="500" height="333" style="border-width: 0px; border-style: solid;"></a></div>
<p>The point of this story is simple. Rather than replace the side sprayer for our sink faucet with a non broken one, we figured we could replace it with something functional that we'll use on a more regular basis, and something that will allow us to use the kitchen more efficiently. Why not replace the broken and bread clogged sprayer with an inline water filtration kit?</p>
<p>I began researching the various kit options back in October, but I wasn't seeing anything we particularly liked. As our initial interest began to wane and other projects took precedence (like the <a href="http://www.oldtownhome.com/2012/12/3/Its-Christmastime-in-the-City-Designer-Home-Tour-Behind-the-Scenes/index.aspx">Christmas home tour</a>) I put it off until a later date. We hadn't mentioned my intentions here on the blog, twitter, or anywhere else when out of the blue we received an email from someone working with 3M/Filtrete and they were interested in sending us a self install water filtration system they'd like us to try. It was like the stars had aligned.</p>
<p>The system they were interested in having us try is the "<a href="http://www.filtrete.com/wps/portal/3M/en_US/FiltreteUS/Filtrete/Products/Catalog-Water/?PC_7_RJH9U5230OI3D0ISMC3OI120P2000000_nid=FZ3B3HDZ93gsHS5VTTWT93glD175NV8D6Sbl" target="_blank">Filtrete High Performance Drinking Water System with Maximum Filtration Plus</a>." The info they sent along was pretty simple.</p>
<ul>
    <li>Entire system only costs $100</li>
    <li>Has a space saving design that mounts under your kitchen sink</li>
    <li>A dedicated faucet easily mounts onto your countertop next to the kitchen faucet</li>
    <li>Reduces contaminants from water including select VOCs, select pharmaceuticals, microbial cysts and lead&nbsp;</li>
    <li>Filters last up to six months, and changes are quick and easy with no tools required</li>
</ul>
<div>Our interest was piqued, so we gave it some thought.</div>
<p>If you're a regular around here, you may have noticed that we're not big on freebies. We don't do sponsored posts or created content, the giveaways we conduct are usually for gift certificates or tickets rather than products, and we're definitely not going to lead you astray and tell you how great a product is if we don't actually believe in it. One thing you don't know is that we've actually been approached by tool brands we don't prefer and we've respectfully decline their offer, as it just isn't us. All that being said, when we were offered this water filtration kit to try out, given that we were looking for something similar already, and there was no obligation to even mention it here or anywhere else, we figured we'd go for it. Ugh, it sounds like I'm justifying this post when I'm just trying to give you the background. I'm lame, sorry. I'm new to this accepting stuff thing, so I hope you don't hold it against us. </p>
<p>Anyhow, we accepted the offer and received the Filtrete inline water filter kit a few weeks later. </p>
<p>
</p>
<div class="MediaContainer PhotoContainer"><a href="http://farm9.staticflickr.com/8471/8442813828_bf8d2bfd39_z.jpg" rel="PhotoPopup" popupheight="427" popupwidth="640"><img alt="" src="https://farm9.staticflickr.com/8471/8442813828_bf8d2bfd39.jpg" width="500" height="333" style="border-width: 0px; border-style: solid;"></a></div>
<p>The kit is touted as a DIY friendly inline filter. You install the filter in your cold water supply line, then place the spout next to your sink. The end result is instant filtered water at the touch of a lever. We have family that has a similar system installed at their sink, and we use it frequently when we're over their house, so we knew we'd probably like the feature in our home.</p>
<p>Wendy and I set aside a day this past weekend to perform the install. The contents of the box were quite straight forward. They primarily consisted of the filter and filter assembly, necessary plumbing components for connection to the cold water line, and the supply spout that mounts above the counter near the sink. </p>
<p>
</p>
<div class="MediaContainer PhotoContainer"><a href="http://farm9.staticflickr.com/8362/8441742383_60f89c4918_z.jpg" rel="PhotoPopup" popupheight="427" popupwidth="640"><img alt="" src="https://farm9.staticflickr.com/8362/8441742383_60f89c4918.jpg" width="500" height="333" style="border-width: 0px; border-style: solid;"></a></div>
<p>About 90% of our installation went extremely smoothly and without issue. The remaining 10% that caused some delay was <strong>completely my own fault </strong>because I wanted to try to do things in a completely non standard way. You'd think I would have learned to follow directions by now, but nope. </p>
<p>Since we already had a non functioning sprayer on our sink, and we were looking to get rid of it once and for all, we were able to go ahead and unhook it from our faucet and remove it from the top of the sink. I jumped down below the sink and I'm sure I gave Wendy a good glimpse of plumber's crack, <em>damn you low rise jeans not suited for plumbing!!!!</em> (I don't know why I didn't change my clothes, but you can thank Wendy for not taking a photo of the crack that's whack.)</p>
<p>
</p>
<div class="MediaContainer PhotoContainer"><a href="http://farm9.staticflickr.com/8186/8441760427_a55dab5aaa_z.jpg" rel="PhotoPopup" popupheight="427" popupwidth="640"><img alt="" src="https://farm9.staticflickr.com/8186/8441760427_a55dab5aaa.jpg" width="500" height="333" style="border-width: 0px; border-style: solid;"></a></div>
<p>Once we had removed the sprayer, its location became the perfect spot for the water filter spout. </p>
<p>
</p>
<div class="MediaContainer PhotoContainer"><a href="http://farm9.staticflickr.com/8094/8441786143_aa6959e28b_z.jpg" rel="PhotoPopup" popupheight="427" popupwidth="640"><img alt="" src="https://farm9.staticflickr.com/8094/8441786143_aa6959e28b.jpg" width="500" height="333" style="border-width: 0px; border-style: solid;"></a></div>
<p>Had we not had this spout location we could have drilled a new 1-1/4" hole in our butcher block counters, but luckily this wasn't a necessity, as I'd prefer to not put additional holes in our counter. </p>
<p>Securing the spout in place was actually very easy. The hardware supplied includes a chrome escutcheon, rubber gasket, several washers, and a single nut to secure the device. These all need to go onto the faucet in a specific order, so I had to be sure I got it right before slipping it through the hole.</p>
<p>
</p>
<div class="MediaContainer PhotoContainer"><a href="http://farm9.staticflickr.com/8233/8442882796_9b06078dd2_z.jpg" rel="PhotoPopup" popupheight="427" popupwidth="640"><img alt="" src="https://farm9.staticflickr.com/8233/8442882796_9b06078dd2.jpg" width="500" height="333" style="border-width: 0px; border-style: solid;"></a></div>
<p>Once the faucet was in place, Wendy ensured I had it in the desired location...</p>
<p>
</p>
<div class="MediaContainer PhotoContainer"><a href="http://farm9.staticflickr.com/8475/8441794447_462cec4aea_z.jpg" rel="PhotoPopup" popupheight="427" popupwidth="640"><img alt="" src="https://farm9.staticflickr.com/8475/8441794447_462cec4aea.jpg" width="500" height="333" style="border-width: 0px; border-style: solid;"></a></div>
<p>...and I slid under the sink again to put the support washer in place and tighten the nut and washers.</p>
<p>
</p>
<div class="MediaContainer PhotoContainer"><a href="http://farm9.staticflickr.com/8050/8442895270_d944bb4c93_z.jpg" rel="PhotoPopup" popupheight="640" popupwidth="427"><img alt="" src="https://farm9.staticflickr.com/8050/8442895270_d944bb4c93.jpg" width="333" height="500" style="border-width: 0px; border-style: solid;"></a></div>
<p>I hand tightened the nut until I reached a reasonable amount of resistance, then used a wrench to tighten it just one half turn more. This will keep the whole assembly in place and pressure on the rubber washer without putting too much stress on the mechanism.</p>
<p>Under the sink I also got to work running the various plumbing items. The brace we had built for the cabinet back when we were leveling it for the butcher block install proved to be a perfect location to mount the filter holder and filter. All we needed to ensure was a 2-1/2" clearance below the filter so that we would be able to change it in the future.</p>
<p>I marked the screw locations by holding the filter mount in place, then drilled two pilot holes. Rather than using the supplied screw (which were too long for our application), I used 1" #10 wood screw. Using these screws gave me a secure place to mount the device without having the screws go through the back of the piece of wood. </p>
<p>
</p>
<div class="MediaContainer PhotoContainer"><a href="http://farm9.staticflickr.com/8333/8442997506_a5726beaa3_z.jpg" rel="PhotoPopup" popupheight="640" popupwidth="427"><img alt="" src="https://farm9.staticflickr.com/8333/8442997506_a5726beaa3.jpg" width="333" height="500" style="border-width: 0px; border-style: solid;"></a></div>
<p>Isn't the area below our sink absolutely beautiful? With the screws in place I inserted the white inlet and blue outlet tubes into the filter mount. The process was as simple as pushing the plastic tube into the opening which then bit down on the sides of the tube making a water tight seal.</p>
<p>
</p>
<div class="MediaContainer PhotoContainer"><a href="http://farm9.staticflickr.com/8194/8443003724_acaa09b3f3_z.jpg" rel="PhotoPopup" popupheight="427" popupwidth="640"><img alt="" src="https://farm9.staticflickr.com/8194/8443003724_acaa09b3f3.jpg" width="500" height="333" style="border-width: 0px; border-style: solid;"></a></div>
<p>With the tubes in place I simply slid the mount over the waiting screws. </p>
<p>
</p>
<div class="MediaContainer PhotoContainer"><a href="http://farm9.staticflickr.com/8377/8441915793_7ff0943f63_z.jpg" rel="PhotoPopup" popupheight="640" popupwidth="427"><img alt="" src="https://farm9.staticflickr.com/8377/8441915793_7ff0943f63.jpg" width="333" height="500" style="border-width: 0px; border-style: solid;"></a></div>
<p>Once everything was where I wanted it to be, I tightened the screws to secure the filter mount in its location. At this point I was able to unwrap the filter component and twisted it onto the installed filter mount. Piece of cake.</p>
<p>
</p>
<div class="MediaContainer PhotoContainer"><a href="http://farm9.staticflickr.com/8109/8456397324_516e60410a_z.jpg" rel="PhotoPopup" popupheight="640" popupwidth="426"><img alt="" src="https://farm9.staticflickr.com/8109/8456397324_516e60410a.jpg" width="333" height="500" style="border-width: 0px; border-style: solid;"></a></div>
<p>The final connection I needed to make was to the water supply, and this is where I took a wrong turn that was entirely my own fault. The instructions were simple, use the supplied black plastic tee and connect it to the cold water supply for the sink. Once connected, insert the white tube into the fitting and call the job complete. Did I do this? NO!</p>
<p>Instead I proceeded on a foolish wild goose chase. Since we had removed the sprayer faucet I figured "why not install this filter where the side sprayer connected to the sink? This would allow me to operate the filtered water faucet via the sink faucet, where I could even control the temperature of the filtered water. This was a bad move for many reasons.&nbsp;</p>
<p>What I'm saying is "<strong>Don't be dumb like me, instead just follow the directions.</strong>" It would have saved me quite a bit of time and headaches.&nbsp;</p>
<p>First, I didn't have the parts I needed to make this work. I had to go out and buy a brass adapter for the faucet outlet that converted to a 1/4" compression fitting.</p>
<p>
</p>
<div class="MediaContainer PhotoContainer"><a href="http://farm9.staticflickr.com/8383/8456381316_4ed3eb8db3_z.jpg" rel="PhotoPopup" popupheight="427" popupwidth="640"><img alt="" src="https://farm9.staticflickr.com/8383/8456381316_4ed3eb8db3.jpg" width="500" height="333" style="border-width: 0px; border-style: solid;"></a></div>
<p>Second, once I connected everything up, I messed up the compression fitting and couldn't get an actual seal, so there was a minor leak. At this point in the project I turned into Nick Miller from "New Girl" and started swearing and yelling at the sink.</p>
<p>Third, the filter is only rated to filter water up to 100 degrees, so there's really only a chance that we would have forgotten, turned on the hot water, used the filter, and possibly ruined the whole thing.&nbsp;</p>
<p>And fourth, once I had everything hooked up this way, it just didn't work as I expected. The filter doesn't allow enough flow so the water is still coming out of the main faucet at the same time. It would just be a waste of water over time.&nbsp;</p>
<p>Rather than leave this non-standard, leaking, and partially functional install in place, I opted to simply cap off the old side spray supply and just go with the standard tee fitting.</p>
<p>
</p>
<div class="MediaContainer PhotoContainer"><a href="http://farm9.staticflickr.com/8374/8455287423_76fdf98fae_z.jpg" rel="PhotoPopup" popupheight="427" popupwidth="640"><img alt="" src="https://farm9.staticflickr.com/8374/8455287423_76fdf98fae.jpg" width="500" height="333" style="border-width: 0px; border-style: solid;"></a></div>
<p>Sorry for the bad photo, it's tight and dark under the sink!</p>
<p>One word of caution, this black plastic tee fitting is plastic, so if you're using this product, be very careful during install or risk crossing a thread and stripping the whole thing. If that happens, the only thing to do is head out to the store and pick up a new fitting that allows for a 1/4" compression outlet. Luckily, we didn't have this issue and were able to use the supplied fitting.</p>
<p>After actually following instructions we had ourselves a leak free and 100% functional filtered water supply right at our sink. After my non-standard install issues, the first glass of water felt like a little victory.</p>
<p>
</p>
<div class="MediaContainer PhotoContainer"><a href="http://farm9.staticflickr.com/8515/8455369357_fe60286a37_z.jpg" rel="PhotoPopup" popupheight="427" popupwidth="640"><img alt="" src="https://farm9.staticflickr.com/8515/8455369357_fe60286a37.jpg" width="500" height="333" style="border-width: 0px; border-style: solid;"></a></div>
<p>All in all, I'm very happy with the function of the inline water filter. The install was very straight forward (once I went ahead and followed directions), and the flow rate of the filtered water is much faster than I expected. The fact the filter lasts for six months before replacement seems great, but I'm very interested to see how the flow rate performs over the six months, and if a significant amount of use causes the throughput to decrease significantly or moderately. </p>
<p>When we do need to replace the filter, we won't even need to shut off the water. We'll just twist off the old filter and twist the new one on. We also wrote the install date on the filter itself so we're able to track when we last replaced it. The replacement filter looks like it's about $20 on various websites.</p>
<p>We do have a few minor comments on the kit. The critical tee piece for integrating this kit within the existing plumbing is a plastic component fitting, but I think I would have preferred if the fitting were brass. Beyond this, I also wish the components on the faucet were all metal (the black plastic handle and tip of the faucet may clash with decor), but this is purely an aesthetic preference. Overall, these are rather minor items.</p>
<p>Now that this is installed Wendy and I have started to talk about the possibility of adding something similar to one of the sinks that we'll install in our master bathroom. It'd be nice to have a quick and easy place to get filtered water for the night, especially if we've forgotten to bring a glass up for bed. They also sell a kit that doesn't include the upper faucet, this way we could buy a different nozzle that matches better with the decor of our bathroom.</p>
<p>Do you have a filter installed in your house? I know there are many different options, from whole house filters to filters that attach to the faucet spout. Does this look like something you might like? If you answered yes to that last question, be sure to <a href="http://www.oldtownhome.com/2013/2/8/Reader-Reward-Under-Sink-Water-Filtration-Kit-from-Filtrete/index.aspx">check out our giveaway</a>&nbsp;of one of these kits to a lucky commenter.</p>
<p><em>Though this wasn't a sponsored post, we were given the item we installed for free. We were under no obligation to say anything about the item, so the experience, opinions, and thoughts on the product are all our own. In other words, we liked it enough to share our experience with you. Thank you to Filtrete for inviting us to try out this product.</em></p><p><a href="https://www.oldtownhome.com/2013/2/8/A-Tall-Drink-of-Water-Installing-a-Filtered-Water-System/">Read Full Post</a></p>]]></content>
    <category term="Header Image" />
    <category term="Kitchen" />
    <category term="Projects:Home Improvement" />
    <category term="Review" />
    <PostImage>http://farm9.staticflickr.com/8234/8455348243_cd4a393f4d.jpg</PostImage>
    <media:thumbnail url="https://farm9.staticflickr.com/8234/8455348243_cd4a393f4d_t.jpg" />
    <ExtensionElements>
      <Item>PostImage</Item>
      <Item>media:thumbnail</Item>
    </ExtensionElements>
  </entry>
  <entry>
    <guid>54e93bbe-1fe3-4385-8056-d5c0de484566</guid>
    <id>https://www.oldtownhome.com/2013/1/11/Wax-On-Wax-Off---Butcher-Block-Oil-Treatment-Update/</id>
    <title>Wax On, Wax Off - Butcher Block Oil Treatment Update</title>
    <summary type="html"><![CDATA[<p>Today's post is a bit of a followup to a post we did a while ago regarding the <a href="http://www.oldtownhome.com/2012/11/14/Best-Method-for-Treating-a-Butcher-Block-Counter-Top/index.aspx">best methods (in our opinion) for treating our new butcher block counter tops</a>. Now that we're several months into the rather proud ownership of beautiful wood kitchen counters, I think it's time we take a quick look back and fill you in on a few developments and revelations we've had since our install. We've adjusted our approach slightly and it's working really well.</p><p>From our initial research and investigations most die hard butcher block people suggest you only need to use a mineral oil or chestnut oil to treat the wood. Based on this advice we went ahead and applied mineral oil to the counters in a daily, then weekly, then monthly fashion. We made sure to check on the counters often and reapply when it seemed to be getting a little dry, and we made sure to wipe up any standing water so it wouldn't be allowed to sit, soak in, and stain or otherwise affect the counters. In all, we felt our counter treatment was going well, until we visited my parents' house over Thanksgiving. </p><p>
</p><div class="MediaContainer PhotoContainer"><a href="http://farm9.staticflickr.com/8337/8228994530_dfcf928b1d_z.jpg" rel="PhotoPopup" popupheight="427" popupwidth="640"><img alt="" src="https://farm9.staticflickr.com/8337/8228994530_dfcf928b1d.jpg" width="500" height="333" style="border-width: 0px; border-style: solid;"></a></div><p>My parents installed butcher block on their kitchen island a few years ago and they've really liked it.&nbsp;Over Thanksgiving we had the opportunity to check out what they've been using to treat their counters. The first thing I noticed was just how smooth their counters felt compared to our counters.&nbsp;<em>That's my mom at the sink in the photo above, mid Thanksgiving meal prep, so please excuse any disorganization or mess, she had no idea I was taking the photo.</em>&nbsp;</p><p>I asked my parents what they use to treat their wood and they broke out their butcher block supply arsenal. We're talking multiple bottles here folks. I get my overkill honestly. Of the items they used one struck me over the rest, the Howard's mineral oil plus natural (bees') waxes. </p><div class="ToolItem">
<iframe src="http://rcm-na.amazon-adsystem.com/e/cm?t=oltoho-20&amp;o=1&amp;p=8&amp;l=as1&amp;asins=B001ESTA30&amp;IS1=1&amp;ref=qf_sp_asin_til&amp;fc1=3A3128&amp;lt1=_blank&amp;m=amazon&amp;lc1=61838A&amp;bc1=FAFAF8&amp;bg1=FAFAF8&amp;f=ifr" style="width: 120px; height: 240px;" scrolling="no" marginwidth="0" marginheight="0" frameborder="0"></iframe>
</div><p>While we've been using the mineral oil to treat our counters, I've noticed how it works. It goes on the surface, soaks into the wood, and then we wipe away any excess. This seems to work well for the short term treatment, but the oil doesn't fill any voids or build up the surface of the counter, leaving any rough surface texture feeling in place. In the case of my parents' counters, though it's a different and smoother species of wood (cherry I believe?), their surface is almost a little shiny, like it had been polished. They've never treated it with more than the products they showed me, so I assumed it had to be the added waxes they've been using.</p> <a href="https://www.oldtownhome.com/2013/1/11/Wax-On-Wax-Off---Butcher-Block-Oil-Treatment-Update/">more</a>]]></summary>
    <published>2013-01-11T11:10:00.000-05:00</published>
    <updated>2013-01-11T11:10:00.000-05:00</updated>
    <link rel="alternate" href="https://www.oldtownhome.com/2013/1/11/Wax-On-Wax-Off---Butcher-Block-Oil-Treatment-Update/" />
    <author>
      <name>Alex</name>
    </author>
    <content type="html"><![CDATA[<p>Today's post is a bit of a followup to a post we did a while ago regarding the <a href="http://www.oldtownhome.com/2012/11/14/Best-Method-for-Treating-a-Butcher-Block-Counter-Top/index.aspx">best methods (in our opinion) for treating our new butcher block counter tops</a>. Now that we're several months into the rather proud ownership of beautiful wood kitchen counters, I think it's time we take a quick look back and fill you in on a few developments and revelations we've had since our install. We've adjusted our approach slightly and it's working really well.</p>
<p>From our initial research and investigations most die hard butcher block people suggest you only need to use a mineral oil or chestnut oil to treat the wood. Based on this advice we went ahead and applied mineral oil to the counters in a daily, then weekly, then monthly fashion. We made sure to check on the counters often and reapply when it seemed to be getting a little dry, and we made sure to wipe up any standing water so it wouldn't be allowed to sit, soak in, and stain or otherwise affect the counters. In all, we felt our counter treatment was going well, until we visited my parents' house over Thanksgiving. </p>
<p>
</p>
<div class="MediaContainer PhotoContainer"><a href="http://farm9.staticflickr.com/8337/8228994530_dfcf928b1d_z.jpg" rel="PhotoPopup" popupheight="427" popupwidth="640"><img alt="" src="https://farm9.staticflickr.com/8337/8228994530_dfcf928b1d.jpg" width="500" height="333" style="border-width: 0px; border-style: solid;"></a></div>
<p>My parents installed butcher block on their kitchen island a few years ago and they've really liked it.&nbsp;Over Thanksgiving we had the opportunity to check out what they've been using to treat their counters. The first thing I noticed was just how smooth their counters felt compared to our counters.&nbsp;<em>That's my mom at the sink in the photo above, mid Thanksgiving meal prep, so please excuse any disorganization or mess, she had no idea I was taking the photo.</em>&nbsp;</p>
<p>I asked my parents what they use to treat their wood and they broke out their butcher block supply arsenal. We're talking multiple bottles here folks. I get my overkill honestly. Of the items they used one struck me over the rest, the Howard's mineral oil plus natural (bees') waxes. </p>
<div class="ToolItem">
<iframe src="http://rcm-na.amazon-adsystem.com/e/cm?t=oltoho-20&amp;o=1&amp;p=8&amp;l=as1&amp;asins=B001ESTA30&amp;IS1=1&amp;ref=qf_sp_asin_til&amp;fc1=3A3128&amp;lt1=_blank&amp;m=amazon&amp;lc1=61838A&amp;bc1=FAFAF8&amp;bg1=FAFAF8&amp;f=ifr" style="width: 120px; height: 240px;" scrolling="no" marginwidth="0" marginheight="0" frameborder="0"></iframe>
</div>
<p>While we've been using the mineral oil to treat our counters, I've noticed how it works. It goes on the surface, soaks into the wood, and then we wipe away any excess. This seems to work well for the short term treatment, but the oil doesn't fill any voids or build up the surface of the counter, leaving any rough surface texture feeling in place. In the case of my parents' counters, though it's a different and smoother species of wood (cherry I believe?), their surface is almost a little shiny, like it had been polished. They've never treated it with more than the products they showed me, so I assumed it had to be the added waxes they've been using.</p>
<p>When we were <a href="http://www.oldtownhome.com/2012/12/19/Creating-a-Cutting-Board-from-Butcher-Block-Scrap/index.aspx">making our cheese boards from remnant butcher block scraps</a> I used this new oil and wax combo to give it a try, and I was extremely happy with how it turned out. So happy, in fact, that we started using it on our counters. The important thing is that it is still 100% food safe and all natural.</p>
<p>To use this wax we employ the following simple methods.</p>
<p>
</p>
<div class="MediaContainer PhotoContainer"><a href="http://farm9.staticflickr.com/8079/8292309667_1258c2c901_z.jpg" rel="PhotoPopup" popupheight="427" popupwidth="640"><img alt="" src="https://farm9.staticflickr.com/8079/8292309667_1258c2c901.jpg" width="500" height="333" style="border-width: 0px; border-style: solid;"></a></div>
<p>After removing all items from the counter to oil (which is actually the biggest pain when it comes to butcher block counters), I hit the whole counter top with a 220 grit sandpaper. It wasn't too major of a sanding job, just enough to smooth out any rough areas that had developed and to remove any surface blemishes from water stains. This is one of those things I really like about butcher block. I only sanded before the first application of the oil and wax, it's not an every time thing.</p>
<p>
</p>
<div class="MediaContainer PhotoContainer"><a href="http://farm9.staticflickr.com/8232/8364930186_9409476511_z.jpg" rel="PhotoPopup" popupheight="427" popupwidth="640"><img alt="" src="https://farm9.staticflickr.com/8232/8364930186_9409476511.jpg" width="500" height="333" style="border-width: 0px; border-style: solid;"></a></div>
<p>Once I was happy with the sanded look and feeling, I got ready to apply the oil/wax. The most important thing I've learned while using this is to SHAKE&nbsp;VIGOROUSLY. I'm talking whole-body-arm-hurting shake. This will mix the wax and oil in the container, making sure you have a more even overall application. Think about how much better oil and vinegar dressing tastes when shaken, or peanut butter when&nbsp;stirred,&nbsp;same philosophy here, but we're not eating this, but you get the idea.</p>
<p>
</p>
<div class="MediaContainer PhotoContainer"><a href="http://farm9.staticflickr.com/8517/8364932496_387092883c_z.jpg" rel="PhotoPopup" popupheight="427" popupwidth="640"><img alt="" src="https://farm9.staticflickr.com/8517/8364932496_387092883c.jpg" width="500" height="333" style="border-width: 0px; border-style: solid;"></a></div>
<p>When I apply the oil to the surface I like to spread it all over the area and then begin wiping with the rag to spread it around. I've seen some people say to apply in one small area and spread, but that doesn't work quite as well for me.&nbsp;</p>
<p>
</p>
<div class="MediaContainer PhotoContainer"><a href="http://farm9.staticflickr.com/8075/8363869041_7d9c3dae01_z.jpg" rel="PhotoPopup" popupheight="427" popupwidth="640"><img alt="" src="https://farm9.staticflickr.com/8075/8363869041_7d9c3dae01.jpg" width="500" height="333" style="border-width: 0px; border-style: solid;"></a></div>
<p>Once this waxy oil has been spread all over the counters it should sit for a while. The bottle says to allow it to sit for 20 minutes, but I prefer to let it be a while longer. Perhaps a few hours or even overnight if possible. This allows the oil to really soak into the surface and replenish any&nbsp;shriveled&nbsp;and thirsty wood fibers.</p>
<p>
</p>
<div class="MediaContainer PhotoContainer"><a href="http://farm9.staticflickr.com/8497/8363872495_aa4d7845c4_z.jpg" rel="PhotoPopup" popupheight="427" popupwidth="640"><img alt="" src="https://farm9.staticflickr.com/8497/8363872495_aa4d7845c4.jpg" width="500" height="333" style="border-width: 0px; border-style: solid;"></a></div>
<p>You can see how much richer the surface color is once it's all been applied.&nbsp;When I feel the surface has drunk in enough of the nutrients, I wipe off any excess with my rag (or paper towels when in a pinch) and begin buffing the surface. This is where the difference in using the wax comes out. While the oil wipes away, the wax stays on the surface and is worked into all of the various voids of the porous wood.&nbsp;</p>
<p>
</p>
<div class="MediaContainer PhotoContainer"><a href="http://farm9.staticflickr.com/8474/8364944260_bd92cd9675_z.jpg" rel="PhotoPopup" popupheight="427" popupwidth="640"><img alt="" src="https://farm9.staticflickr.com/8474/8364944260_bd92cd9675.jpg" width="500" height="333" style="border-width: 0px; border-style: solid;"></a></div>
<p>As I've repeated the process and the wax has slowly built up, I noticed a significant change in the texture of the previously rough oak counters. The texture remains to some extent, but it's been smoothed considerably, and it much easier to work on.&nbsp;</p>
<p>
</p>
<div class="MediaContainer PhotoContainer"><a href="http://farm9.staticflickr.com/8189/8364946120_fc7078990f_z.jpg" rel="PhotoPopup" popupheight="427" popupwidth="640"><img alt="" src="https://farm9.staticflickr.com/8189/8364946120_fc7078990f.jpg" width="500" height="333" style="border-width: 0px; border-style: solid;"></a></div>
<p>I'm quite glad that we've reassessed our approach over time, and I'm sure we'll continue to do so. There's obviously no "end all and be all" for how to treat butcher block, but now that we've been using this mineral oil and wax combo on our counters for about a month, we've noticed a much smoother feeling starting to emerge. We also notice that the water has started to bead a bit more on the surface, and can be wiped off more easily after being allowed to sit a while longer.&nbsp;</p>
<p>
</p>
<div class="MediaContainer PhotoContainer"><a href="http://farm9.staticflickr.com/8217/8292312723_1b9d26c650_z.jpg" rel="PhotoPopup" popupheight="427" popupwidth="640"><img alt="" src="https://farm9.staticflickr.com/8217/8292312723_1b9d26c650.jpg" width="500" height="333" style="border-width: 0px; border-style: solid;"></a></div>
<p>What do you think? Is this a good direction to head? My parents also use the "Mystery Oil" on their counter, but putting anything "mystery" on our counters makes me feel a bit&nbsp;apprehensive. Do you have wood counters? If so, what do you use?</p>
<p><em>Note: I'd also like to point out, as with our <a href="http://www.oldtownhome.com/Toolbox-Tuesday/index.aspx">Toolbox Tuesday</a> posts, we weren't compensated for this review. We simply want to&nbsp;<a href="http://www.oldtownhome.com/Toolbox-Tuesday/index.aspx">share good products</a>&nbsp;when we see them, and hope that learning from our mistakes can help save you time, money and frustration.</em></p><p><a href="https://www.oldtownhome.com/2013/1/11/Wax-On-Wax-Off---Butcher-Block-Oil-Treatment-Update/">Read Full Post</a></p>]]></content>
    <category term="Butcher Block Counters" />
    <category term="Header Image" />
    <category term="Kitchen" />
    <PostImage>http://farm9.staticflickr.com/8494/8369589903_fa9282a595.jpg</PostImage>
    <media:thumbnail url="https://farm9.staticflickr.com/8494/8369589903_fa9282a595_t.jpg" />
    <ExtensionElements>
      <Item>PostImage</Item>
      <Item>media:thumbnail</Item>
    </ExtensionElements>
  </entry>
</feed>