The majority of our master bedroom efforts dealt with the interior aesthetics and function of how we use and can most enjoy the interior of our bedroom. From the closet build to the fabric and accessories choices, the purpose all along was to turn a place we spend a third of our lives into a space we could comfortably enjoy.
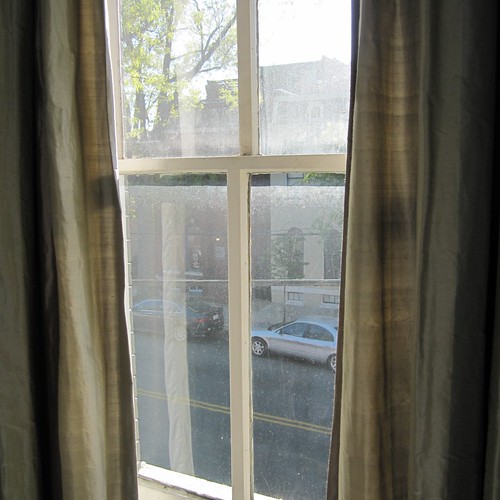
That being said, two elements in the room needed some attention that had to do far more with the function of an exterior item. The two windows in the front of our bedroom are two of our home's five remaining original 125 year old windows.
These windows are great examples of double hung weight and pulley sash with original weights and wavy glass. The problem is, they've not really been cared for over the years. Some of the the sash cords were broken, the upper sash had been painted shut, paint has been applied so heavily to the frame that one sash couldn't open fully, the sills were rotted after years of neglect, and the original construction had a fairly significant design flaw that allowed water to collect at the bottom of the lower sash and make its way into the wall, causing this just beneath the paint.
I knew the windows had to be restored, and the sash would be a bigger job down the road, so my goal during our bedroom project was simply to restore the window boxes, sash ropes, and get the sash back into operation while also correcting the design flaw.
I started by working to free all of the sash and remove them from the window frames. The process started by carefully removing the sash stops from the interior of the window frame, followed by removing the parting beads. I had to work very slowly and methodically to save as many of the pieces of wood as possible. Anything I break will need a custom fabricated replacement to match the original, and I've prefer to do as little custom fabrication as possible.
Once the sash stops were removed, I was able to remove the lower sash from the unit. I say unit because these windows, as with windows today, we're delivered from the local lumber yard as complete units. Here's and example of a window in the Smoot lumber yard showroom that is very similar in construction to our windows. Most likely, our windows also came from the local Smoot lumber yard, which was only a few blocks from our house when it was built in the 1880s.
I cut the remaining sash cords from the lower sash and removed it entirely from the frames. With the lower sash gone I turned my attention to the upper sash. They were painted shut from the inside and the outside, so I had a task ahead of me.
I was able to somewhat easily cut away the paint inside, but how could I cut the outside paint? I didn't want to climb a ladder nearly 30 feet above the sidewalk (Wendy wouldn't have allowed that), so I had to come up with a better way. That's when I had a good idea.
I duct taped my Fein oscillating tool with a cutting blade to a long piece of 1" x 2". Then I was able to turn on the cutter and work the stick from the inside and guide the tool to cut the paint that was holding the upper sash hostage. It only took me about 15 minutes to free both upper sash.
With the lower sash and parting beads removed, I was free to remove the upper sash from their positions, which revealed sash ropes in good shape and two more sets of sash pulleys. I then removed the sash pulleys in order to strip the many layers of paint that had been applied over the last hundred years.
These cast iron pulleys are all in great shape. It was very cool to strip the paint and see a patent date of Feb 1879 stamped right into the face.
I'll tell you one thing, it was super weird not having any sash in the window openings. I was doing this work during the summer, so we only had to worry about the hot weather, not the cold of winter.
Once the widows and hardware had all been removed I turned my attention to restoration. My first task was to remove the badly damaged and beaten zinc weather stripping. It had done its job, but those days were over and it needed an update. I also began stripping all of the this paint from around the window frame. I'll tell you one thing for sure, it was not easy. I didn't use any chemicals on this, just a scraper and elbow grease. After a few days of scraping we had ourselves a perfectly clean window box just waiting for a fresh coat of paint.
I mentioned the design flaw that let water into the window. The sash pockets have two little doors in them so you can access the weights. Well, these doors in most windows don't go all of the way to the base of the window unit, which keeps any water than accumulates beneath the sash out of the wall. Unfortunately, in our windows these little doors go all of the way into the bottom of the unit. This has allowed rain to sneak inside of the window box, into the wall, and ultimately caused a significant amount of damage to the plaster and rot to the wood. You can see just what I'm talking about in this photo.
This left the weight pocket door loose, wobbly, and poorly secured due to rot at the bottom of each piece. Some were worse than others, but all had issues.
I decided to resolve this century and a quarter long design flaw once and for all. We were putting a lot of time and effort into fixing the molding and plaster, so the last thing I wanted to deal with is more damage after everything was corrected.
Using an old piece of salvaged and tight grain old growth pine I cut a small piece that fit perfectly in the weight pocket opening. I then cut a significant angle in the piece and affixed it in the openings with copious amounts of glue, a few small nails, and finally a little all weather caulk right at the joint. The end result is a weathertight seal at the base that will effectively keep water from falling into the weight pocket.
It's also worth noting that I used the old and salvaged wood to ensure a long lasting fix. Newer pine runs the risk of expanding/contracting more and ultimately allowing water back where we don't want it. And if water gets on new pine, it rots and deteriorates much faster.
My work continued on the window frames for about three days total, which left us with several days of partially or completely open windows without sash. During this period we ended up hanging plastic to keep most heat and weather out, and got lucky with sunny and mild days the whole time.
Our house definitely looked a bit condemned/suspect during those days. Our neighbors were selling their house at the time, and I wonder if anyone going through their house said something along the lines of, "It's nice, but did you see the sort of rough shape the house next door is in?"
With everything stripped, patched, sanded, and corrected, we were looking at windows that were finally ready to be put back together.
We placed the sash pulleys back in their pockets using the orignal screws and ran new sash cord. I have to apologize as I don't have any of the re-cording photos, but we'll be working on another window pretty soon so I'll be sure to thoroughly document it. After a few hours of measuring and effort we had ourselves four completely functional window sash.
We also added spring bronze weather stripping to give it a more weather tight seal, much like we did with our front door.
We still have a lot of work to do on the window sash, but that will need to wait until I'm finished with the storm windows. The sash will need to be out for quite a while and I don't think a little plastic hanging in the opening will cut it during that time. We'll surely keep you posted on that aspect of the project.
This project is one of those examples that I want to use to show the value of an old window. Many assume "old window = inefficient window." In reality, an old window that is properly maintained and has a storm window applied is as efficient, if not more efficient than its modern counterpart. Not to mention that modern windows will only last you about 30 years, whereas this properly maintained window should last another hundred years or more.
Do you have a home with old windows? Do you prefer the look of old to new? Would you go to the trouble of saving your old windows, or are you of the mindset of "out with the old, in with the new"?