The upgrades we’ve been performing on our kitchen, though not entirely cosmetic, have focused primarily on the various changes we can make to bring the area more inline with the rest of our home. Through building additional counter and storage space, and upgrading our counters to butcher block, we had taken a previously tired space and breathed in new life, but it still seemed something was missing.
The visual interest that a tile backsplash can bring to a kitchen was sorely lacking and incredibly obvious. This was only made more apparent once we finished our butcher block counters. Though we knew it would take a fairly significant level of effort to complete, we also knew that it was something we’d absolutely need to do.
After significant debate, we finally landed on installing a 3” x 6” subway tile in a running bond style. This decision removed a huge weight from our shoulders as it meant a tile install that would be far more straightforward and involve fewer cuts than the more complex herringbone pattern we were also considering. With that decision and our completion of the Hardibacker install, Wendy and I were ready to move forward and begin tiling.
Before we begin our recap of this portion of the project, we can both tell you that television is a lying fool! If you watch HGTV, DIY Network, or any show where the homeowner works to "spruce up their place" and it includes fun and easy tiling...it's a load of crap. Tiling is a skill that's pretty easy to learn, but it's still something we find really stressful. The whole process is time consuming, you are constantly racing against the clock, you're typically having to make small and intricate cuts, what you do is almost immovable without significant effort just a few minutes after you put the tile in place, and when you're done at the end of the day, your hands are cracked, dry, and beaten. With that being said, it's totally DIY-able. We're just saying that you shouldn't be fooled by the television shows into thinking it's this quick, pain free, and easy process -- you need to know what to expect heading into it.
We kicked off the job with a little bit of prep work including tile saw set up, gathering supplies (sponges, buckets, 1/4" and 1/8” v-notch trowels, and taping knives), covering the counters with plastic to protect them from the thinset and water, and establishing a guide line to begin tiling from on the far right side of our counters.
Our plan was to work from right to left around the entire tileable area in a counter clockwise manner. This would allow us to start with the easy area and establish a good edge, and then finish in the harder area behind the stove and fridge.
If the first steps of any good tile job is the prep, the second is typically the mixing of the thinset. Though I’m by no means even close to a professional tile setter, I still have my brand preferences of thinset and grout based on previous experience. Personally, I like VersaBond for thinset, and Mapei’s Keracolor for grout (we’ll talk more about that when we get to the grouting phase). The thinset is a lightly modified thinset that stays workable for an adequate amount of time, but cures fully even in difficult curing applications. You can typically find the VersaBond at The Home Depot, and Keracolor grout at Lowes (which is a bit of a pain because they aren’t at both places).
Wendy and I have tiled a couple different areas of our house, and we’ve learned pretty much all we know using the excellent references and professionals that are willing to give free advice on the John Bridge tile community and forums. If you’re ever planning to undertake a DIY tiling job, or a bathroom job that includes tile or stone, be sure to check out these forums. They are invaluable with how much they are willing help out the novice DIYer with grand goals. We liked what we saw so much that we bought John Bridge’s book, Tile Your World. It’s an excellent reference for the aspiring beginner to advanced tile setter.
Okay, back to the thinset. There’s a bit of a trick to mixing up the thinset to be most effective, and it has to do with consistency. While the package tells us how much water to add to a full bag of thinset, we knew we’d only be mixing up smaller amounts (because we really aren’t fast enough to work with full bags, nor did the space require it). When this occurs, the best thing to do is break out the calculator and unit converter to determine how many cups of water we need per pound of mix, then get a small food scale to let us know just how many pounds of thinset we are mixing.
Next, I slowly add water to the thinset, mixing on slow as it’s added. I don’t even bother trying to mix by hand, I just us a good mixing paddle and drill with plenty of fully charged batteries. But most importantly, I mix on slow so I don’t end up with thinset all over the place.
Once I’ve added the recommended amount of water, I check the consistency of the mix. It should be a little thinner than a wet cookie dough (mmm, cookie dough). The key here is to realize that the mix will thicken up slightly, so I typically want to add a little extra water here to loosen the mix just a tad. Since you can’t add water later in the process I either add it now or forever hold my peace.
I ended up mixing our first batch of thinset a little on the thick side of things (I think I was distracted by trying to setup and get supplies all at the same time), which was a small mistake but is easily overcome. When this happened, it just meant we had a little less work time before I needed to mix a new batch.
The other important bit of advice is to adhere to the directions to allow the mix to “slake” for about 10 minutes before mixing for a second time. This ensures a full mix and allows the chemical reaction for hardening to work more effectively.
Once our thinset was fully mixed, I used my 1/4" v-notch trowel to apply the thinset to the wall while Wendy began tiling. It’s often good to work in partnership when tiling. One person applies thinset and cuts tiles, while the second applies the tiles to the walls, inserts spacers, and back-butters tiles as necessary.
One tiling on cement board tip we can offer is rather simple. Before applying thinset, I start by wetting the cement board with a sponge. This somewhat odd step is something I picked up while working for a contractor in college. Cement board drinks water like it's its job. When you apply wet thinset to dry cement board, the cement board likes to pull the water right out of the mix, prematurely drying it out. It's much better to slow this process a bit by wetting the cement board. If you do a section without wetting, then do one with wetting, you'll absolutely notice the difference in working time of the thinset.
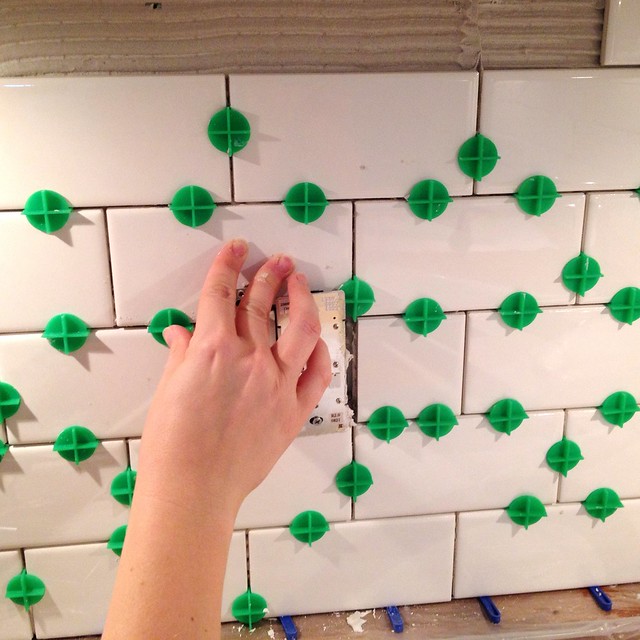
For our backsplash job we have a consistent and level lower line to set the tiles against -- the counter top. We opted to do a 1/16” grout line, so we were using our green tile spacers and blue tile spikes (wedges). Since we couldn’t set the tiles directly on the counters, given that we would need a 1/16” gap there as well, we used the blue tile spikes to give us our desired spacing under the bottom row.
Above this lower line of tile we used the green two sided spacers, and this is where the “swearing” part of this project came in. These little spacers WOULD NOT STAY IN. They were just a little bit too short for the tiles we were using, and as we would place one tile and insert a spacer, three surrounding spacers would fall out. It was one of the most frustrating things either of us has ever experienced while working on the house.
Unfortunately, we didn’t have time to run out to pick up other spacers, and any local stores only had these horrible spacers, or worse, those little crosses. Ugh, it was absolutely infuriating and it got to a point where you could probably have counted the F-bombs being dropped by the minute.
That’s actually a pretty good litmus for how a project is going, F-b/min (F-bombs per minute). I think this has a chance for an international unit of measurement for futility. My rough guess, between the two of us, we probably achieved a good and solid 10 F-b/min, with peaks in the 20-30 range.
Though frustrated, we continued to tile. I would cut, while Wendy would place (until my reach was needed for things like the corner tile placement, seen in the photo above). It was a good system, and one that worked for many hours for us. The tile saw was set up in the backyard, so I could grab a piece of tile, run out, cut, run back in, and hand it off. Because of the 18” tileable height, each and every tile in the top row of the backsplash had to be trimmed by about 3/8”.
We were able to apply the tile in roughly four foot increments. That was about the extent we could work before our thinset would begin to harden too much, and it was also the amount of time we could work before our patience began to run too thin.
In all, putting the tiles up on the wall took about two solid days of effort, which seems like quite a bit given the small 24 square feet which we were tiling, but the tile job was far from simple. We had to make several cuts to accommodate the four outlets/switches, the various changes in height, such as above the stove, and to handle the difficult corner pieces with a slightly wonky wall.
I was able to make a lot of smart cuts with the tile, resulting in a rather small amount of waste. At the end of the project, here’s all of the cut waste we ended up with. Remember, this is after using almost two full boxes of tile while making cuts on every single section. Not too shabby.
It was about this same time in the project that we really started to appreciate the fact we chose the simpler running bond pattern, rather then the herringbone. After all of the swearing and frustration of the tile spacers with the running bond, we couldn’t imagine how angry we would have gotten while doing the herringbone. I think we might have murdered the tile boxes.
One mildly difficult section of tile involved the area directly behind the stove. Since we didn’t have the counter to use as our level line for setting the first course, we had to improvise and use something else. I used a piece of scrap wood and screwed it to the wall level with the top of the counter tops to act as a ledger board of sorts. We were then able to apply the starter course of tile to this along with the same blue tile spikes that we used in the other areas.
We wrapped up the tile job by placing the final tiles towards the back of the refrigerator. I must say, even though it was without grout, the tile backsplash was looking rather amazing! We were absolutely thrilled with the results. We have absolutely no regrets from abandoning our lofty ambitions of installing the herringbone as we’re completely happy with how the running bond ended up.
The total cost of the tile was $56 for three bullnose pieces and two boxes with nine tiles left over. The sheets of Hardibacker were about $33, and the bag of thinset was $20. All told we spent about $110 in supplies to get to this point with the backsplash. With another $20-$30 left to spend on grout, I’d say that roughly $140 for our tile backsplash may be some of the best money we’ve ever spent. It will be interesting to do a whole price roundup at the conclusion of this "little" project to see how far our money went. We’re equally concerned with the project looking good as we are with keeping costs down, but we’re absolutely not willing to sacrifice results just to save some cash. So far I feel like we’re doing pretty good with balancing both objectives.
Unfortunately our Lowes didn't have the "Warm Gray" unsanded grout we're looking for, so had to impatiently wait for it to arrive in the mail. It came over the weekend, so it won't be long until we can show you the true "after" photos of the completed tile backsplash. Until then, we'll be twiddling our thumbs in anticipation of the finished project, as well as the arrival of our new stainless steel appliances. Appliances that actually work. Imagine that.
What do you think about our backplash? Well worth the cracked and dry hands (and bleeding ears from the foul language heard around these parts), or should we have just fixed up the wall and left it painted? I know our answer to that.