In any long term relationship between two functional people, both partners learn to rely on one another for many day to day items. This doesn't mean that one person can't exist without the other or is not capable of performing all tasks, it only means that an agreement, sometimes unspoken, establishes basic responsibilities and roles between two people.
When you remove one person from the equation, even for a short time, the other person must "raise their game" to handle everything. I'd like to think that today's post is a direct result of this game raising phenomenon since Wendy is out of town. After all, left to our own devices, men can sometimes come up with very creative solutions to solve every day problems.
This weekend, while painting the new front door with Alkyd based paint, I ran into the unavoidable but tedious task of cleaning the brushes once painting was complete. It's a necessary step when using good brushes, but one that can be messy or can damage and ultimately ruin your brush if not done properly.
Cleaning water based paint is easy. Run some water over it, comb the paint out, shake it clean, let dry, done. On the other hand, with oil paint you need to soak in mineral spirits or another brush cleaner with the brush suspended so the bristles don't get deformed or sit in the bottom of the cleaner/paint sludge. You also need to soak in progressively cleaner mineral spirits until the paint is all out of the brush.
I've always had an issue with this process. I've tried zip lock bags, paint trim trays, plastic containers, so many things that just never worked. It seemed that no matter what I tried the mineral spirits would leak, the brush would end up sitting in the bottom of the container in the used paint, and I would inevitably deform the bristles. This week that all changed and now I'm going to pass this little trick on to you.
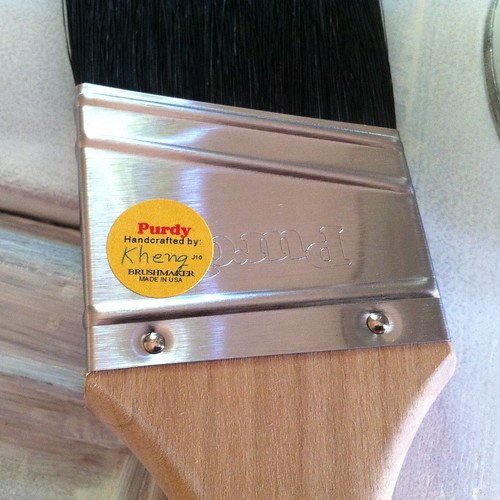
Besides, Kheng put time and effort into this brush, so why not appreciate that time and effort and make it last as long as possible.
First, find a normal water bottle. Since I was using a 2" brush a small 20oz bottle was wide enough. If it were a larger brush, I could have found a slightly larger bottle.
Grab a normal pair of scissors and cut the top of the bottle off. Make sure you leave enough bottle that the whole bristle area of the brush can be submerged while staying about 1" off of the bottom of the container.
Next, find a small piece of scrap wood that will act as the brush stand. The wood needs to be long enough to extend from the top of the brush to well below the surface you will sit the brush on. You'll need to drill a small hole in one end of this scrap piece of wood.
Grab a long nail that will act as the brush support. You'll place this nail through the hole you just drilled in the wood.
Now find a place where you will be able to clamp the wood at the edge of a table or work bench. I used my router table because it would be able to clamp the wood to the leg of the table. You'll need to determine the proper height of the nail to ensure the bottom of the brush sits above the bottom of the container.
Once you have the correct height determined, clamp the piece of wood to the bench or table leg.
Fill your half bottle with mineral spirits.
Place your brush in the container and hang the top of the brush from the nail you placed through the wood.
There you have it, my improvised brush cleaner. I have a couple of bottles on the router table, each with progressively cleaner mineral spirits. After a brush has soaked for a bit in the first cleaner, I take it out and comb it out to get any additional residue out before putting it in the fresher cleaner. After going through the clean mineral spirits, I comb it out one more time, shake it out, then let it dry.
If I were really hardcore, I would probably have four containers of progressively cleaner spirits and a brush spinner to get everything clean. That'll have to wait for when I have enough room to manage all of that.
Though this is a slight deviation from previous Toolbox Tuesday posts I hope it will be helpful for you the next time you need to clean a brush after using a oil based product. But like I said, when we're left to our own devices, guys can come up with some great stuff. ThereIFixedIt.com has some great examples to prove this.
If you have some good brush cleaning tips, let me know, I'd love to make my brushes last longer through cleaning.
Did you enjoy reading this post? Want to learn more about our first-hand experiences with other tools, devices or items used throughout our renovation? If so, check out our complete list of product reviews in our Toolbox Tuesday section.
Note: We weren't compensated for this review. We simply want to share good products when we see them, and hope that learning from our mistakes can help save you time, money and frustration.